For the best quality photo printing, four things are vital. The shot taken, the focus of the shot, the camera exposure, and lastly, the image resolution. Among these four variables, image resolution is the most pivotal aspect of a flawless printing process. If your resolution is correct, the image quality is also superb, and naturally, the prints turn out to be great. However, photographers often find themselves at a loss with low-resolution photos that are detrimental to printing.
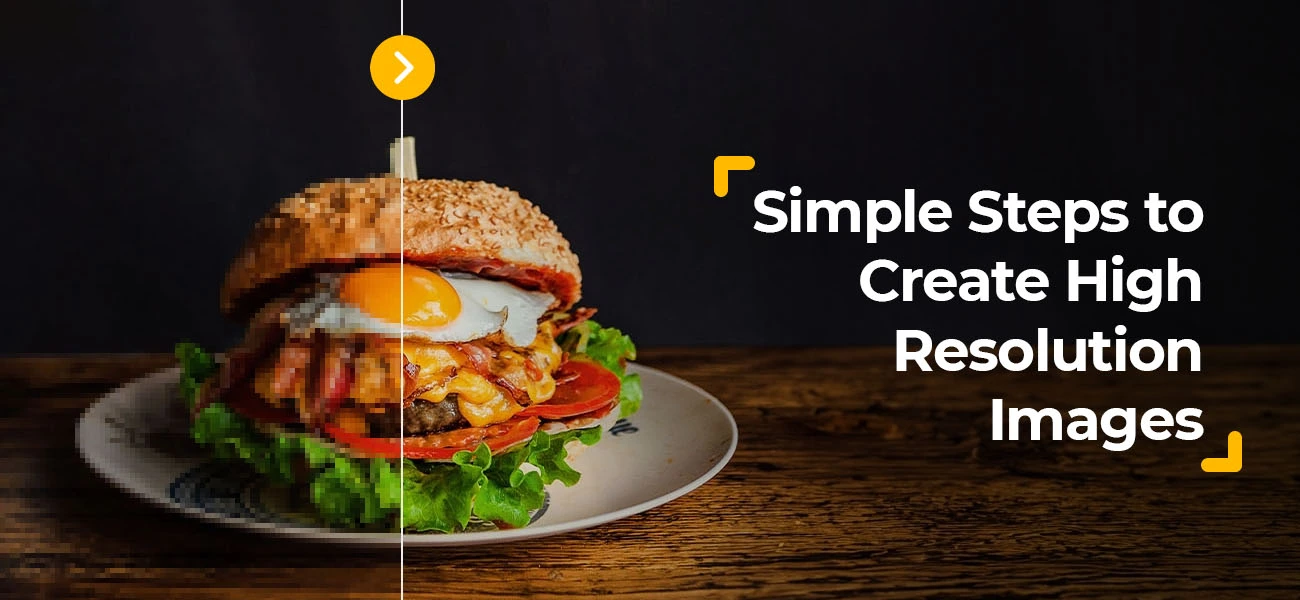
Thankfully, with advanced photo editing software, this can be fixed. In this article, learn the ways of creating high-resolution images and find out why higher resolution is so significant for print purposes. For any beginner in the photo editing or printing profession wanting to know how to improve image resolution, this article will certainly come in handy.
What is image resolution?
Image resolution is the intensity of detailing contained in a digital photo, such as a raster photo, film images, and the like. PPI (pixel per inch), also known as the number of pixels displayed per inch, determines it. The image sensor of the digital camera that takes the pictures creates the pixels.
One may wonder why resolution happens to be so critical while printing photos. Well, it is the resolution that influences the quality and details of a photo and doesn’t let it get pixelated. Because the higher the resolution, the more pixels, and as a result, the more detail.
Now, when it comes to printing images, the quality depends on DPI (dots per inch). This is the unit to measure the number of dots of ink the printer includes per inch of the photo. For a standard printer resolution, 300 DPI is the common printing unit, unless something massive like a billboard, banner, or poster is being printed. This unit is also considered high-resolution for photos, making it ideal for printing purposes.
Therefore, one must multiply the number of inches to print by 300 in order to print a high-resolution image. That is, for a 5 x 7 ft print done on a standard 300 DPI printer, 1500 x 2100 pixels are required. Several beginners wonder how many pixels per inch is high resolution. Therefore, understanding the fundamental difference between web images and print-purpose images is paramount.
If you wonder how to make a high-resolution image from a low resolution file, the following section is especially for you. Check it out and learn how to increase image resolution with a few easy methods.
Creating high-resolution images for printing using Photoshop
Photoshop is an amazingly powerful software and its is built with lots of useful tools that can be utilized to adjust image resolution, making it ideal for high-end printing. This is extremely helpful while making last-minute changes to the photo just before the final printing and enhancing the image resolution. Check out the simple and insightful guide below and get started.
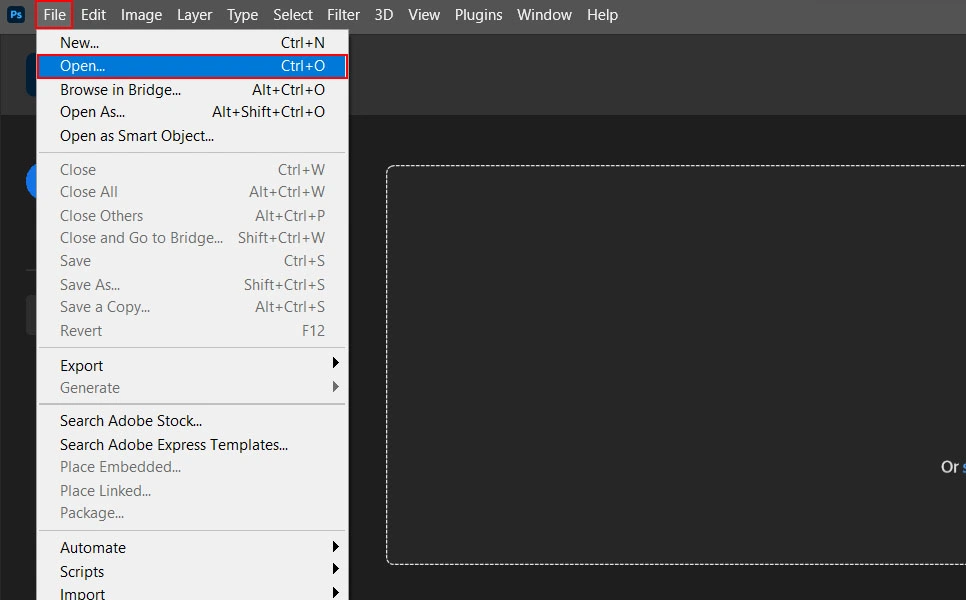
Step 1: Start by opening the photo you want to print in high resolution. Go to the “File” menu at the top left-hand side of your Photoshop working space. Click "Open" and browse the file you want to change the resolution of.
Step #2: Decide on what resolution will be the perfect fit for your print purposes. As mentioned, 300 DPI is the standard unit of most printer for creating high-quality banners, posters, standees, billboard images, etc. Therefore, ensure that the input figure is ideal for the physical prints and that the color mode is in CMYK.
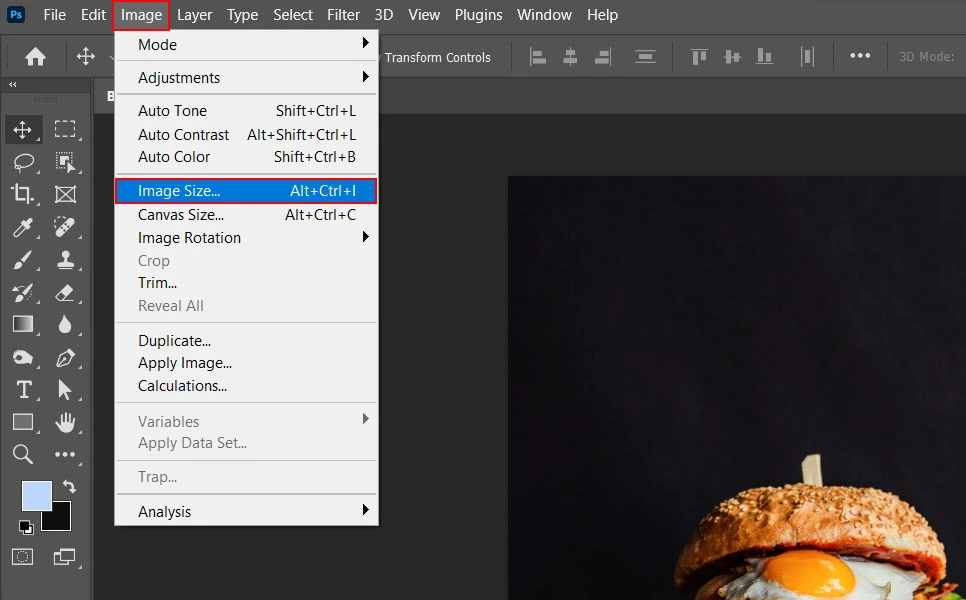
Step #3: In the menu bar at the top of the Photoshop interface, click on the “Image” tab, and then select the “Image Size” functionality. (Keyboard shortcut: Ctrl+Alt+I for Windows, Cmd+Option+I for macOS)
Check out the further editing options and other details in this dialogue box.
Step #4: See the sub-options like “Height”, “Width”, and “Resolution” (Pixels/Inch) fields. Adjust the pixel density and frequency as needed and as recommended for the printer. As a thumb rule, during this stage, keep a few pre-made templates or presets handy for some of the most commonly used resolutions.
Usually, these templates are organized as per millimeters or inches (custom unit system). Using these templates as references saves a lot of time and ensures accurate precision.
Click OK once you are satisfied with your preferences.
Two important things to remember are, export the photo into multiple sizes to make it optimized for different media. This saves manual modification each time. Also, always make sure you have backups of the raw image as well as the exported file. This makes you ready for any accidental mishap or hardware crash.
Hope this simple guide to changing and creating image resolution at a higher level using Photoshop will help you enrich your workflow. With this piece of insight, you can enhance photos with Photoshop by increasing their resolution, making them perfect for printing. So, get started today and make your photo editing and printing processes more efficient.
Changing image resolution with Super Resolution in Adobe Lightroom
Lightroom is a fantastic tool that Adobe also offers, and it is just as sophisticated as Photoshop. In Lightroom, one can quickly improve low-resolution images and make them high-resolution using an advanced feature called Super Resolution. There’s no need to resize the image in order to get the desired quality.
With this intuitive feature, Lightroom selects the best pixels to add to the image based on its context. This automatically doubles the image size and increases the pixel count (almost to quadruple). Users can import any image file format, such as TIFF, DNG, PNG, JPG, and so on. Check out the steps below:
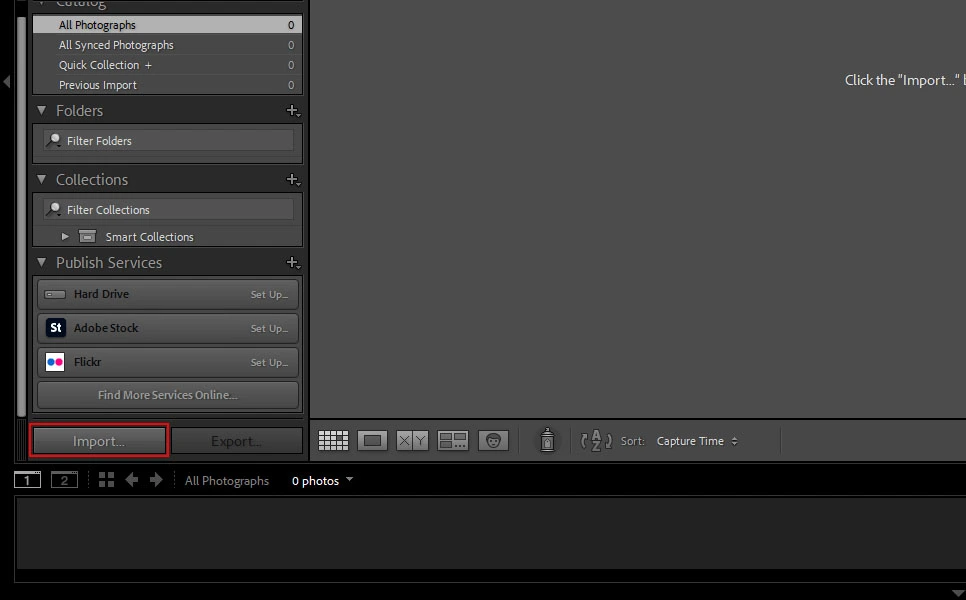
Step #1: Open the image file in Lightroom. First, open the Lightroom software and click the “Import” option in the lower left-hand side of the “Library” module. Alternatively, click on File > Import Photos and Video.

Step #2: From the “Photo” menu above in the toolbar, select the “Enhance” option.
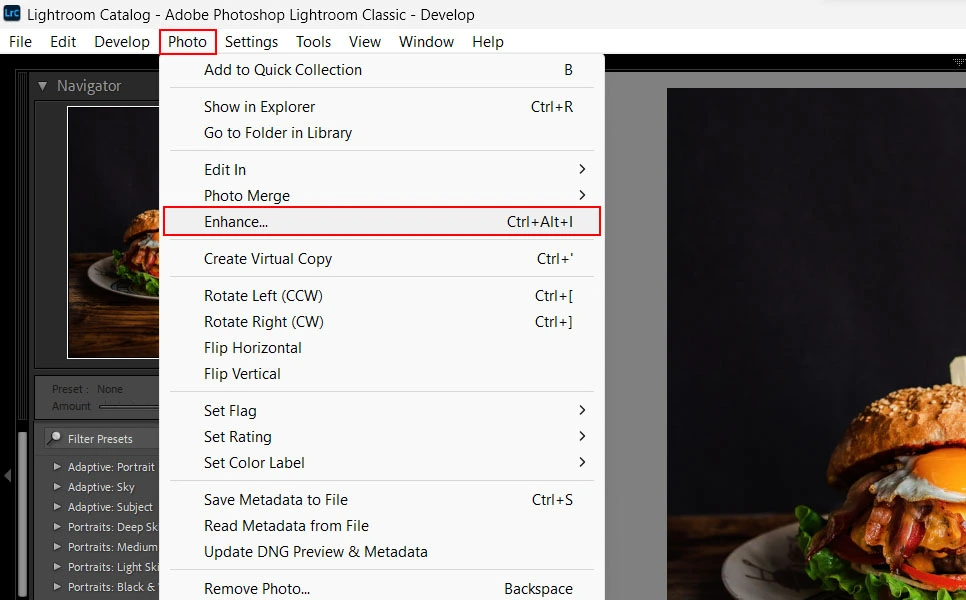
Step #3: Now, from the “Enhance” option, select “Super Resolution”.

Step #4: In the “Super Resolution” screen, click the “Enhance” button at the bottom.
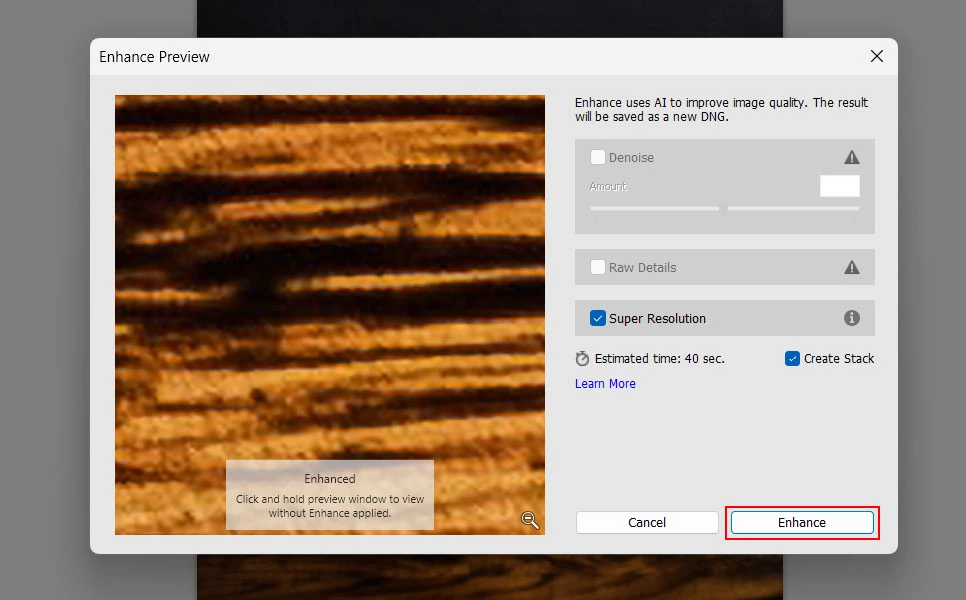
With this, Lightroom will automatically enhance the image and increase its resolution. The new high resolution file will be saved in a DNG (Digital Negative) file. Any other edits made to the file will be successfully retained in the new file.
The importance of high-resolution images in printing and digital photography
Low or incorrect resolution is one of the main culprits for unpleasant, pixelated prints. Besides, since physical printed photos are mainly used for marketing and promotional purposes, any blurred or pixelated images make the brand look unprofessional. They also severely hamper its brand authenticity. Moreover, the photo editor's or photographer’s reputation is also at stake due to the incorrect resolution.
In short, a sloppily printed image, be it for any purpose, renders the entire effort and purpose futile. Professional photographers or image editing artists must be thorough with different resolutions for paper prints and web views.
Contrary to physical prints, images created for web purposes can be of relatively lower resolution. The standard measurement of online image resolution is 72 PPI, which seems much lower than 300 DPI; however, web images appear at high quality at 72 PPI.
The best part of this resolution unit is that images seem to be of higher resolution and clarity, but their file sizes remain smaller. This ensures faster loading times and decent web performance.
Conclusion
There you are! A complete guide to creating high-resolution images in different software programs. For a professional graphic artist or photo editor, knowing the methods to change a low-resolution image to a higher resolution is imperative.
Physical marketing assets like posters, banners, brochures, billboards, etc. that are generally printed in massive sizes must always be in high resolution, or else the final product will look pixelated and unprofessional. Adjusting the image sizes and pixels in Photoshop and Lightroom gives the graphic artist better control over the files, making them ideal for sharing as well as large-scale printing.
So, now that you have learned the methods of changing image resolution from low to high, why not try it out for real? However, if you still find the work process too technical or if you are under too much pressure to edit bulk images, collaborate with a professional image editing companies and let them create high-resolution images for your printing-related projects.
Specialized professionals with years of experience developing and retouching digital photos support these external photo editing teams. They also have unlimited access to the latest technologies and software applications.