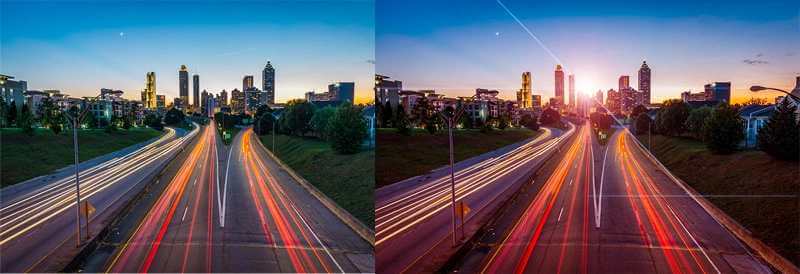
Photoshop Filters are one of the most important features of Adobe, which holds the potential to modify the entire look and feel of an image by adding special effects. It is mainly used by professional photographers, graphic designers, and photo editors to enhance the quality of the image by eliminating distortions and manipulating them.
Besides, it is also used by amateurs and hobbyists for their respective image enhancement projects. You may come across many third-party filters that are usually present as plug-ins on the web. However, the software itself provides different types of filters in Photoshop that you can use to address your needs.
In this article, we are going to discuss some of the existing Photoshop filters, as well as the newly added filters in 2026. So, if you are a beginner in photo editing, or an intermediate looking to refine your image editing workflow in 2026, bookmark this article.
By the end of it, you will be enriched with these advanced digital filters and be able to create special visual effects in your images. Explore these non-destructive filters and effects in Photoshop with us, that not only enhance image quality but also eliminate distortions.
Let’s begin!
What is a filter in Photoshop?
A filter in Photoshop is a feature or digital effect that allows users to modify photos, repair them, create multiple special visual effects, and shift pixels. Photoshop offers several filters to perform unlimited purposes.
Some of these are changing colors, sharpening, adding blur, image stylizing, glowing and smoothening the edges of the image, and much more. The Photoshop filters mainly work in the active layer in the active selection.
If the layer mask or active layer is not selected, the filter effects get applied to the entire layer. With these filters, graphic artists and photo editors can change later content in a hassle-free and swift manner.
Types of Photoshop Filters?
There are a lot of things that you can do with Photoshop Image filters. You can create compositions that are attractive and realistic. You can create new images from scratch, perform photo retouching, develop unique transformations, or even imitate a painting or sketch that is hard to recognize. Most importantly, Photoshop filters are easy-to-use tools.
You can add awe-inspiring effects to your images by using various types of Photoshop filters, which are mentioned below:
-
Blur Filters
![Blur filters Blur filters]()
Blur filters in Adobe Photoshop are mainly used to soften a selected area or an entire photo, which is particularly handy for professional image retouchers. The algorithm of these intuitive filters smoothens transitions by averaging the pixels’ color values, beside the shaded parts and the hard edges of the selected lines.
Please note: In the “Layers” panel, deselect the “Lock Transparent Pixel” option to apply a “Blur” filter to a layer’s edges
-
Average
It will help you in identifying an image or a selection having an average color so that you can fill it with the desired color to give it a smoother look.
-
Motion Blur
It is used to add realistic motion effects. For example, this effect can be used to make an image appear as though it is containing a moving object having a fixed time exposure.
-
Shape Blur
You can create the blur with the help of a kernel, which can be chosen from the list of shape presets. For adjusting its size, use the radius slider.
-
Surface Blur
With this filter option, you can create a blur while preserving the image edges. It is generally used to remove grain and noise from the pictures.
-
Lens Blur
It provides the effect of a narrower field-depth to put focus on the main objects present in the pictures while blurring the unimportant things.
-
Gaussian Blur
It gives a blurry or hazy effect to the selected area of the image with an adjustable amount. Besides, it also gives a low-frequency detail.
-
Radial Blur
You can add a soft blur to the zoomed-out or rotating camera by selecting the Spin option, and then specifying the degree of rotation.
-
Smart Blur
Here, the filter option will enable you to blur the image with accuracy once you have specified the desired threshold, radius, and blur quality.
-
Blur and Blur More
This filter eliminates visual noise or ‘grains’ if a major color transition happens. It softens the noise by averaging the pixels' color values beside the selected line's rough edges and the shaded area. The effect of the “Blur and Blur More” filter is very strong.
-
Box Blur
This filter is primarily ideal for creating special effects; it blurs a photo or a selected part of it, averaging the neighboring pixels’ color values. The size of the area can be customized to calculate a specific pixel’s average color value; the larger the radius, the greater the blur.
-
Average
-
Blur Gallery
The Blur Gallery filters are powerful blurring filters in Adobe Photoshop that enable you to selectively blur a photograph. You can use it to “remove” distracting elements from a picture, direct the viewer’s eye to where you want it to go, or add creative effects. You can find the Blur Gallery under the Filter option in the menu.
-
Field blur
The Iris blur can create a shallow depth-of-field effect in images, regardless of what camera or lens you use. Like with the Field blur, you can also define many focus points in a picture with pins.
When you use the Iris blur a default pin is placed on the image. You can add more blur pins by clicking on the photo. You can redefine and fine tune the blur using the various handles in the view, and use the Blur Tools panel to specify a blur value.
-
Iris blur
It offers fine ink strokes to capture the image details. Here, background color is used for paper and foreground color is used for ink.
-
Tilt-Shift
The Tilt-Shift filter gives the effect that the photo is taken with a tilt-shift lens. It defines an area of sharpness and at the edges, fades to a blur, which is perfect for when you are photographing miniature objects.
Again, the default Tilt-Shift blur pin is placed on the image and then you have to click the image to add additional blur pins. Drag the blur handles to increase or decrease the blur and use the Blur Tools panel to specify a blur value. Defines different areas in the image by dragging the lines or drag and rotate the handles.
-
Path blur
With the Path blur effect, you can create motion blurs along paths that you have defined. Additionally, you can control the shape, type (Basic Blur or Rear Sync Flash blur), and amount of blurring along the path. If you have applied different path blurs to the image, Photoshop will automatically composite them together.
-
Spin blur
The Spin blur is a radial blur measured in degrees, rotating and blurring an image around one or more points. You can work with center points, blur size and shape, and other settings and view all your changes in a live preview. Also, Photoshop automatically blends multiple spin blurs together in an image.
-
Field blur
-
Sketch Filters
![Sketch Filters Sketch Filters]()
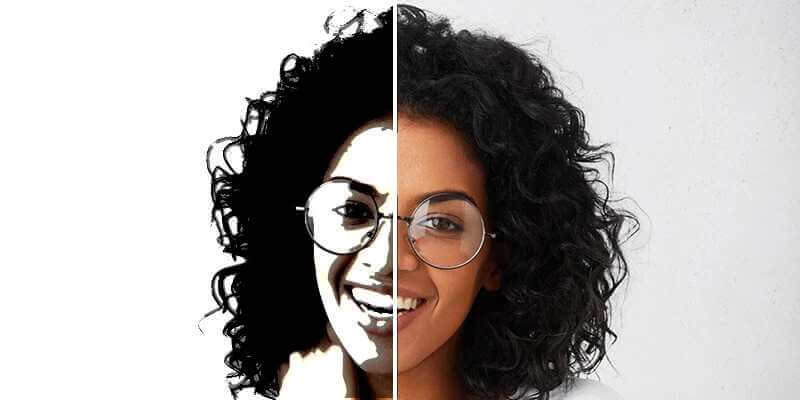
The filters in the sub-menu Sketch are used to add texture to mimic a 3D-like effect in an image. They are also used for sketching hand-drawn looks or fine-arts style drawings. Usually, the sketch filters utilize background and foreground colors while redrawing the image.
Use the “Filter Gallery” to access and apply the sketch filters.
-
Stamp
This filter makes an image appear as though it is created with a wood or rubber stamp. Besides, it can be best implemented for black and white images.
-
Graphic Pen
It offers fine ink strokes to capture the image details. Here, background color is used for paper and foreground color is used for ink.
-
Photocopy
With this effect, an image appears as though it is photocopied. Here, dark areas are copied around the edges and midtones are either solid back or white.
-
Conté Crayon
It gives the exact texture of conté crayons on the picture. Here, the foreground color is used for dark areas and background color for bright areas.
-
Note Paper
This effect makes an image appear as if it is developed from a handmade paper. Its dark area is used for showcasing the background color.
-
Chalk & Charcoal
The charcoal effect will be given to the foreground color and the chalk effect will be given to the background color in the image.
-
Bas Relief
The “Bas Relief” filter beautifies a particular photo by giving it the appearance of being carved in low relief. That is, the figures in the photo appear to be protruding slightly from the background; no or little undercutting of the outlines can be seen in the image.
Also, the image gets illuminated to accentuate the surface variations. This filter uses the background or foreground colors to replace the darker and lighter parts of the image, respectively.
-
Charcoal
This filter gives a smudgy, posterized effect to an image, with the number of colors being reduced and changing the color tone gradation across several areas. Significant edges are drawn with bold strokes, and the mid-tones use a diagonal stroke.
The charcoal filter uses the foreground color as its dominant tone, and the background color acts as the paper’s color.
-
Chrome
This filter gives the effect of a polished chrome surface with a shiny, highly reflective, and bright surface. On the reflective surface, the highlights are the high points, and the shadows are the low points.
Usually, experienced professionals use the “Levels” dialog box to add more contrast to the image.
-
Halftone Pattern
Professional retouchers and photo manipulators utilize this particular Photoshop filter effect to create a retro look in the image, replicating old-fashioned color printing. This effect is simulated by converting a continuous range of tones in a photo into a pattern of lines or dots.
Note: The “Halftone” filter won’t work if there’s no white around the black areas or if it is transparent).
-
Plaster
The “Plaster” filter, a part of the “Filter” gallery, uses the background color to mimic raised areas and the foreground colors to represent recessed areas. This Photoshop effect molds a photo from 3D plaster and then adds color to it using the background and foreground shades. It has a parameter of image balance, light direction, and smoothness.
-
Reticulation
The “Reticulation” filter redraws a photo simulating the clumping of a motion, precisely the controlled distortion and shrinking of a photographic print emulsion. This creates an effect of the image being clumped in the shadowy areas and lightly grained in the highlighted parts.
-
Torn Edges
The torn-down effect is sometimes required to create a photo manipulation of a page torn from a magazine having rugged edges. To replicate a similar appearance, the “Torn Edges” filter in Adobe Photoshop can be utilized.
This filter first reconstructs an image as if it has come from torn paper bits, then colorizes it using the background and foreground colors.
-
Water Paper
Watercolor papers have a textured surface ideal for absorbing water-based inks or paints. To mimic this effect, Photoshop has this “Water Paper” filter. This filter uses blotchy daubs that soften lights and adds dark squares to simulate watercolor on textured, damp paper.
These daubs appear painted on fibrous paper (made for water-based paints) and cause the color to flow and blend, just like in the real-life watercolor paintings we see.
-
Stamp
-
Brush Stroke Filters
![Brush Stroke Filters Brush Stroke Filters]()
Adobe Photoshop’s “Brush Stroke” filters simulate traditional paint brushes and color techniques primarily used in fine arts. These filters, similar to “Artistic” filters (discussed below), give a beautified painterly look to images by mimicking different brush and ink strokes that a painter or an artist uses in real life.
These filters can be accessed through the “Filter Gallery” and add paint, edge detail, grain, textures etc.
-
Spatter
This effect is similar to that of the Spatter airbrush, which can be used to simplify the overall effects of the image.
-
Dark Strokes
It will enable you to paint the lighter areas with long, white strokes, and the darker areas with short, dark strokes, respectively.
-
Sprayed Strokes
Using Sprayed strokes, you can use dominant colors for repainting a picture by applying sprayed and angular strokes.
-
Angled Strokes
It will help you to repaint an image by applying diagonal strokes, i.e., strokes in the opposite direction, to the lighter and darker areas.
-
Crosshatch
It will help you to add texture and roughen the edges of the colored areas of an image by incorporating simulated pencil hatching.
-
Ink Outlines
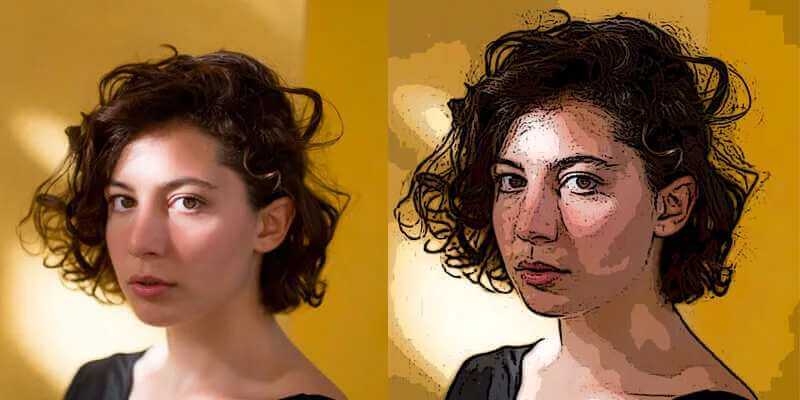
This filter sketches an image with fine, narrow lines tracing over the original version. This line drawing replicates the pen-and-ink style used by mainstream painting artists. The filter has parameters based on dark and light intensity and stroke length.
-
Sumi-e
The Sumi-e filter creates soft, blurry, and rich inky blackish edges, emulating the Japanese-style art of ink painting. This oriental drawing style is a much-celebrated art form done in monochrome on handmade paper with “sumi” ink. The aesthetics of the Japanese style are thus replicated with the appearance of a wet brush saturated with black ink on handmade rice papers.
-
Accented Edges
To accentuate an image’s edges, professional photo retouchers use the “Accented Edges” filter in Photoshop. This filter exaggerates the margins between different parts of an image using different color tones.
This exaggeration or accentuation can be regulated by adjusting the edge brightness. When it is set to a high value, the accents appear chalky white; when the value is higher, the accents appear inky black.
-
Spatter
-
Distort Filters
![Distort Filters Distort Filters]()
These filters can distort layers geometrically, giving a 3D or similar other distorting/reshaping effect, like twisting, warping, pulling, stretching, and so on. The filter facilitates realistic facial appearances and bodily gestures with depth by deforming the pixels in the image.
These filters are highly memory-intensive and require a higher RAM to run without glitches.
-
Spherize
It will give a 3D effect to the image or the selection by distorting it and wrapping it around a spherical shape to fit the curve.
-
ZigZag
Here, you need to specify the radius of the pixel and understand how you should displace it so that the selected area of the image will be distorted accordingly.
-
Ripple
In this case, you need to specify the size and the number of ripples depending on which an undulating pattern will be created in the desired section.
-
Ocean Ripple
By using it, you can add randomly-spaced ripples to the surface of the image to produce a feel as if the picture is located underwater.
-
Glass
This effect looks as if you are viewing the image via different types of glasses. You can either use it or create your own glass effect for applying.
-
Displace
Using this feature, you can choose from the different default settings provided for the displacement map to create distortions for an image or a particular selection.
-
Diffuse Glow
The “Diffuse Glow” filter creates a dramatic effect on a particular photo using the active background color, giving a soft halo-like effect. It uses the highlights in an active layer and brightens the light outward; this fading out of the light creates a dreamy effect as if seen through a diffusion filter with soft light.
The filter has parameters such as clear amount, graininess, and glow amount adding transparent white noise to an image.
-
Pinch
This filter applies a pinch distortion to a selection or a layer from inward or outward, thus squeezing the pixels of an area. It functions oppositely to another Photoshop filter, “Bloat”. When the positive value is set at +100%, the selection shifts towards the center of the brush area; and when the negative value is -100%, the selection is pinched outwards.
However, the filter doesn’t work on photos having larger pixel sizes, for e.g., more than 11500 px by 11500 px.
-
Polar Coordinates
The “Polar Coordinates” filter moves the pixels of a selection to convert its rectangular area into a circular one and vice versa. Basically, it switches the pixels’ position along the X and Y axes. It is a highly useful tool to create a distortion in an animation or an image and produces a cylindrical effect, also called “anamorphosis”, an 18th-century popular art style.
In this art form, a distorted photo appears proper when seen through a mirrored cylinder.
-
Shear
The “Shear” filter effect distorts an image in a way that gives a more organic look to it, following the line of a curve instead of a straight line. Users can specify the particular curve by tracing the line, thereby adjusting any random point along the curve. The “Default” option must be clicked to make the curved line straight.
However, the only downside of the “Shear” filter is, it cannot be applied to any text.
-
Twirl
The “Twirl” effect creates amazing backgrounds by rotating a selection into a series of colorful twirls. The rotation happens near the center, and the angle must be specified to produce the twirling pattern. This creative distortion effect converts an ordinary image into a spectacular one; more aesthetic results can be achieved if the effect is applied multiple times.
However, just like the “Pinch” effect (discussed above), the “Twirl” effect also doesn’t work on large photos beyond 11500 px by 11500 px.
-
Wave
The “Wave” filter works just as another distortion filter, “Ripple”, but has greater control over the distortion intensity. The filter effect comes with level options or parameters such as wavelength, wave generators, wave type, wave height, etc. The filter shifts the pixels of a selected area in a defined wavy pattern, and the setting can be configured at any point.
-
Spherize
-
Noise Filters
![Noise Filters Noise Filters]()
As the name suggests, the “Noise” filter eliminates or adds noise or pixels having color levels that are distributed randomly, thus emulating the shooting of photos on a high-speed film. The filter helps blend a selected area with its neighboring pixels and creates a more realistic appearance with a textured layer.
The “Noise” filter can also remove dust or scratches from an area of the photo and create unusual textures.
- Reduce Noise
It will affect the picture as a whole or the individual selections by reducing the noise and preserving the edges.
- Add Noise
By adding random pixels, you can give a realistic look to the images that are retouched to a greater extent.
-
Dust & Scratches
In this case, you can reduce the noise and achieve a balance between image sharpening and concealing flaws.
- Median
It blends the pixel brightness within the selection to reduce noise. You can also use the filter for reducing motion effects.
-
Despeckle
The “Despeckle” filter eliminates visual noise without blurring the edges of an image where major color changes happen. The filter strategically blurs the rest of the selection, leaving out the edges. This removes the noise or grain, keeping the detail intact.
Having parameters of radius and threshold, the “Despeckle” filter is a simple yet useful filter for professional photo editors.
- Reduce Noise
-
Stylize Filters
![Stylize Filters Stylize Filters]()
The “Stylize” filters offered by Photoshop add height, depth, and line effects to a selection creating wonderful effects on the entire image. All the effects in this filter family can be used to add a touch of creativity and special effects. An impressionistic or painted effect can be created by repositioning the pixels and increasing the contrast in an image.
-
Diffuse
You can use it to soften focus by shuffling the pixels in the selection according to different options such as normal, lighten only, darken only, etc.
-
Wind
This filter can give a windblown kind of effect to the images. It includes different options such as Wind, Blast, and Stagger.
-
Find Edges
This effect will help you to locate the particular sections of the image that underwent different transformations while emphasizing on its edges.
-
Tiles
It can break the image into a series of tiles where the area between them can be filled with different options such as reverse image, foreground color, background color, unaltered image, etc.
-
Glowing Edges
It can be applied cumulatively by identifying the color edges of the images and adding a neon-like glow to it.
-
Trace Contour
The “Trace Contour” filter in the “Stylize” filter family locates the transitions of highly bright areas and creates a narrow line drawing for each color channel. This replicates the line drawings of a contour map.
-
Solarize
Imitating the darkroom technique of film development by re-exposing an incompletely developed photo to light to create creative changes in the mid-tone areas of the photo - the “Solarize” filter effect also fuses a negative and positive image. This produces a dramatic effect in the image.
The only drawback is that this filter has no configurable settings; everything is software-generated.
-
Emboss
Photoshop’s “emboss” filter gives a raised or stamped appearance to a selected area while retaining the color and detail. The process involves converting the fill color of the selection to gray and tracing along the edges with the original fill color.
The filter has options for embossing angle (+360° to raise the selection, -360° to recess the same).
-
Extrude (Removed from the latest Photoshop)
This filter is a relatively recent addition to the “Stylize” filter family of Photoshop and has been proven to be a hit amongst professional image editing service agencies. The “Extrude” filter raises a selected area of an image or layer and pushes the area outward.
This mimics a three-dimensional texture effect creating pyramid or block-like structures simulating depth by blurring the image’s colors.
Note: Since extrusions depend on 3D features (which has been removed from newer versions of Photoshop), they are no longer available. However, they may still be present in the earlier versions.
-
Oil Paint
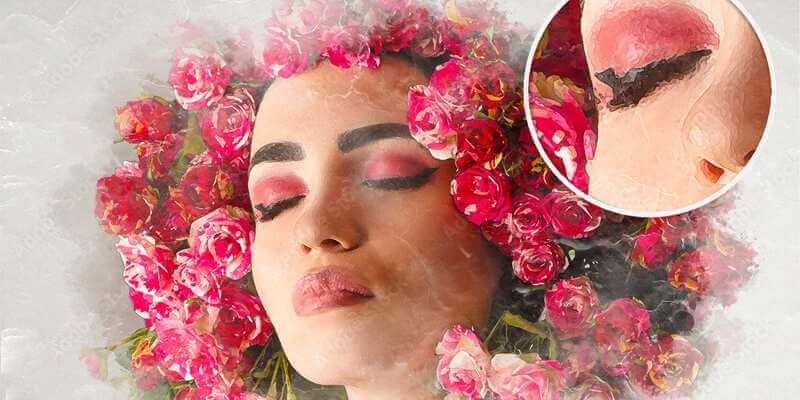
Use the Oil Paint filter to turn a photo into what looks like a classic oil painting. With some simple sliders, you can adjust the stylization amount, brush scale, cleanliness, and other factors.
Note: If your Oil Paint filter is disabled, check if your computer supports OpenCL v1.1 or higher. This is applicable for Photoshop versions below 23.2.
-
Diffuse
-
Render Filters
![Render Filters Render Filters]()
Render filters in Photoshop are used to create 3D structures and shapes, refraction and cloud patterns, mimicking reflections from a light source on an image. The best aspect of this filter is that the photo editor can manipulate objects in a virtual space and develop objects resembling 3D objects, such as cuboids, cylinders, spheres, etc. As well as create texture fills from a greyscale image and replicate 3D lighting effects.
-
Clouds
It can create a soft cloud pattern by using random values that vary between background and foreground colors.
- Lighting Effects (Removed from the latest Photoshop)
You can use this filter to create infinite lighting effects on RGB images by varying different styles, types, and properties.
Note: The lighting Effects filter has been discontinued in the latest versions of Photoshop. Lighting Effects uses the 3D engine and in July of 2026, Adobe removed the legacy 3D features from Photoshop owing to changes in operating systems: Direct X in Windows and Metal on macOS. PS 22.2 is the last version where you can still use 3D and lighting effects. Even the CC app has them.
-
Fibers
This filter makes use of the background and foreground color to create the appearance of woven fibers in the image.
- Lens Flare
In this case, you can shine a bright light into the camera lens for generating the appearance of refraction inside the image.
- Difference Clouds
The “Difference Clouds” filter produces a cloud pattern with randomly generated values varying between the background and foreground colors by blending or fusing cloud data with the existing color pixels within a selected layer.
-
Clouds
-
Artistic Filters
![Artistic Filters Artistic Filters]()
This set of filters is mostly used to emulate an artistic or fine-arts effect on an image for commercial usage. The effects produced are generally traditional or natural media effects, such as collages or typography, and can be accessed in the “Filter Gallery”.
-
Film Grain
It can remove blend banding and give a more saturated pattern to the shadow tones and mid-tones.
-
Plastic Wrap
It generates the effect of a liquid or a shiny plastic coating that is best for highlighting the surface detail of the image.
-
Paint Daubs
It gives a paint effect to the images while allowing users to select from a wide range of brush sizes and types.
- Watercolor
This option has a medium brush loaded with colors and water to give a watercolor effect to the images.
-
Colored Pencil
This effect provides a rough crosshatch look to the images with the use of pencil colors present on a solid background.
-
Palette Knife
With this option, you can decrease the image details, thereby providing the effect of a thinly-painted canvas.
- Cutout
This type of option produces the exact appearance of the roughly cut-out pieces of colored paper on an image.
-
Neon Glow
With this option, you can add various types of glows to an image to colorize and soften its appearance.
-
Smudge Stick
Try using it with short diagonal strokes to blur the darker areas. If applied to lighter areas, it can lose detail.
-
Dry Brush
This feature adds a dry brush effect while painting the image edges by reducing its color range to the common color areas.
-
Fresco
This is the handiest filter that replicates sheer artistry and aesthetics in any image. Replicating the “fresco painting” artform evolved during the Renaissance period, the “Fresco” filter augments contrast by pushing darker and lighter shades, simulating a warm and saturated wet-plaster effect found in the mural from Renaissance Italy.
This helps the user paint coarsely with short, rounded daubs resembling the “Dry Brush” filter.
-
Poster Edges
As the name suggests, this filter posterizes or reduces the number of colors present in an image per the posterization intensity set by the user. While reducing the colors, the algorithm for this effect also locates the edges and draws black lines on them.
Larger areas of the image are given a simple shading, while fine, darker details are distributed throughout the image.
-
Rough Pastels
A fabulous filter effect that replicates strokes of pastel chalk appearing with textures depending upon the color levels. The filter creates the appearance of a textured background, with the chalk appearing thick and slightly textured in brightly lit areas and scraped off in darker areas to retain the texture.
-
Sponge
This Photoshop effect is primarily used to depict sponge painting with color blotches blending onto each other. Highly textured and contrasting color areas can be created, as can textural overlay colors, with the “Sponge” filter.
-
Underpainting
This filter helps create the illusion that a layer is painted against a textured background, such as brick, sandstone, burlap, canvas, and the like. The “Underpainting” filter comes from the concept of a real-life painter who draws an “underpainting” after sketching the initial general outlines and finally paints the actual image over it.
-
Film Grain
-
Texture Filters
![Texture Filters Texture Filters]()
To create the effect of organic materials with proper depth, substance, and geometrically positioned alignments, highly experienced image editors leverage the “Texture” filters. The main functionality of this set of filters is to simulate real-world objects along with their organic textures and patterns.
-
Grain
Different types of grains, such as clumped, stippled, regular, vertical, and horizontal grains are simulated for adding texture to the image.
- Stained Glass
In this type of effect, the picture is repainted as single-colored adjacent cells that are outlined in the foreground color.
- Mosaic Tiles
With this effect, a photograph appears as if it is made up of small tiles or chips.
- Patchwork
This filter breaks up the image into predominantly-colored squares while increasing or decreasing the tile depth to recreate shadows and highlights.
-
Craquelure
The “Craquelure” filter gives images that contain a wide range of color and grayscale values an embossed appearance. The word “craquelure” is French for dense cracks or peelings on the paint that form on hard surfaces. Keeping true to the real meaning of the world, this filter designs various cracking patterns, paints images against high-relief plaster surfaces, and simulates the effects of age-related wear and tear.
The “Craquelure” filter has brightness, depth, and crack spacing parameters.
-
Texturizer
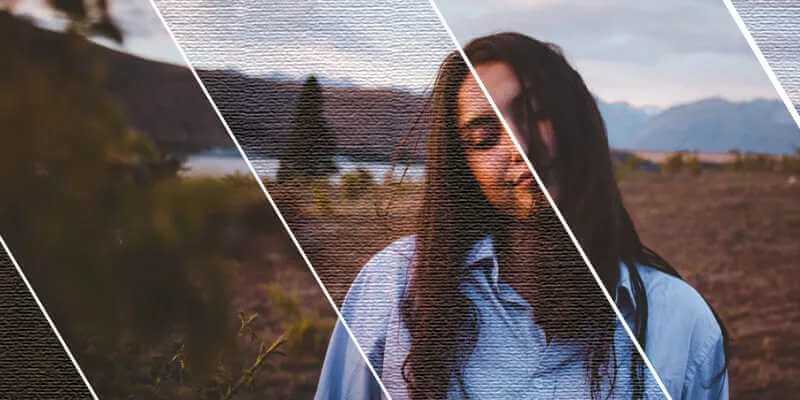
The “Texturizer” filter simulates various types of textures to an image or selects a texture file to use on the image. Either way, this tool is very handy for adding realistic textures to any digital image to make it look all the more natural. When applied, images appear as if painted directly on a particular texture like brick, canvas, glass blocks, sandstone, etc.
The “Texturizer” filter has parameters such as light direction, texture relief, texture scaling, etc.
-
Grain
-
Pixelate Filters
![Pixelate Filters Pixelate Filters]()
If you want to sprinkle some funkiness in images, try the “Pixelate” filters in Photoshop that produce surreal effects by clumping together the pixels of a photo. The algorithm of these filters defines a selected area, locates pixels of similar color values, and breaks them down, giving them a unique appearance.
Apart from producing a quirky image, the “Pixelate” filters are also used to blur a logo, someone’s face, or any sensitive information present in an image.
- Color Halftone
It generates a feel as though a larger halftone screen is used on each channel where the image is divided into rectangles and later replaced with a circle.
- Facet
With this effect, you would find solid or similar color pixels gathering together to form like-colored pixel blocks. It is generally used to give a hand-painted look to the scanned image.
-
Mezzotint
With this filter, you can convert completely-saturated colors into a color image or a normal image into a random black-and-white pattern.
-
Pointillize
In this type of effect, you can break up the image colors into dots that are placed randomly, just like what you will find in a pointillist painting.
-
Crystallize
This filter produces the effect of viewing an image through a glass pane with several irregular patterns or facets. In short, this filter effect breaks a selected image into multiple sections and groups all the neighboring pixels together to create polygonal shapes of solid color shades that are much larger in size.
-
Fragment
The “Fragment” filter is an integral part of the “Pixelate” filter sets, producing a blurry effect on an image upon application and giving a texture-like appearance to the image. The filter creates four copies of the adjacent pixels on a selected part of an image, averages the pixels, and then offsets them. For projects that require high-end creative blurriness in images, this filter is ideal.
However, a couple of downsides are that the size and offset in the “Fragment” filter are not configurable, and can only be applied to solid objects, large texts, and shapes.
-
Mosaic
This filter is used to create pixelated images resembling mosaic tiles made of small chips or blocks of color. The “Mosaic” filter converts an image into square blocks of colors representing the image beneath, and adds texture to the image that appears in grout patterns. The blocks of colors are the same as in the selected area.
Parameters for this filter are lighten grout, tile size, and grout (the distance between two tiles) width.
- Color Halftone
-
Sharpen Filters
The Sharpen filter brings blurred images back into focus by increasing the contrast between adjacent pixels.
- Sharpen and Sharpen More
They focuses a selection and improves the clarity. However, the Sharpen More filter has a stronger sharpening effect than the Sharpen filter.
- Sharpen Edges and Unsharp Mask
You can sharpen areas of the image where there are significant color changes. The Sharpen Edges filter sharpens only edges and preserves the smoothness of the overall image. It sharpens edges without you needing to specify an amount.
You can use the Unsharp Mask filter to adjust the contrast of the edge detail and produce a darker and lighter line on either side of the edge. It emphasizes the edges and makes the image appear sharper.
-
Smart Sharpen
You can set the sharpening algorithm or control the amount of sharpening in the shadows and highlights in an image with the Smart Sharpen filter. This will give you high-quality results through adaptive sharpening technology as it minimizes noise and halo effects in the image. It’s a preferred sharpening method for those who don’t have a particular sharpening filter in mind.
Smart Sharpen also has optimized controls so you can perform targeted sharpening. The sliders can make quick adjustments and the advanced controls let you fine-tune the results.
The Smart sharpening filter supports CMYK and lets you sharpen arbitrary channels. Which means you can sharpen individual color channel, such as just the blue channel, green channel, or the alpha channel.
- Sharpen and Sharpen More
-
Sepia
![Dramatic Sepia Dramatic Sepia]()
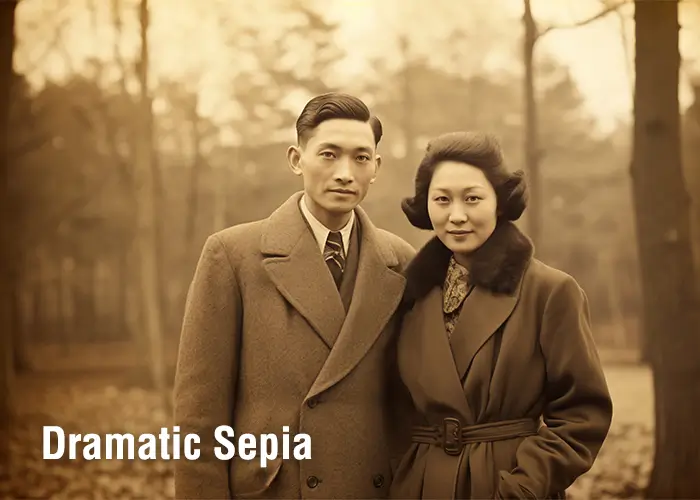
This Photoshop effect helps photo editors create the best moody images with a vintage look and feel. It is a non-destructive filter that allows adding multiple layers to the image and offers precise control over the editing brushes. It is best to create a light sepia undertone or a sunburnt appearance, giving the photo a timelessness. Apart from working on portraits, “Sepia” works best on landscapes too.
You can find this filter by clicking Image › Adjustments › Photo Filter.
-
Parametric Filters (currently only in Beta versions)
![Parametric Filters Parametric Filters]()
“Parametric Filters” are a set of various stylized filters that Photoshop launched only in its beta version (25.2). This update is one of the most important, given its intuitive preset filters like oil painting, vintage, glitch, scratch photo, or sepia effects that can be added to an image non-destructively. The best part of parametric filters is that they can be applied as adjustment layers that can be removed or readjusted anytime. By tweaking the parameters of a specific filter and creating their own custom preset filter for future use.
-
Neural Filters (AI-Powered)
Neural filters use AI and machine learning to help you accurately capture skin tones, colourise black-and-white photos and perform style transfers quickly, in just a few clicks. You can find them under the Filters tab of the menu. These are some of neural filters you can use:
-
Skin Smoothening
It helps you effortlessly touch up skin, with Simple sliders for Smoothness and Blur for removal of tattoos, freckles, scars and other elements.
-
JPEG Artifacts Removal
Repeated saving of JPEG files can make it look fuzzy or pixelated (called artifacts due to the compression algorithms that reduce the file size. JPEG Artifacts Removal can help you reverse these effects and fine-tune the image by adjusting the edges with a high, medium or low level of blur.
-
Style Transfer
The Style Transfer filter allows you to copy a look of from one image (color, hue or saturation) and apply it on another. You can use sliders for Style Strength, Brush Size and Blur Background, and tick boxes like Preserve Colour and Focus Subject to adjust the final look of the picture.
-
Super Zoom
Lets you zoom into a subject while maintaining sharpness of the details. You can use it to enhance facial features, remove compressed artifacts and reduce noise.
-
Colourise
Use Colourize to quickly give color to black-and-white photos. Specify the colors you in the picture and Adobe Sensei will automatically fill it. You can use focus points to add more color to specific areas to adjust the filter.
Beta Neural Filters (that are still in testing) include Smart Portraits, Makeup Transfer, Depth Blur, Landscape Mixer, Colour Transfer and Harmonisation.
-
Skin Smoothening
-
Other Filters
The “Other” filter sub-menu in Adobe Photoshop lets the users custom create their own filters, use them to modify maskings, regulate the brightness values of pixels, save these custom filters and utilize them to edit other photos, offset a selected part in an image, as well as make quick color corrections.
-
Maximum and Minimum
These are used to modify masks. The ‘Maximum’ filter will give the effect of a spread whereas the ‘Minimum’ filter will give the effect of a choke.
-
Custom
Using this option, you can customize your own effect and adjust the brightness of each pixel according to convolution, i.e., a predefined mathematical operation.
-
High Paas
This effect will help you to retain the image edges according to the specified radius while allowing you to conceal the rest. It’s just the opposite of the Gaussian Blur.
-
Offset
This filter is an integral part of the “Other” sets of Photoshop filters and is mainly used to move a selection. The algorithm of the “Offset” filter shifts a selected area (vertical or horizontal), creating a gap between the new position of the selection and its original location.
This gap can be filled with any other color, image, or any other choice of fill per the requirement.
-
Maximum and Minimum
How to Use a Photoshop Filter?
The filters provided by Adobe Photoshop can be found in the Filter menu. There are two ways of applying filters, one is from the Filter Menu and the other from the Filter Gallery. Go through the following instructions to learn how to use it:
-
Applying from the Filter Menu
- Select the desired layer or the particular area of a layer or the Smart Object.
- Select the desired filter from the sub-menus.
- If a dialog box or Gallery appears, enter the desired option and click OK. If not, you can be assured that the effect is already applied.
-
Applying from the Filter Gallery
- Choose the desired layer or the particular area of a layer or the Smart Object.
- Select the Filter Gallery.
- Click on the filter name of your choice to add it. You can also click on the inverted triangle icon to see its complete list.
- Enter the desired values or select the options.
- For a cumulative application, click on the New Effect Layer Icon and then choose the additional filter. For rearranging the applied filters, drag it to a new position in the applied list that is present in the lower right corner of the Gallery dialog box. For removing the applied filters, select them and then click on the Delete Layer option.
- Once everything is done, click OK.
-
Troubleshooting (How to fix filters that don’t work)
Issue Suggested Solution(s) Some filters in the menu appear grayed out or unavailable. Some filters are only available when working with images with color depths of 8-bits/channel or 16-bits/channel, in specific color modes (like CMYK). You can check the color depth by going to Select Image > Mode
![]()
Oil Paint, Blur Gallery or Liquify are grayed out/unavailable. How to enable them? Some of Photoshop’s features have specific system requirements. Liquify and Oil Paint for example, need your computer to have a compatible graphics processor (GPU).
You can ensure that the settings are enabled by going to Performance > Preferences > Use Graphics Processor.
You can also enable the OpenCL technology to improve the performance of certain features.Photoshop prompts me that there isn’t enough memory (RAM) when I try to perform certain actions. What do I do? You can start by adding scratch disks. Meanwhile, ensure that your available disk space is significantly more than the size of the document you're editing.
Generally speaking, the free space should be two to 3 times the size of the document.I tried to sharpen an image but the text in it is still blurred. How can I resolve this issue? Firstly, the image you're trying to sharpen should have a resolution of 300 px or higher.
You can fix it by going to Type > Anti-Alias on the Type layers to sharpen them.I have the latest Photoshop version but I can't find the Refine Edge tool. Has it been removed? The Refine Edge tool has been replaced by the Select And Mask workspace in the new Photoshop versions. They have the same functionality, but streamlined. I can’t open the Adobe Camera Raw filter while editing specific images. To use the Adobe Camera Raw filter, the image must be of 8-bits/channel and 16-bits/channel color depths.
You can check your image’s color depth by going to Select Image > Mode
How to Enhance the Filter Performance?
Some filter effects in Photoshop can be memory-intensive. For example, if you don’t have sufficient memory space to process an effect, then you would not be able to apply it and will get an error message. Similarly, these effects cannot be applied to Bitmap-code or indexed-color images. However, for improving filter performance, you may want to check out the tips that are mentioned below:
- Improve the speed of memory-intensive filters such as Cutout, Chrome, Ripple, Stained Glass, Splatter, Lighting Effects, Glass Filters, etc. by modifying the settings.
- If possible, add more RAM to Photoshop and exit from other running applications to make more space available.
- Before running the filter, try to free up the memory space by using the Purge command.
- If you are going to print the image with a grayscale printer, then first convert the copy to grayscale before applying the effects.
- If you need to process a high-resolution image, you can apply the effects to individual channels.
- Try applying the effects or settings to a small portion of the image.
Photoshop filter is one of the basic features that you should get acquainted with for mastering your Photoshop skills. Without having any prior knowledge, it would be impossible for you to leverage the full potential of filters for instilling the desired effects in an image. Even if you are choosing third-party filters, getting an overall idea of Photoshop’s filters would help you perform picture transformation in a more creative and efficient manner.
Guidelines while choosing the best filter
The key to a successful photo editing project is to harness the massive potential of Photoshop. Whether you are a novice, an intermediate, or a pro, selecting the right filter for your project matters more than anything. Just like selecting the right brush or tool from the numerous offerings in Adobe Photoshop suite, identifying the right kind of filter is a work of art.
Check out these guidelines while you sit to choose the best filter for your next photo editing and post-processing project.
- Filters are typically applied to the visible, active selection or layer, and can be applied individually.
- One cannot apply filters in Photoshop to indexed-color or Bitmap-mode photos.
- Certain filters only work on RGB images.
- However, all filters work on 8-bit image files.
- For 8-bit per-channel image files, most of the filters must be implemented cumulatively through the Filter Gallery.
- Filters that work on 16-bit image files:
- Average Blur
- Box Blur
- Vanishing Poin
- Lens Blur
- Motion BLur
- Liquify
- Radial Blur
- Reduce Noise
- Sharpen/Sharpen Edges
- High Pass
- Solarize
- De-Interlace
- Emboss
- Despeckle
- Filters that work on 32-bit image files:
- Average Blur
- Box Blur
- Gaussian Blur
- Unsharp Mask
- NTSC Colors
- Emboss
- Add Noise
- Cloud
- Shape/Surface Blur
- Radial blur
- Smart Sharpen
- De-Interlace
- Some specific filters and effects in Photoshop are processed entirely in RAM. Unavailability of adequate RAM to process the filter effect will show up as an error message.
–etc.
–etc.
Final thoughts
Photoshop is the quintessential retouching tool to create out-of-the-box effects on any photo, create endless image manipulations, and make the entire composition look unique. As you can see, there are many Photoshop features in the Adobe Photoshop suite that one can use to enhance creativity within their workflow. Furthermore, the new filters, effects, and Photoshop actions that were launched recently are here to take your Photoshop services to new heights of success.
However, the only thing that matters is selecting the relevant one out of so many. Experienced and professional photo editing companies are the best options for such precise jobs. They are backed by seasoned photo editors and post-processing specialists who offer stellar photo editing services at reasonable rates.
Embrace the potential of Photoshop filters and create visual masterpieces! Good luck!

