Photos are a powerful means of visual communication. Whether for businesses, at workplaces, schools, or to freeze a precious moment, photographs are an effective way of documenting things and keeping them for a lifetime.
Photo enhancement is the process of making a photograph more eye-catching by highlighting its features prominently, which is otherwise not always possible through simple photography. Because often professional photo shoots end up having number of flaws owing to many external factors. Enhancement aims to adjust the image quality by altering the color, gradient, hue, saturation, temperature, etc.
The digital camera manufacturing industry has undeniably undergone a lot of upgradation. But sometimes, we are still not satisfied with the finish of the images we click. Photographs that are produced not just through low-quality cameras but even through high-end cameras often demand a bit of polishing.
Photo enhancement comes with a sea of benefits. Some of them are:
- A seamless approach to reduce imperfections in images.
- Professionally enhanced photos increase conversion rates in business.
- Adds value to the effort put in photography.
Now the question is how to enhance photos in Photoshop?
As the demand for having spotlessly clear photographs rose, people became more reliant on software like Photoshop. With this, Adobe kept adding interesting features to “Photoshop” to enhance images and currently, it is the most used software by professionals.
Now, let’s see how we can improve image quality in Photoshop. Stick till the end to get a clear idea of it!
-
Simply use the Enhance feature
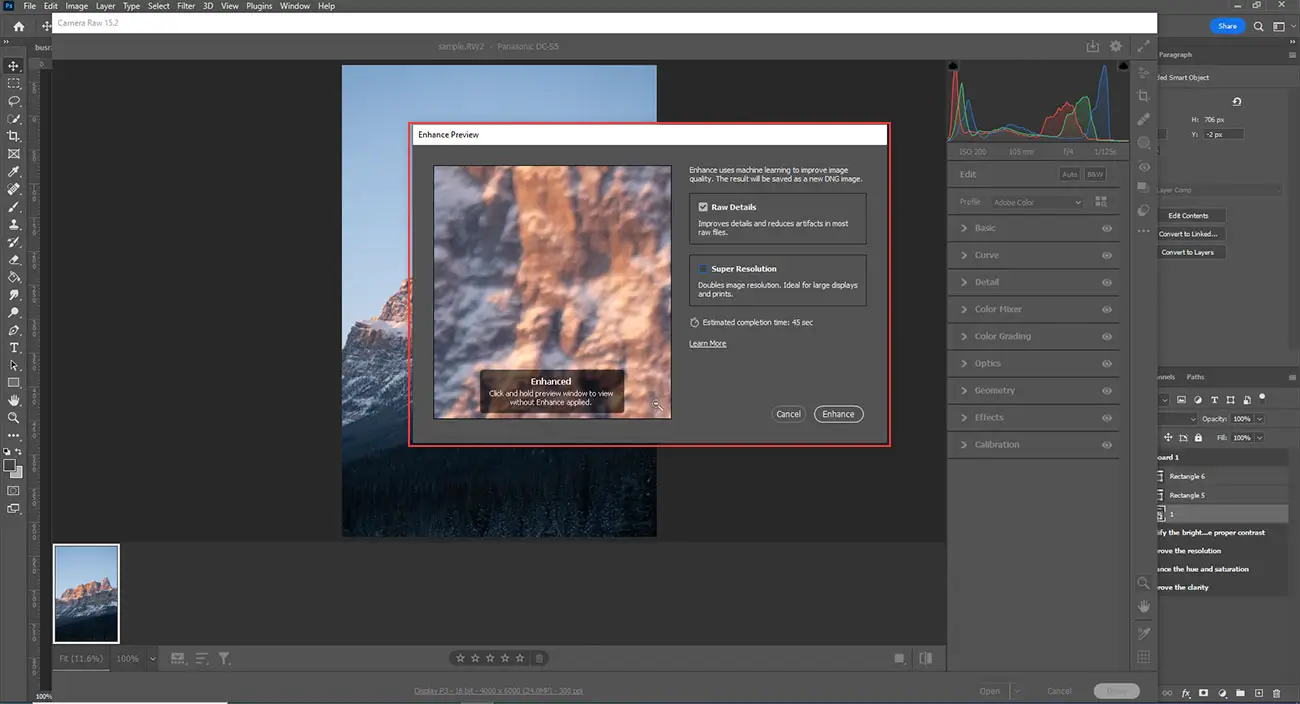
This is apparently the simplest way to intensify the quality of an image. The easiest way to enhance images using Photoshop is by:
Step 1: Right-clicking on the image.
Step 2: Look for the Enhance option.
-
Improve the clarity
A blurry image is like an ink-blot on the photography skill of a photographer. Even if the frame is stunning, a slight amount of blur spoils the entire effort. You can improve clarity in Photoshop in 2 prominent ways:
By sharpening
Unsharp Mask
This feature works by detecting the pixels whose value differ from the adjoining pixels and adjusts the contrast based on the limit set by the user.
Step 1: Go to Filter
Step 2: Find Sharpen
Step 3: Choose Unsharp Mask and set the controls as needed
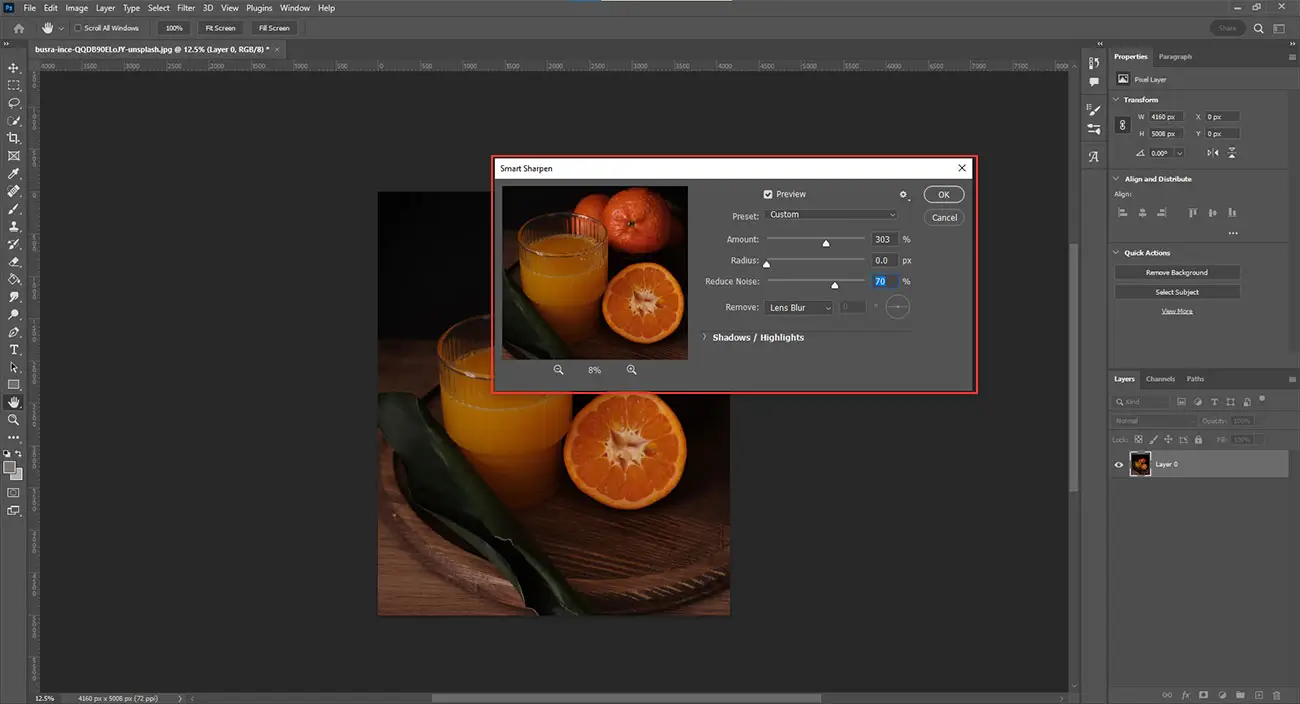
Smart Sharpen
The Smart Sharpen tool works by adjusting the depth of shadows and highlights certain areas.
Step 1: Go to Filter
Step 2: Find Sharpen
Step 3: Choose Smart Sharpen and set the controls as needed
By using the grain-reducing feature “Noise”
Another way to improve the clarity of an image is by using the Noise tool.
Step 1: Go to Filter
Step 2: Find Noise
Step 3: Choose Reduce Noise
-
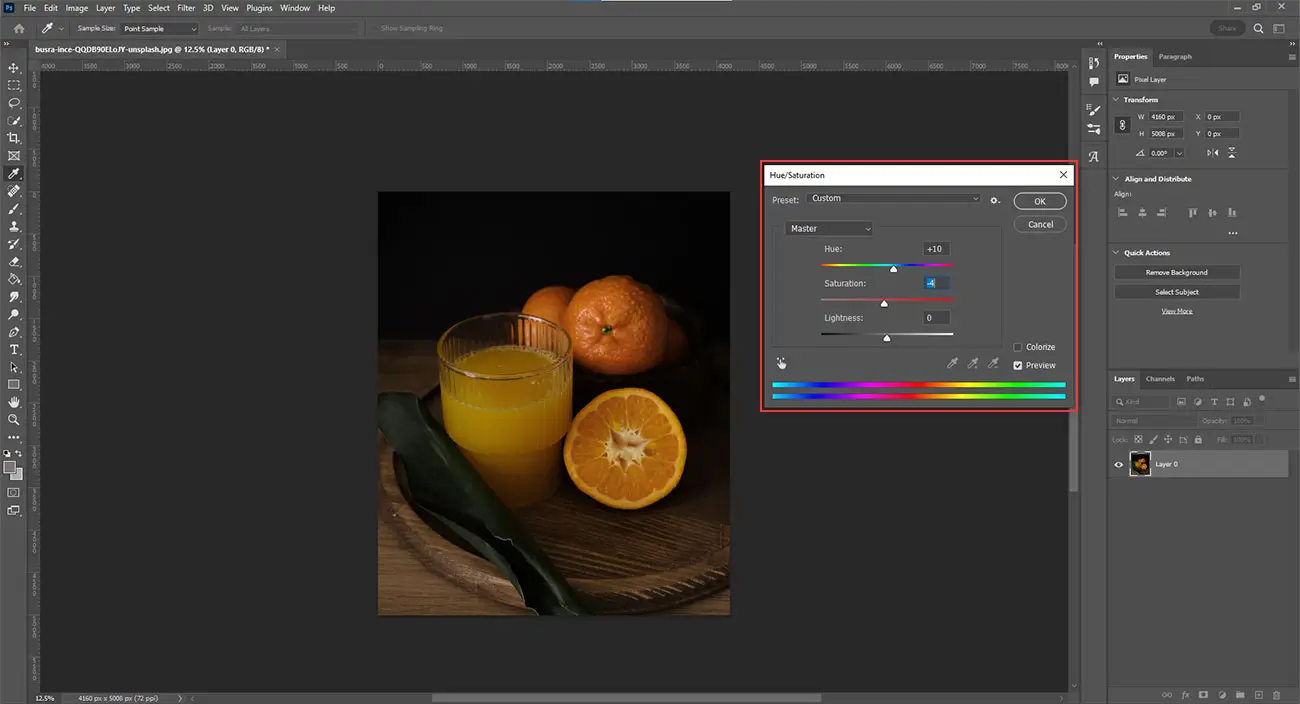
Enhance the hue and saturation
Images have to be appealing and human eyes love views with colors. Hue is the wavelength of light that is perceived by the human eye and saturation is the amount of white light mixed with that color.
So putting down simply, hue is the colour and saturation is the intensity of that color.
Let’s have a look at the steps for enhancing colors in Photoshop.
Step 1: Go to Enhance
Step 2: Find Adjust Color
Step 3: Choose Adjust Hue/Saturation and move the slider as needed.
-
Improve the resolution
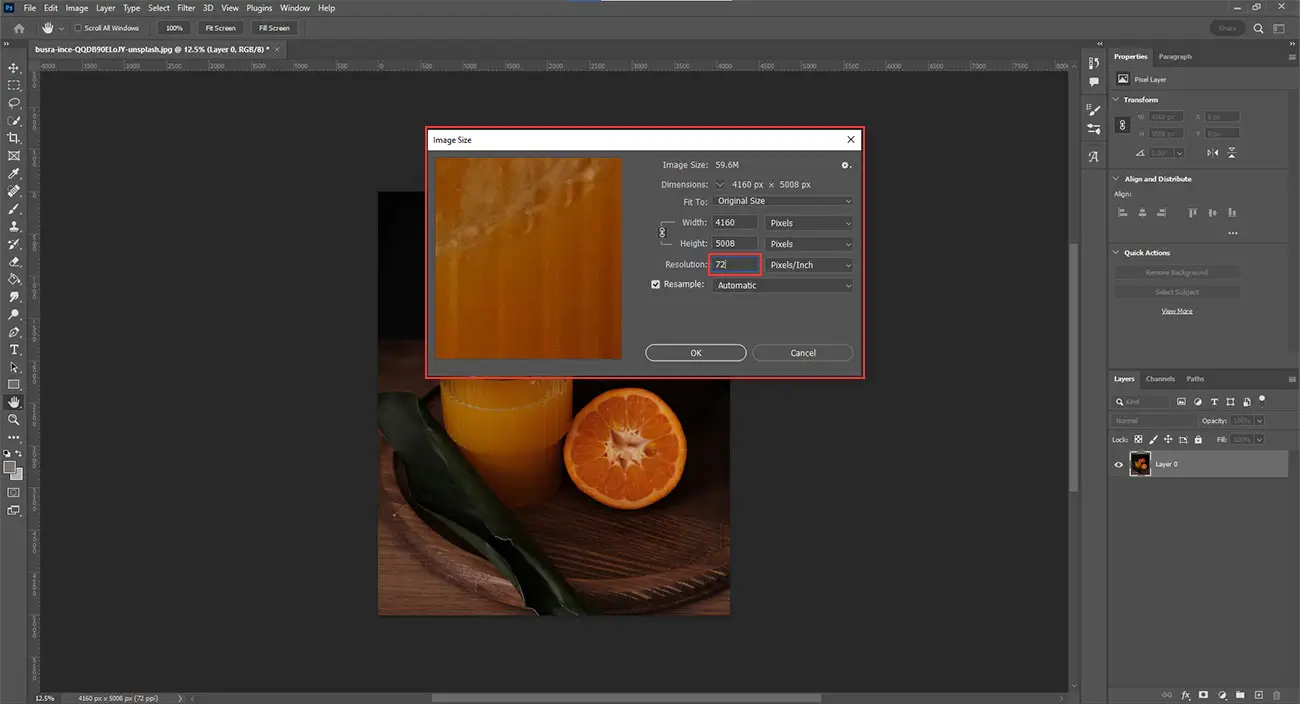
Resolution is the number of pixels per unit length in an image. Two images might have the same dimensions, but if we talk about an image with high resolution, it means it has more pixels.
If the photographs taken has a low resolution, then these are the steps to improve low resolution in Photoshop:
Step 1: Click on Image Size
Step 2: Enter your needed resolution values
Step 3: Click OK
-
Modify the brightness & set the proper contrast
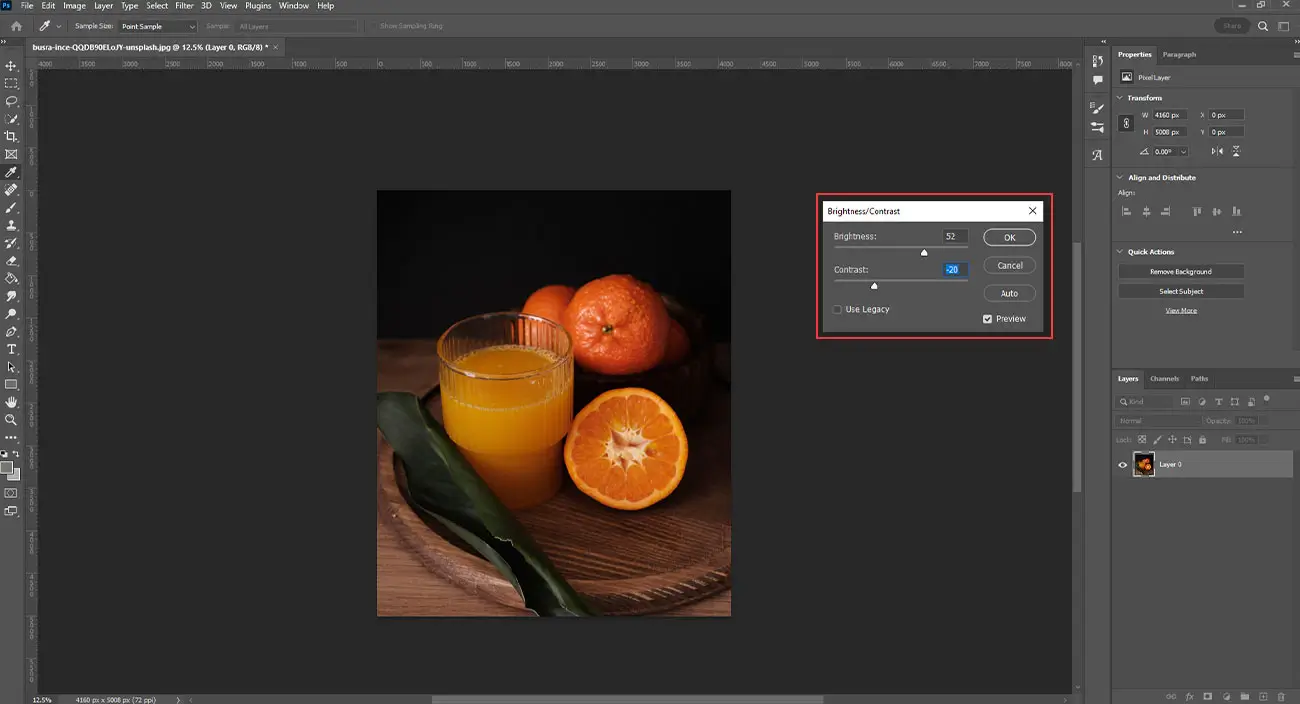
To highlight the features of a picture more prominently, you can adjust its brightness and contrast.
Step 1: Go to Menu
Step 2: Look for Adjustments
Step 3: Select Brightness / Contrast and then adjust the two sliders as required.
Conclusion
As you see, enriching the quality of a photo in Photoshop isn’t that difficult. Photoshop is by far the most demanded photo editing software as professionals and photo editing services providers prefer to use it the most.
If you have no time to enhance the photos, seeking help from an experienced professional photo editing companies deliver high-quality image output by increasing the appeal of a photograph through various image editing techniques.
That’s it for today! Stay tuned for more.