Flawless skin is essential in professional photography, but blemishes, acne, and uneven textures can reduce an image’s impact. Whether you're a beginner or an expert, mastering how to remove blemishes in Photoshop can elevate your editing skills.
Photoshop provides various tools for skin retouching, allowing you to achieve smooth, natural-looking results. In this guide, we shall explore different methods and step-by-step techniques to help you refine portraits while maintaining a realistic appearance.
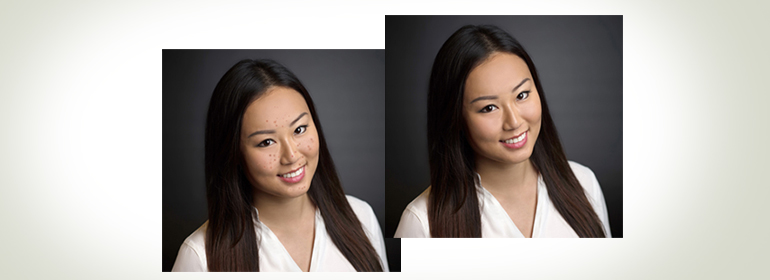
By learning these techniques, you can enhance your images professionally without making them look overly edited. Let us dive into the process of flawless skin retouching.
Best Tools to Remove Blemishes in Photoshop
Photoshop provides several retouching tools to enhance skin appearance and remove imperfections. Here are the most effective ones:
-
Photoshop Spot Healing Brush

One of the simplest and quickest ways to remove blemishes using Photoshop is by using the Photoshop Spot Healing Brush. This tool automatically blends the selected area with the surrounding skin, making it ideal for eliminating small imperfections like pimples, dark spots, and scars.
Steps to Use the Spot Healing Brush:
- Open your image in Photoshop.
- Select the Spot Healing Brush Tool from the toolbar (Shortcut: J).
- Choose a soft, round brush and adjust the size according to the blemish.
- Click on the blemish to instantly remove it.
- Repeat as needed for other imperfections.
-
Clone Stamp Tool
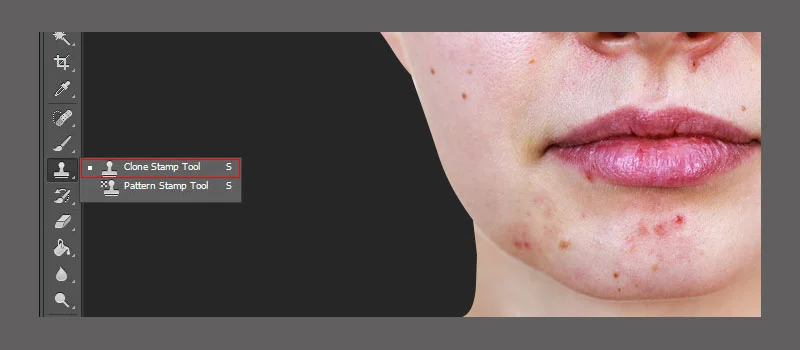
The Clone Stamp Tool is another powerful feature for Photoshop retouching. It allows you to sample an area of clear skin and apply it over blemishes manually.
How to Use the Clone Stamp Tool:
- Select the Clone Stamp Tool (Shortcut: S).
- Adjust the brush size and softness.
- Hold Alt (Windows) / Option (Mac) and click on a clean skin area.
- Release the key and paint over the blemish to replace it.
-
Healing Brush Tool
Unlike the Photoshop Spot Healing Brush, the Healing Brush Tool lets you manually select a reference point to blend the correction more naturally.
Steps to Use the Healing Brush Tool:
- Select the Healing Brush Tool (Shortcut: J).
- Hold Alt (Windows) / Option (Mac) and select an area with clear skin.
- Paint over the blemish to blend it seamlessly.
Skin Smoothing in Photoshop for a Flawless Look
Once blemishes are removed, the next step is skin smoothing in Photoshop to maintain a natural, polished appearance. Over-smoothing can make the image look unnatural, so moderation is key.
-
Using Frequency Separation for Professional Skin Retouching
Frequency Separation is a widely used technique for professional skin retouching. It separates the texture and color of the skin, allowing you to edit them independently.
Steps for Frequency Separation:
- Duplicate the image twice (Ctrl + J / Cmd + J).
- Rename one layer as Texture and the other as Color.
- Apply a Gaussian Blur to the Color layer (Filter > Blur > Gaussian Blur). Adjust until blemishes disappear.
- Select the Texture layer and go to Apply Image (Image > Apply Image). Choose the Color layer and set blending mode to Subtract with Scale 2, Offset 128.
- Change the Texture layer blending mode to Linear Light.
- Use the Healing Brush Tool on the Texture layer to remove imperfections while keeping the skin texture intact.
-
Applying the Surface Blur Filter
The Surface Blur filter is another method for skin smoothing in Photoshop, helping reduce harsh skin textures.
Steps to Apply Surface Blur:
- Duplicate the background layer.
- Go to Filter > Blur > Surface Blur.
- Adjust the Radius and Threshold settings to maintain details while softening imperfections.
- Use a layer mask to apply the effect only to the skin.
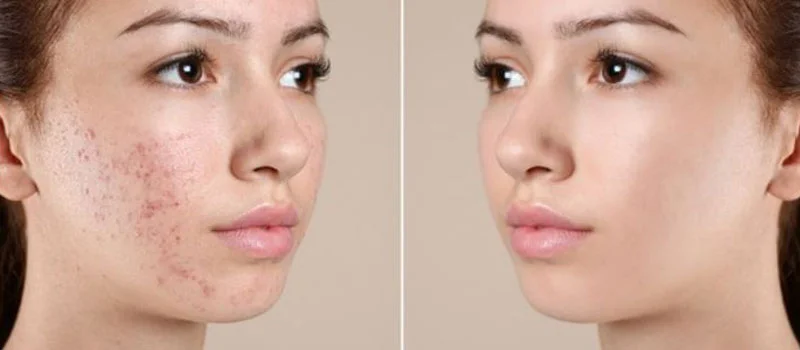
How to Remove Acne in Photoshop Without Overediting
Removing acne while maintaining realistic skin texture is crucial for professional skin retouching. Follow these steps to remove acne in Photoshop without making the skin look fake.
Steps to Remove Acne in Photoshop:
- Open the image and duplicate the layer.
- Use the Photoshop Spot Healing Brush or Healing Brush Tool to eliminate acne spots.
- Apply Frequency Separation for detailed corrections.
- Use Dodge & Burn to enhance highlights and shadows naturally.
- Adjust skin tone using the Selective Color Adjustment Layer for a polished look.
Enhancing the Final Look with the Best Photoshop Tools for Skin Retouching
To make your edits look professional, use the following best Photoshop tools for skin retouching:
-
Dodge and Burn Technique
Dodge and Burn helps refine skin tone by brightening (Dodge) or darkening (Burn) areas, improving depth and realism.
How to Apply Dodge and Burn:
- Create a new layer and fill it with 50% gray.
- Change the blending mode to Soft Light.
- Use the Dodge Tool (Shortcut: O) to lighten highlights.
- Use the Burn Tool to add shadows where needed.
-
Using Layer Masks for Controlled Editing
Layer masks allow you to apply effects selectively without permanently altering the image.
Steps to Use Layer Masks:
- Click on the layer you want to edit.
- Add a Layer Mask (Layer > Layer Mask > Reveal All).
- Use a soft black brush to erase unwanted effects.
Additional Tips for Natural Skin Retouching
To ensure realistic skin retouching, keep these tips in mind:
- Avoid excessive blurring to maintain texture.
- Use lower opacity when painting corrections.
- Zoom in and out frequently to check edits.
- Work on a separate layer for non-destructive editing.
Conclusion
Mastering how to remove blemishes in Photoshop is essential for achieving high-quality, polished portraits. Whether you are using the Photoshop Spot Healing Brush, Frequency Separation, or Dodge & Burn, each technique helps enhance images while maintaining a natural appearance.
By combining these tools with skin smoothing in Photoshop, you can create professional-level retouching that looks flawless yet realistic.Additionally, experimenting with different Photoshop retouching tools can refine your editing skills and help you develop a workflow that best suits your style. Start practicing these techniques today, and take your photo editing skills to the next level.
For businesses and professionals looking for expert photo retouching, MAPSystems offers high-quality image enhancement services. With advanced editing techniques and a skilled team, we ensures that every image looks stunning, natural, and professionally retouched.
Frequently Asked Questions
Use the Spot Healing Brush Tool (J) with "Content-Aware" selected. Click on blemishes to remove them instantly. For better control, use the Healing Brush Tool (J) and sample a clean area before painting over the blemish. Adjust with Frequency Separation for professional results.
Select the Healing Brush Tool (J) or Clone Stamp Tool (S). Sample a clean skin area by holding Alt (Windows) / Option (Mac) and paint over the spots. Use the Spot Healing Brush Tool (J) for quick fixes or the Patch Tool (J) to blend areas seamlessly.
Use the Patch Tool (J) to select patchy areas and drag to smoother skin. Apply a Gaussian Blur on a duplicate layer and use a mask to soften uneven tones. Use Dodge & Burn for balanced lighting. Frequency Separation helps refine textures while keeping skin natural.
Apply a Hue/Saturation Adjustment Layer, reduce reds or browns, and use a Soft Brush Mask for precision. Use the Selective Color Adjustment to fine-tune skin tones. The Healing Brush Tool (J) can remove dark spots, and Frequency Separation helps even out textures without losing skin details.