Animated GIFs are all over the internet. Almost any webpage on which you would land, you will come across animated images. Animated GIF in Photoshop is an intermediate state between static image and video. By alternating between a set of still images in rapid motion, a sense of animation is created in GIF.
GIFs(Graphics Interchange Format) can boost your marketing efforts significantly. Message sent across by GIFs succeed in drawing the attention of prospects towards your sales pitch. The emotional impact on audiences motivates them to share the smaller animations which further spread your brand’s message.
GIFs can be created with ease. Attractive animated GIFs in Photoshop if you can invest some time on the program. Using Creative Cloud or previous versions, you can create a GIF in Photoshop in few simple steps. You can also make GIFs online with GIF animator programs.
How to Create/Edit Animated GIF in Photoshop
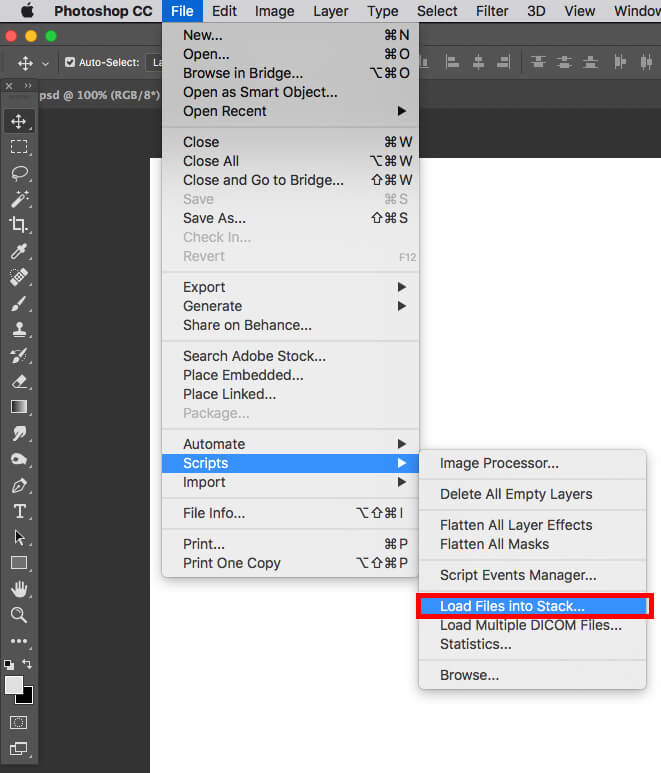
Before starting, you can go through various GIFs to observe how the images transition quickly to create an illusion of motion.When you are ready to begin, start by uploading your chosen images in Photoshop. All images that would be part of GIF should be kept in a separate folder. For uploading images, navigate to
File -> Scripts -> Load Files into Stack

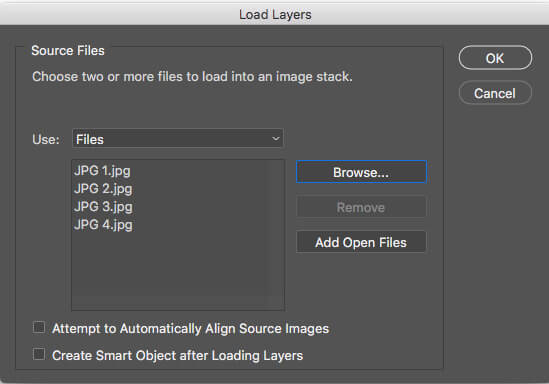
Next, click on ‘Browse’ and select the files that would be part of GIF animation maker. Click ‘OK’.
For each selected image, separate layers would be created by Photoshop.
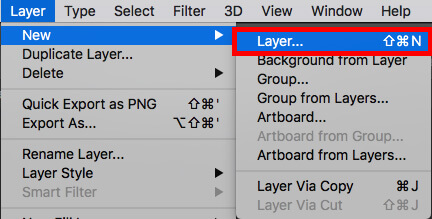
It may be possible that the relevant images are not available with you. For this, you have to define Photoshop layers separately for every frame in GIF. For adding new layer, navigate to
Layer -> New -> Layer
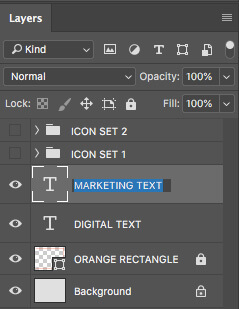
Always name the layers created as this would facilitate their easy tracking while making a GIF in Photoshop. For naming the layer, navigate to ‘Layer’ panel located at the screen’s bottom right. The default name of layer is to be double clicked for typing in your desired name. After finishing, press ‘Enter’.
After naming all the layers, you are ready to move further. Layers can also be combined to make them visible in single GIF frame. The ‘eye’ icon is present on the layer name’s left. Click on ‘eye’ to make the layers visible for merging. Now, only those layer eyes’ are prominent which have to be merged. For creating a new layer in Photoshop which will contain the merged layers, you have to press Shift + Ctrl + Alt +E in Windows or Shift + Command+ Option + E in Mac. Rename the new layer.
The Timeline Window
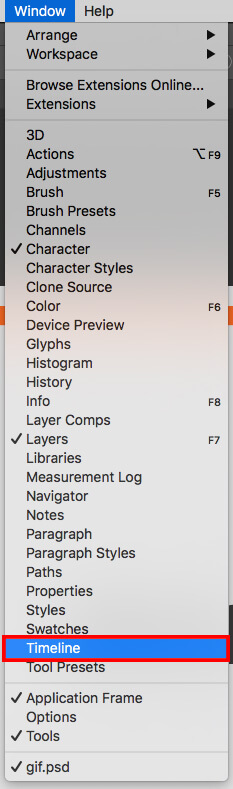
Navigate to the menu bar at top for choosing Window -> Timeline. With the Timeline on, different layers can be turned on or off for varying durations. This would cause the static images to behave as animated GIF.
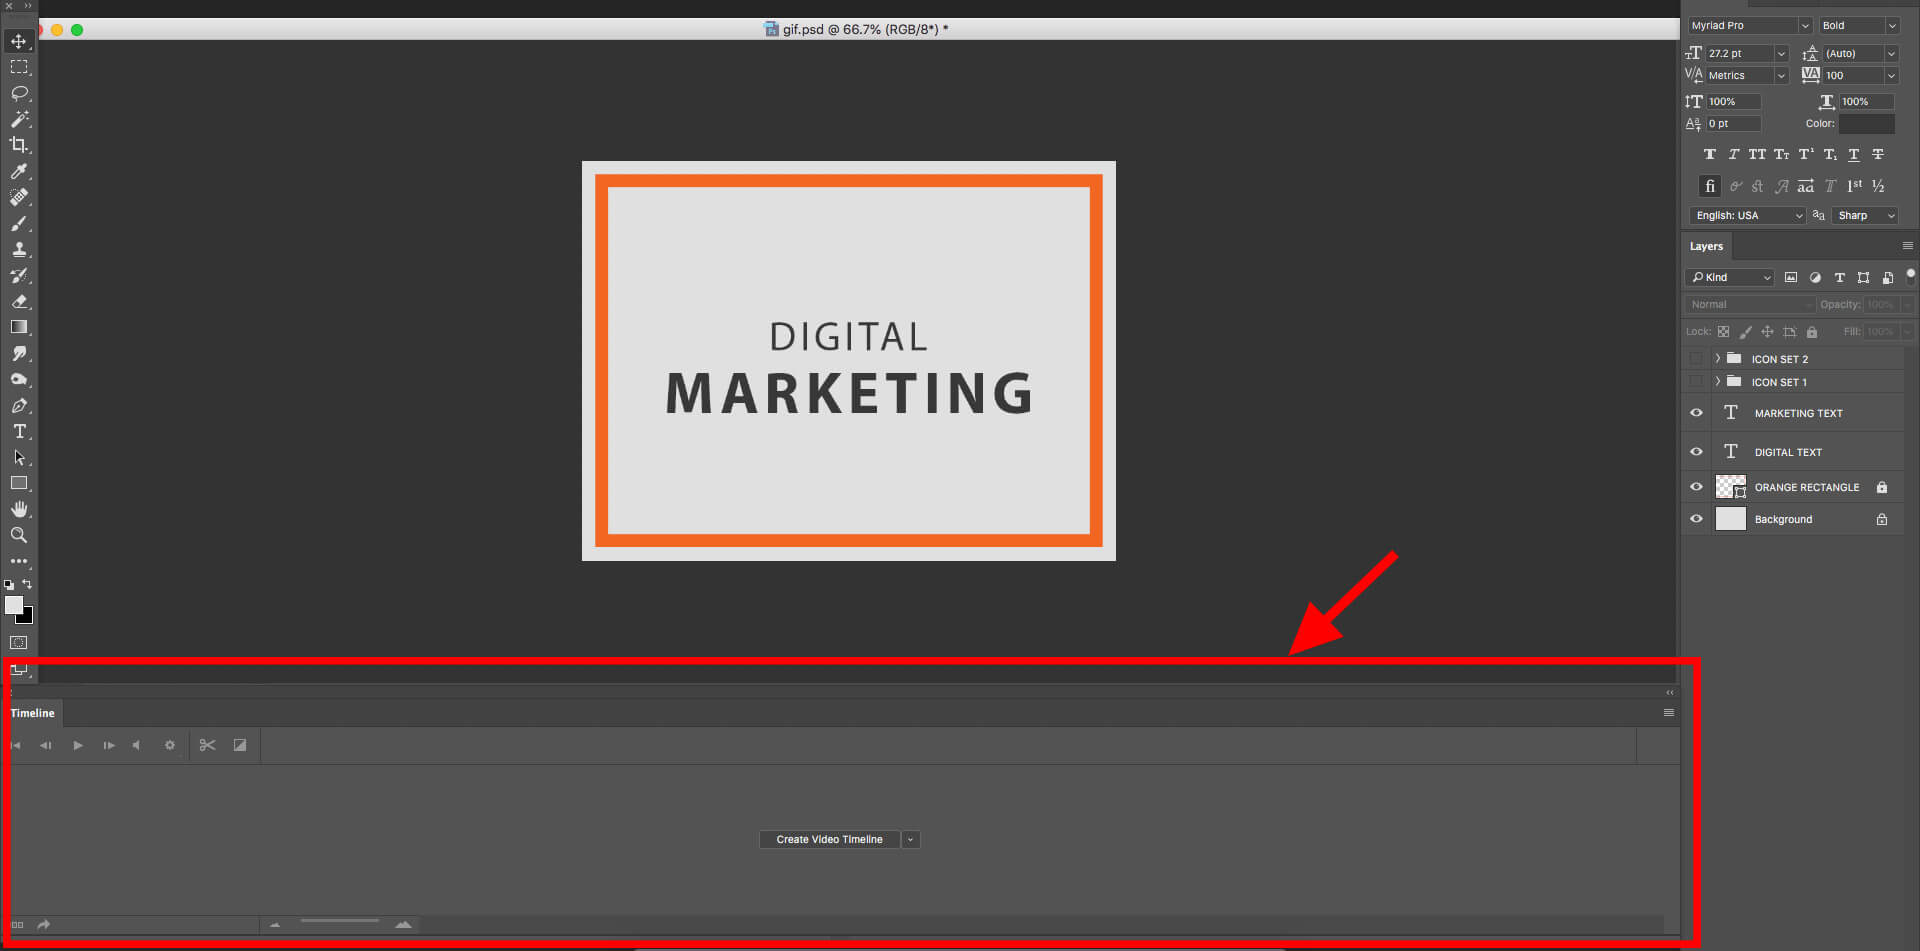
Timeline Window would be situated ay screen’s bottom.
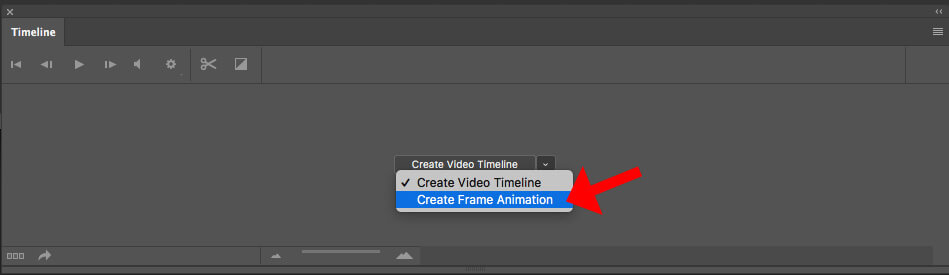
‘Create Frame Animation’ would appear auto selected in the Timeline Window. If not, you can click the same from dropdown menu with header ‘Create Video Timeline’.
This option would change the appearance of Timeline Window.
Creating New layers
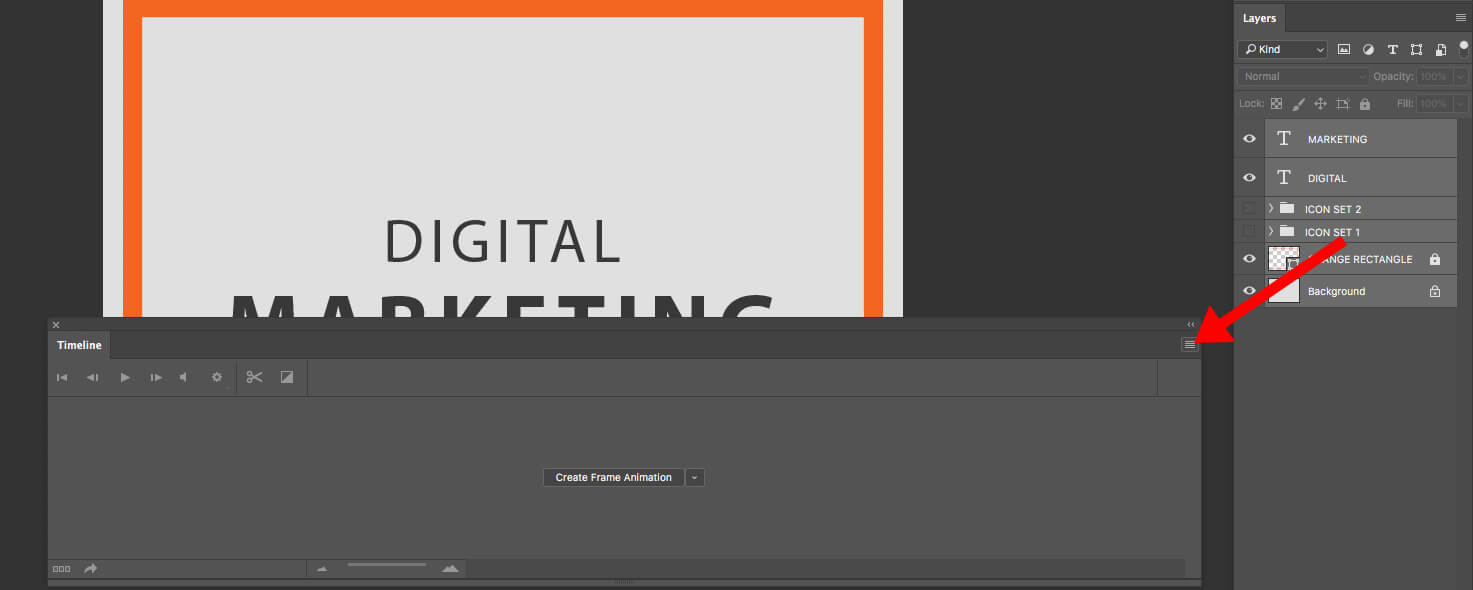
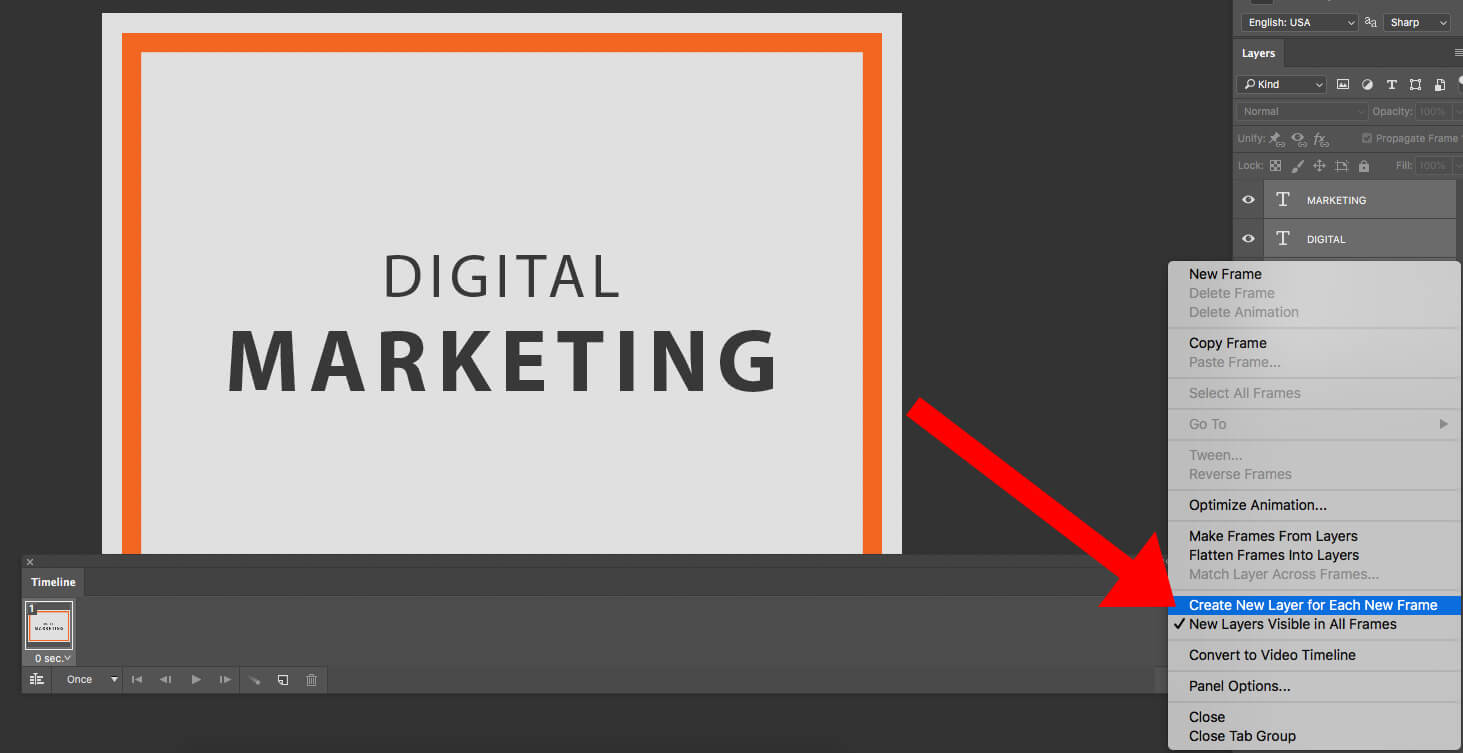
You now have to create separate layer for every new frame. Get all layers selected by clicking on ‘All Layers’ from ‘Select’ menu located at the top of Photoshop window. After this, the menu icon on Timeline screen’s right is to be clicked.
Select ‘Create new layer for each new frame’ from the menu that drops down.
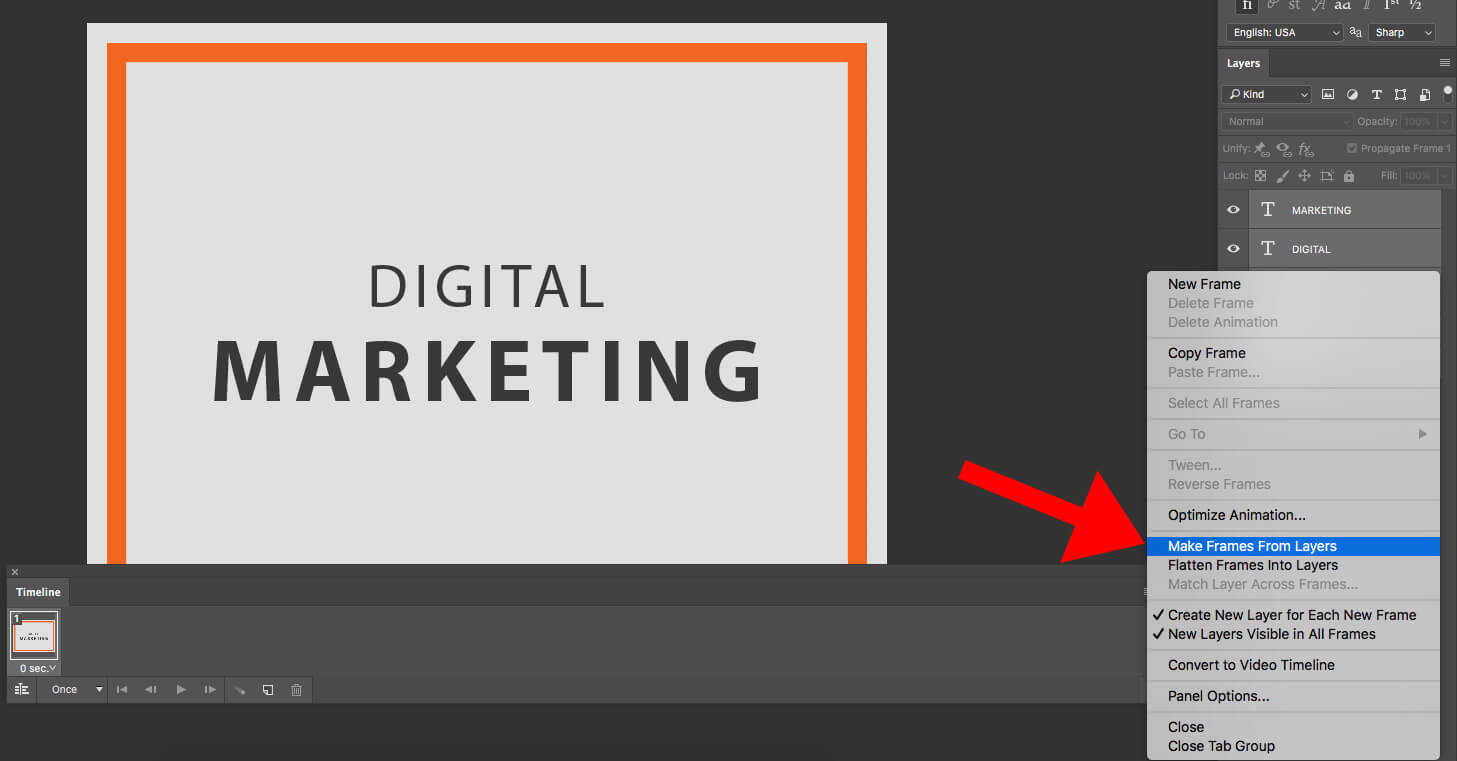
Select ‘Make Frames from Layers’ from the menu icon on right of Timeline screen. Upon clicking, every layer would be transformed into GIF’s frames.
You have to specify the duration for which each frame should before getting switched to the next frame. You can do so from each frame’s bottom by clicking on the time and choosing the duration for which frame should appear. 0.5 seconds for each frame is ideal time.
From toolbar’s bottom, specify the iterations for which each frame is to be looped. You can choose anything between ‘Once’ to ‘Forever’. Repetition sequence can be customized by clicking on ‘Other’.
Click the ‘Play’ icon at bottom for previewing the GIF.
Saving and Exporting created GIF
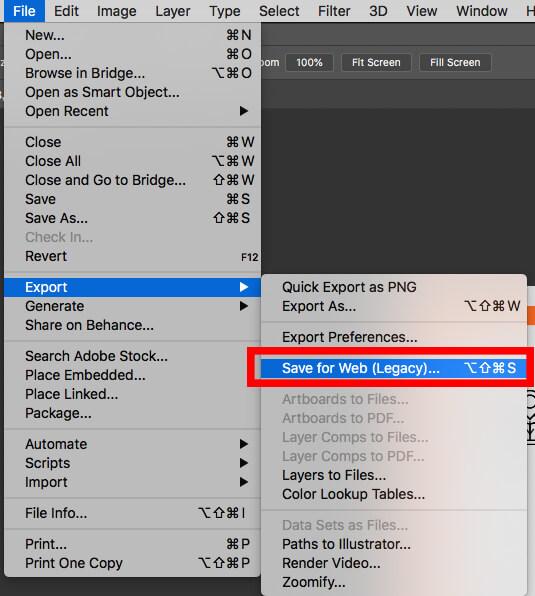
Once the GIF has been created satisfactorily, you need to save it for online use. Navigate to top menu bar. Click File -> Export -> Save for Web (Legacy).
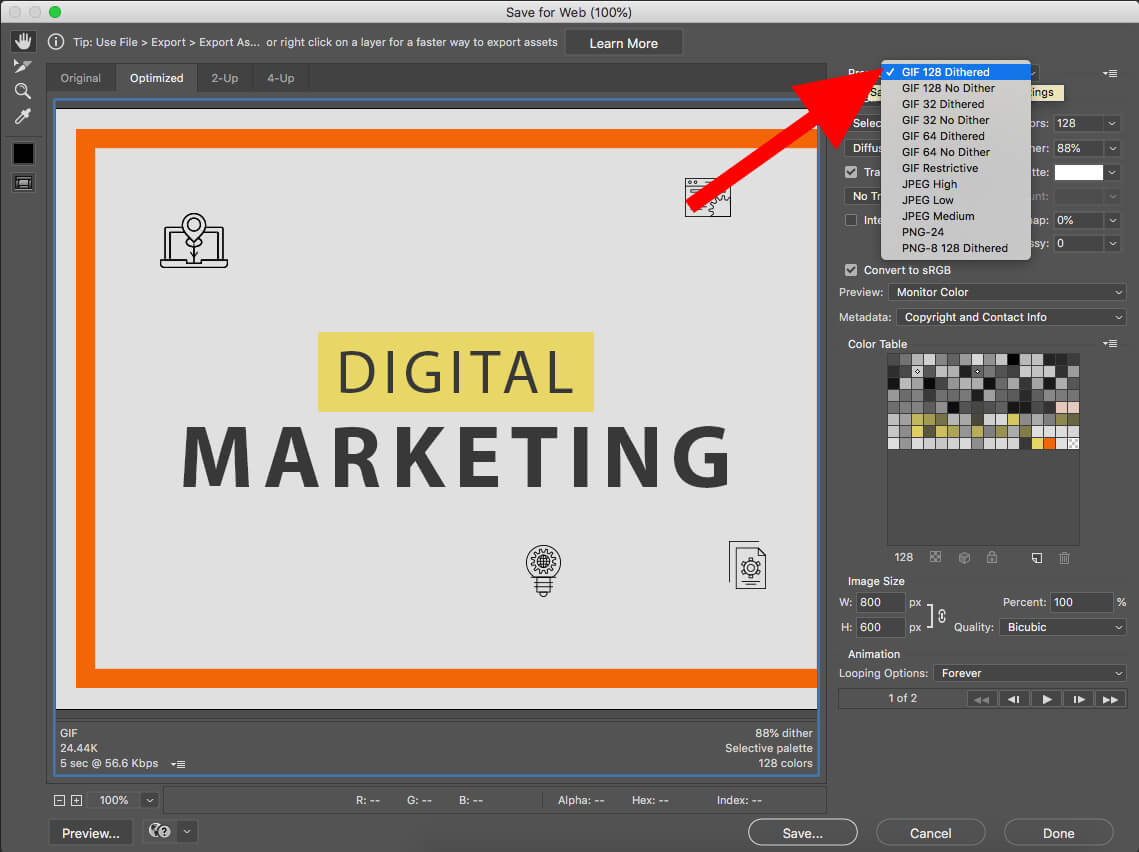
Navigate to ‘Preset’ for selecting the type of GIF file you want as output from its dropdown. Color banding can be prevented in GIF containing gradients by selecting ‘Dithered GIFs’. ‘No Dither’ is ideal choice if the image carries an abundance of solid colors. You will also come across numbers (128, 64, 32 etc.) against GIF file. This is an indication of the preciseness with which colors of original image file would be preserved in GIF. If you increase the percentage of dithering, the colors would be precise and bright but file size would increase.
Clicking Save at window’s bottom would result in saving file in your device. The GIF can now be used for marketing or other purposes. Once uploaded, the animated sequence in GIF would plat out seamlessly and grab more attention.


Creating GIF without Photoshop
A number of programs facilitate creation of GIFs easily. Some of the most popular ones have been discussed below.
GIF Maker by Giphy
Giphy is known for maintaining the most exhaustive animated GIFs’ library worldwide. Its GIF Maker is easy to use and comes free of cost. You can create animated GIFs from static images, links in YouTube, already created GIFs, and video files.
For creating GIF, the video file has to be dragged and dropped. You can also specify the YouTube or other site’s video URL as well as URL of existing Giphy page. A series of images can also be uploaded for creating animated slideshow.After uploading the file, you would be directed to the GIF editing screen. For ensuring that the GIF’s file size remains smaller enough to be quickly loaded on social platforms, reduce the video’s duration to a maximum of six seconds. The program also allows addition of captions or drawings to the GIF. After creating a GIF, you may upload the same to your site or blog and add relevant tags to make discovery of your GIFs easier.
Advantages
The GIF Maker can be navigated and used with ease. Editing of GIF’s length can be done in simple steps. Start time as well as duration of GIF can be specified through 2 different bars. Stickers, captions and other features which can be customized are contemporary and useful. GIFs can be created from different sources.
Drawbacks
You cannot make a GIF private with Giphy’s tool. So, if you desire to keep GIFs confidential, you may have to rethink. Despite this, the tool is highly useful in creating attractive GIFs.
-
GIFs.com
This easy to use tool is available online. You can create editable GIFs from videos on Instagram, Vine and YouTube. Basic GIFs can be created free of cost. However, access to advanced features is available only on making payment. However, certain options offered by GIFs.com are unique to the platform. These include themed stickers and Instant Effects.
To start with GIF creation, you have to copy paste the link of video which has to be transformed into GIF. The length along with starting and ending position of the GIF have to be indicated on the timeline located at screen’s bottom. You can then go about tailoring the GIF and can add various effects. Captions can be rendered attractive with customizable fonts. Once done, name the GIF and add tags to make it easily discoverable online.
Advantages
The platform is very easy to get accustomed to. GIF can be created within five minutes. All standard fonts are available for captioning GIF. You can also avail of advanced options to edit the GIF; for example, the sticker’s opacity can be changed.
Drawbacks
As a free user, you may not be able to avail of some important features like removing watermark from GIF, compressing and resizing the file, downloading original file to desktop etc. You need to be a customer to avail these. Also, the process of editing the length of GIF is not clearly spelt out. Certain features like Instant Effects do stand out but other paid features are usually available for free on other platforms.
-
Video to GIF by Imgur
Imgur allows conversion of video into GIF. You can easily and quickly create superlative GIFs but you may not be able to use fancy features like customizable fonts or themed stickers offered by other online tools.
You have to specify the video’s URL which will be transformed into GIF. In the video preview section, you can choose the start time of GIF and can specify the GIF’s length or duration. Once done, you just have to press the ‘Create GIF’ button and the sharable and downloadable GIF would be ready.
Advantages
Imgur’s Video to GIF is one of the quickest tools for creating high quality GIF. Support is provided only for videos which have been uploaded over the internet. Just an .mp3 file won’t serve your purpose.
Drawbacks
Additional features to enhance the aesthetic appeal of your GIF is lacking in this tool. Options for customizing GIFs are limited. Dynamics captions, themed stickers, fun filters etc. are not available. Black is the default background of caption which compromises the visual feel of the GIF. The version is supported only for desktop. Despite these challenges, Imgur’s Video to GIF tool allows creation of simpler GIFs in really short time.
-
Boomerang for Instagram
Boomerang for Instagram is a mobile app. A sequence of images has to be provided. The images are stitched together and the resultant GIF can be played in forward and backward directions. You need not edit anything.
After uploading the images, you just need to hold down the photo button for some seconds. The GIF would be created. After the GIF has been satisfactorily completed, the same can be shared from Boomerang on Instagram or Facebook instantly. You can also save it for uploading on other sites.
Advantages
The app is unique in the sense that it does not make the GIF to loop about but causes it to be played in forward and reverse directions. The app is fast and the process of creating GIF is very easy. GIFs can be shared on major social media platforms in just one click.
Drawbacks
Videos cannot be used for creating GIFs. No desktop or online version of this mobile app is available. The created GIF can be customized with fun filters, special effects, captions etc.
The app is great for developing sharable GIFs of your business’s offerings.
LICECap
This free to use animated screen capturing tool helps in creating smart GIFs to support your marketing efforts. You can easily supplement your brand’s ‘How To’ marketing pages with GIFs created using LICECap. The use of products can be demonstrated using GIFs created by this tool.
LICECap is available as a desktop app. When it is opened, a window will be displayed which can be adjusted for fitting the entire screen or only a part of the screen which needs to be captured. Once the window size is optimized, you have to press the record button located at the bottom right hand side. Specify your GIF’s file name. Next, you can go about interacting with the screen you would record. Recording can be paused midway for repositioning of the window, if needed. After recording has been completed, the GIF file is automatically saved by LICECap. The GIF can be used to enhance your content.
Advantages
You can create animated GIF in LICECap in real time which is not supported by any of the tools discussed above. You need not specify any URL or .mp3 files. The tool is super easy to use as you don’t have to specify the duration or length of the GIF. The maximum frames per second or FPS can also be specified which would optimize usage of CPU.
Drawbacks
The created GIFs can occupy significant space as the saved files are larger.
LICECap is an effective GIF maker which can add firepower to your marketing efforts and can render content more dynamic.
Conclusion
We have reached the end of this detailed step-by-step guide to creating GIF animation using Photoshop. The steps might seem daunting initially, but one can surely attain the photoshop features with continuous practice. If you are an aspiring graphic design artist or an animator, keep this guide bookmarked. This will come in handy the next time you want to develop exciting GIF animations in Photoshop.
Alternatively, if it feels a lot, you can also reach out to a professional team that offers high-end Photoshop and animation services. Several expert agencies are there that provide outstanding graphic designing services at affordable pricing and fast turnaround. Team up with them and captivate your audience with amusing animated GIFs.