Photographing a large number of images may seem enjoyable, but you may not feel the same when it comes to post-processing. Batch editing can be boring, time-consuming, and is even prone to mistakes if a lot of steps are involved.
However, there’s a technique to get it done the easy way and this article is all about providing you those details.
Whether you are a professional photo editor or not, you may face a situation at least once where you need to edit a group of images. In that case, individual editing won’t be a feasible option. So, your best bet is to rely on Photoshop's batch process feature.
This tutorial will depict a step-by-step process on how to batch edit in Photoshop. The reason we chose Adobe Photoshop for explaining the batch editing process is that it is one of the popular photo editing software and is used by most editors.
Keep reading to get detailed insights into the concept.
What is Batch Editing?
Batch editing is the process of applying the same changes to many pictures all at once. It’s a great technique to save time since you don’t have to carry out the same edits individually to a large number of pictures.
How to Perform Photoshop Batch Edits?
The step-by-step process will help you learn how to edit multiple photos at once in Photoshop. However, before you start, please know that you need to have a basic knowledge of Photoshop working.
Creating Action for Images:
Step 1:

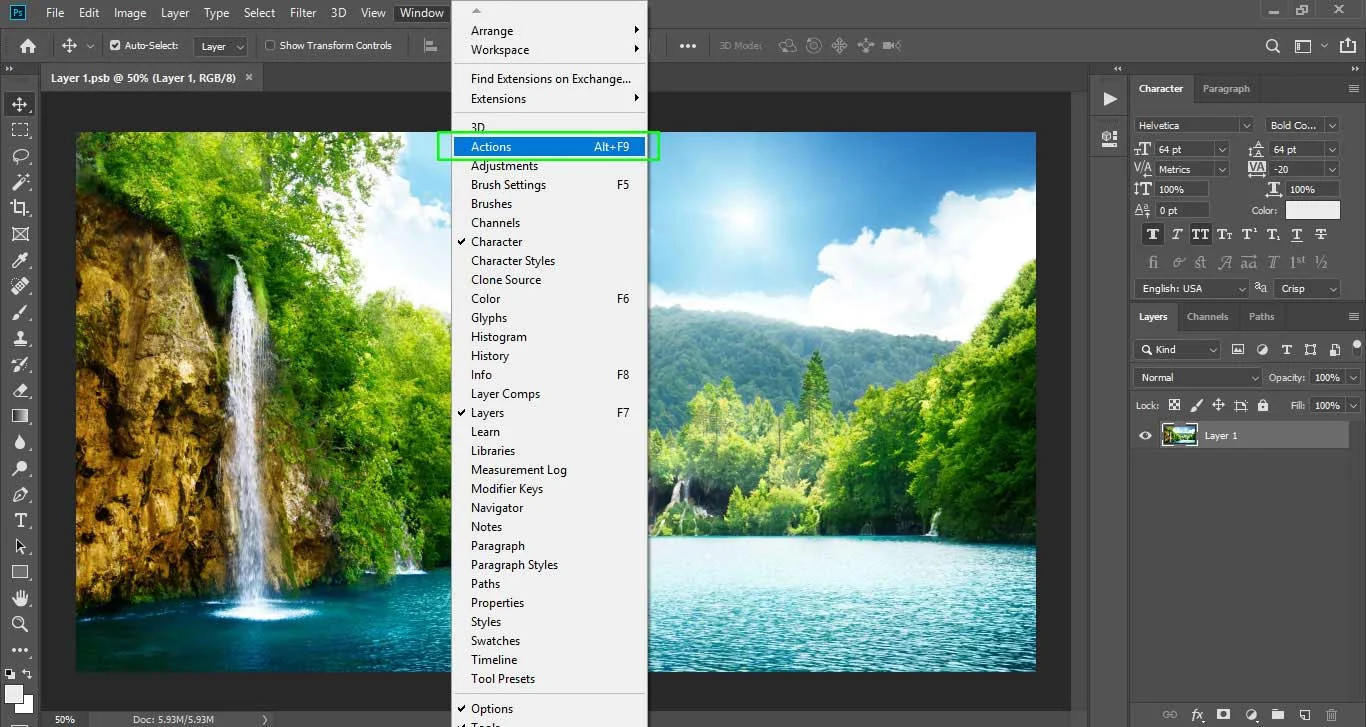
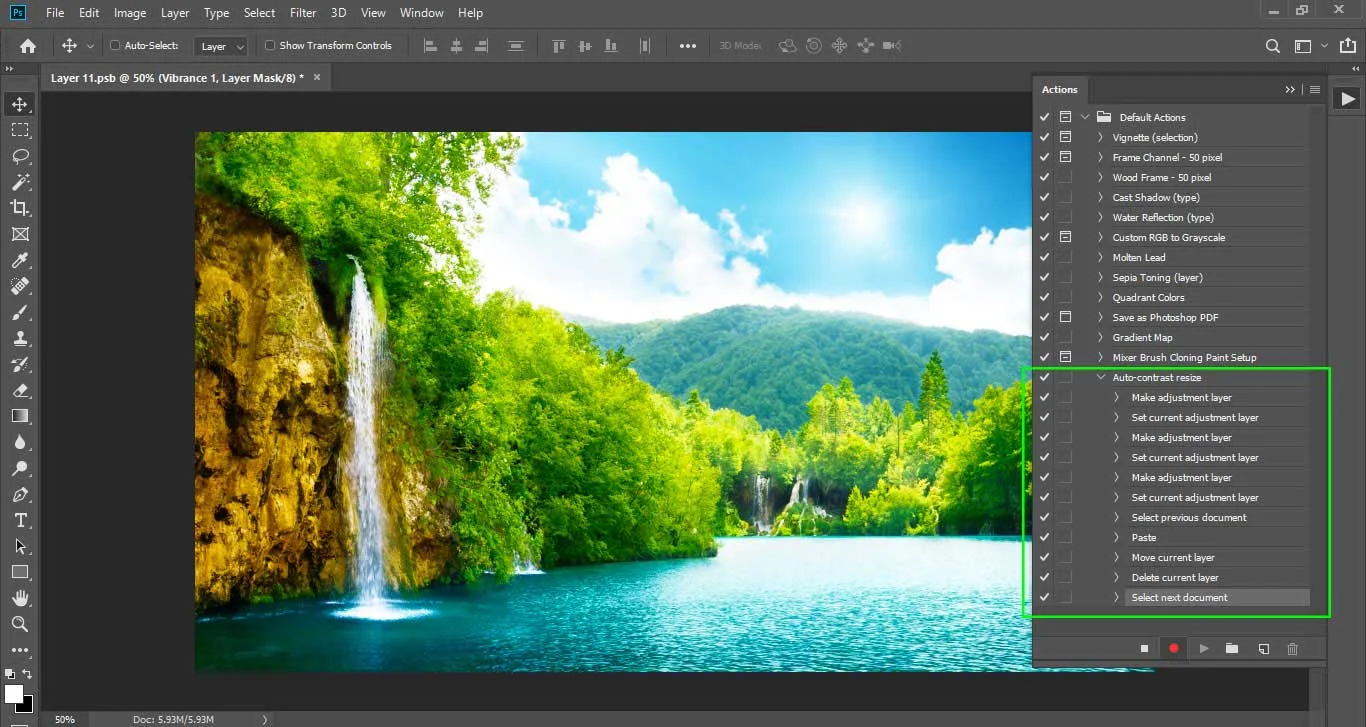
Go to the Windows menu and click Action. The Actions panel will open up.
Step 2:
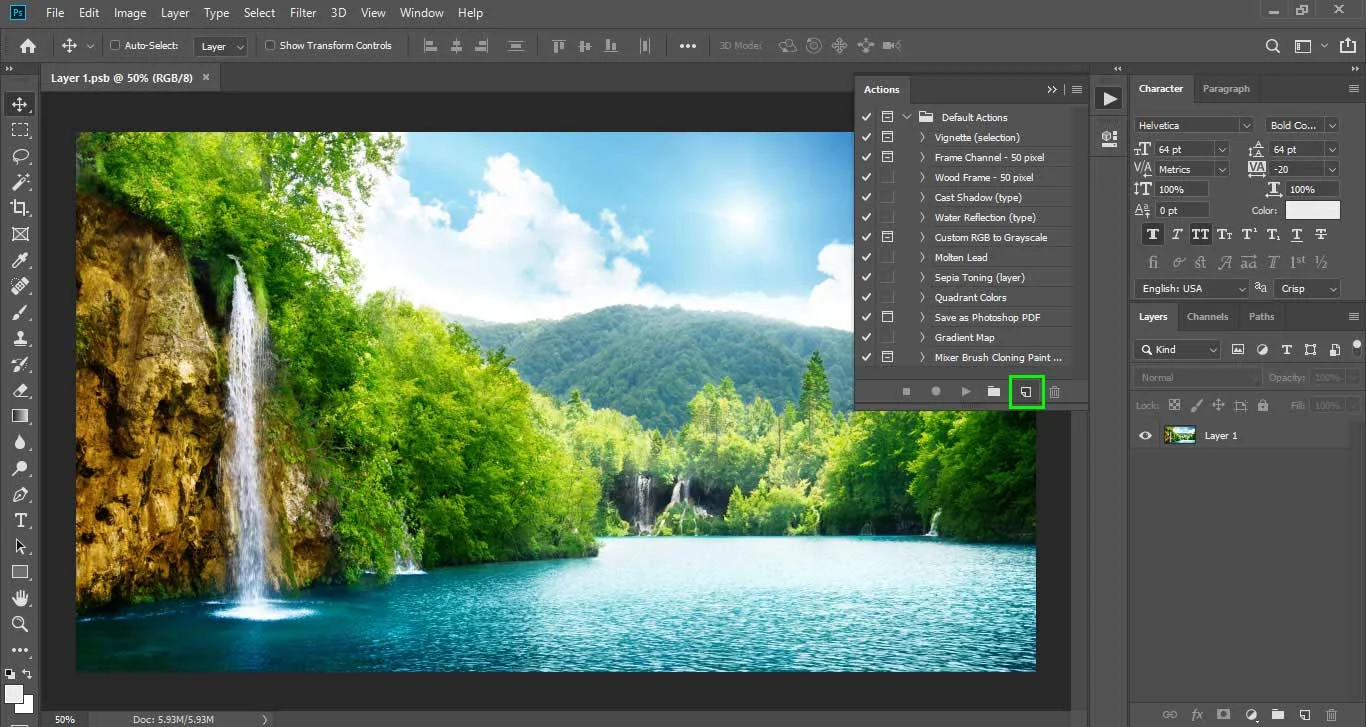
At the bottom of the Actions panel, you will find the Folder icon. Click on it to create a new set and save it as “Batch Actions”.
Step 3:
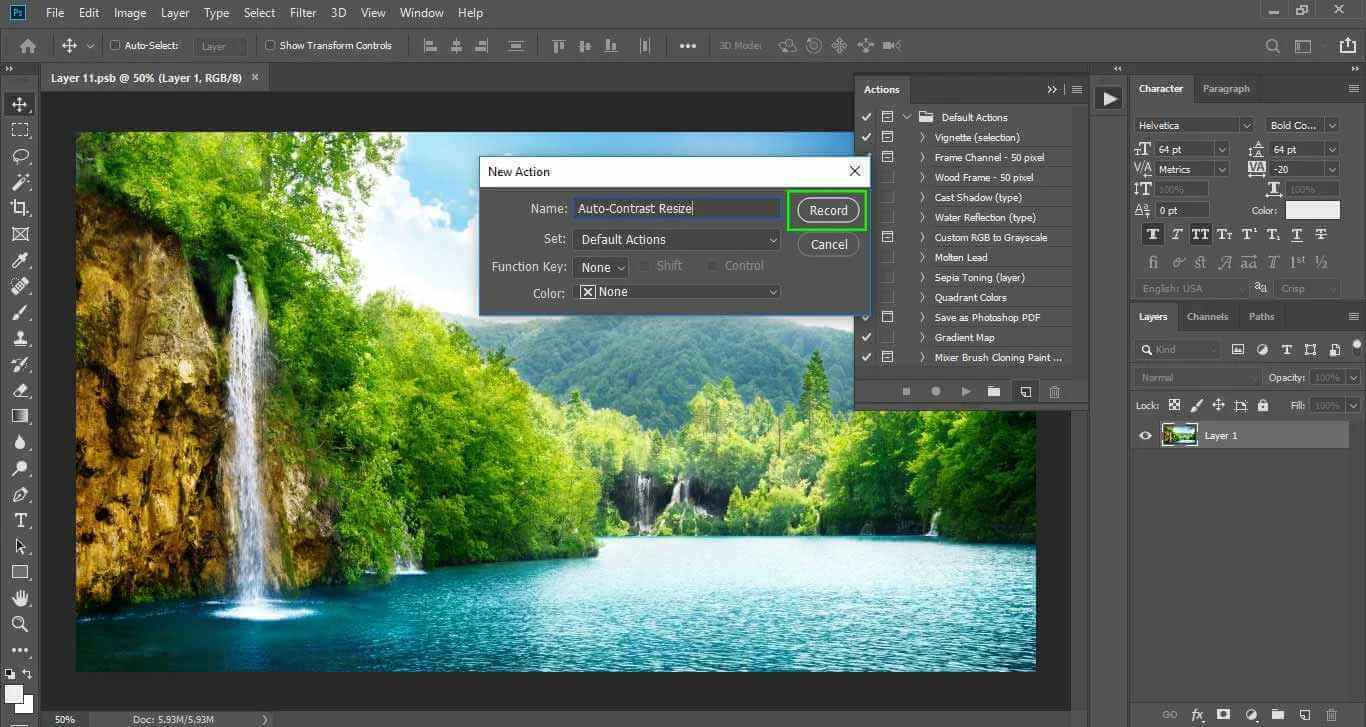
Now, click on the New Action icon to create a new action. This shall be also present at the bottom of the Actions panel. Save it as “Auto-Contrast Resize”.
Step 4:
Click Record and from now on, everything you do will be recorded as an Action step.
Editing the Image:
-
Step 5:
Carry out the desired editing and save the changes when done. You’ll see the new commands added to the Action panel. Expand it to see all the settings you have applied to the pictures.
Stop Recording the Action:
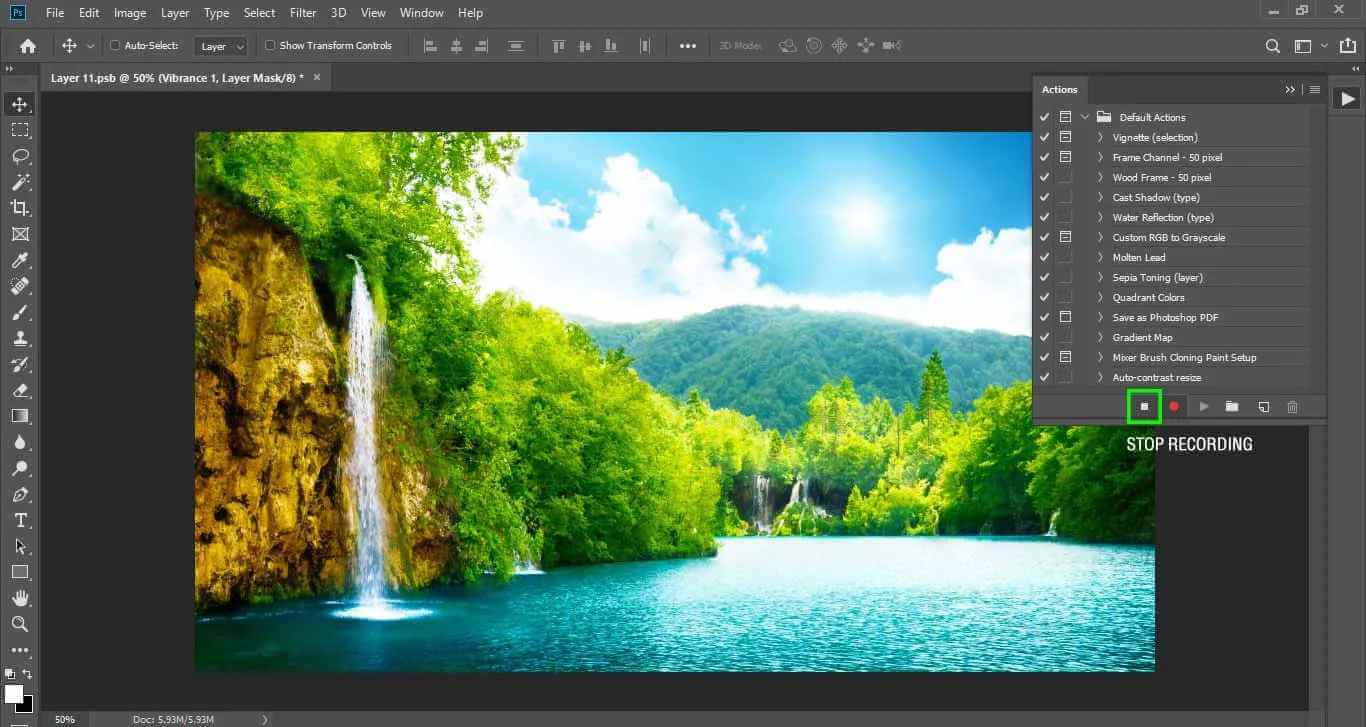
Step 6:
Go to the Actions panel. To the bottom left, a square icon will be present saying Stop Recording/Playing. Click on the icon to stop recording the Action.
Applying Batch Action to Images:
Step 7:
Add all the images you need to batch edit in one folder.
Step 8:
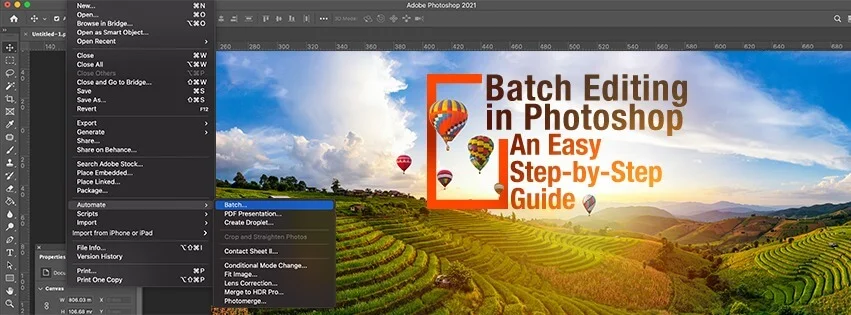
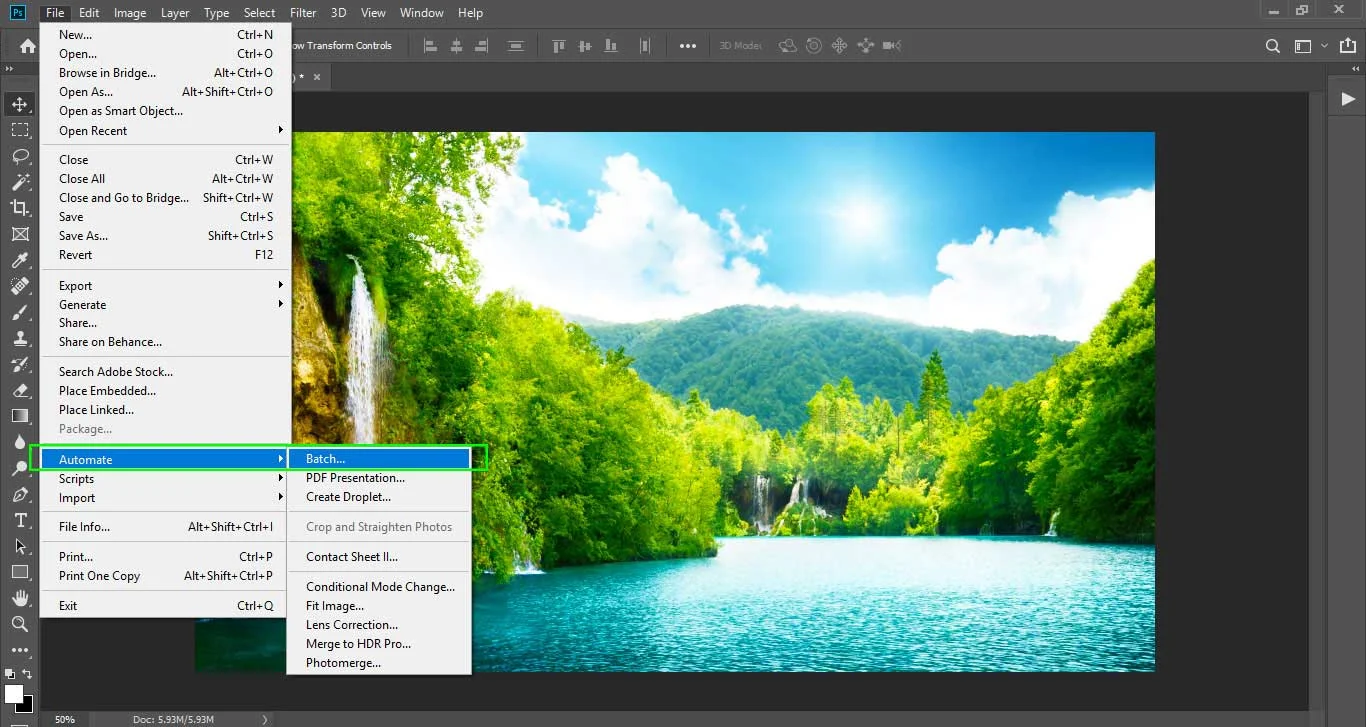
Select File, Automate, and then Batch. A dialog box will appear.
Step 9:
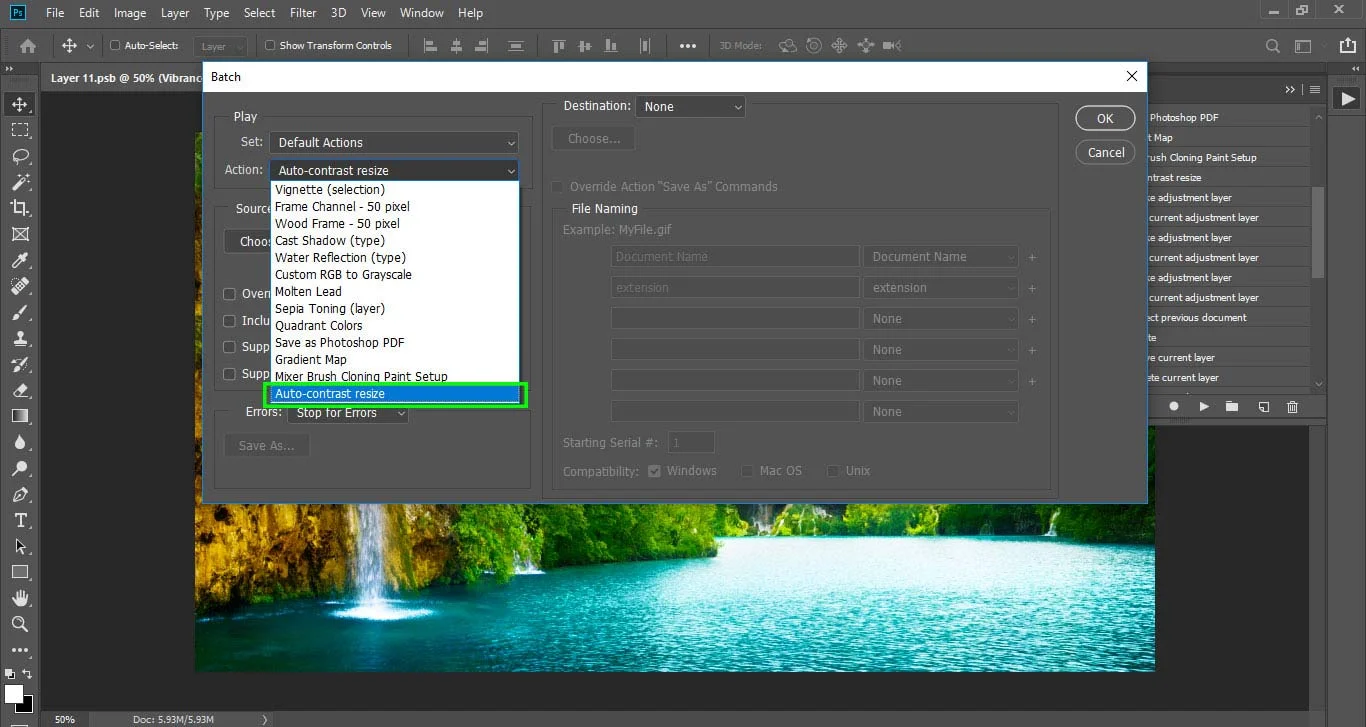
From the top of the dialog box, a list of Actions will appear. From there, choose a new Action.
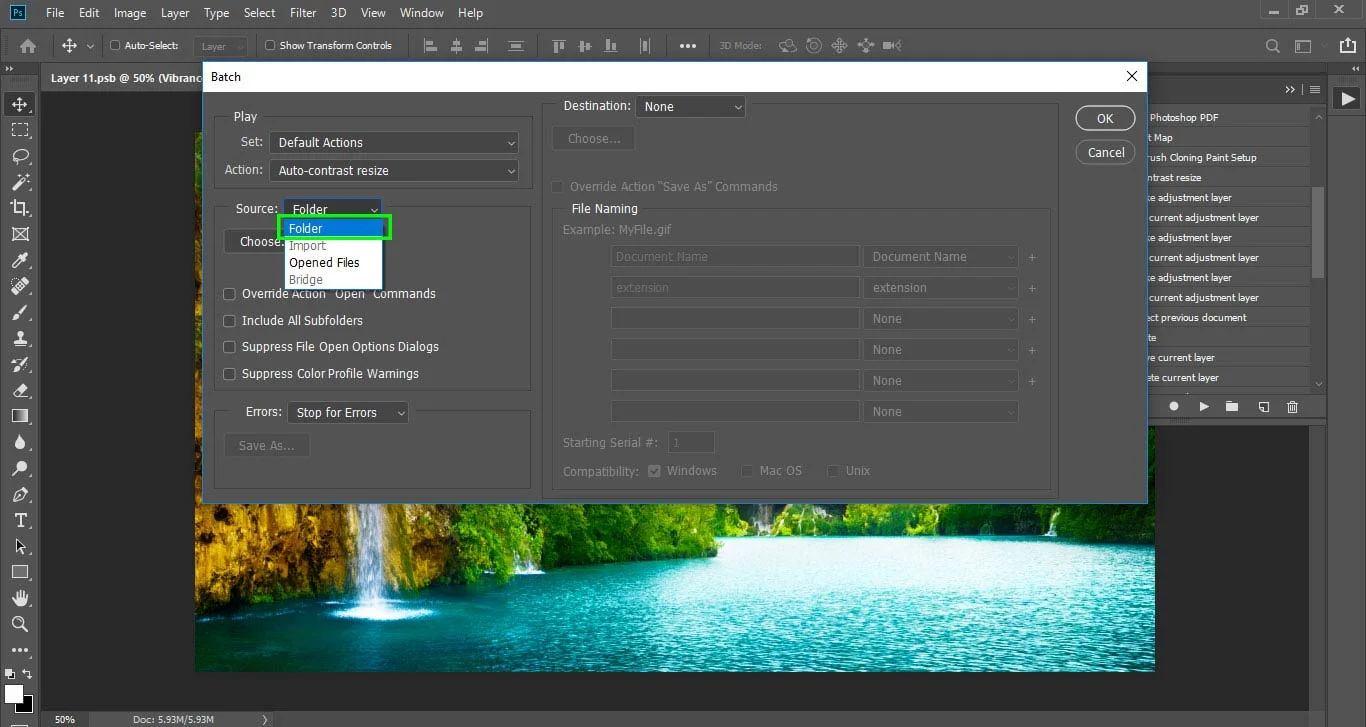
Step 10:
Now, set the Source to Folder in the below section.
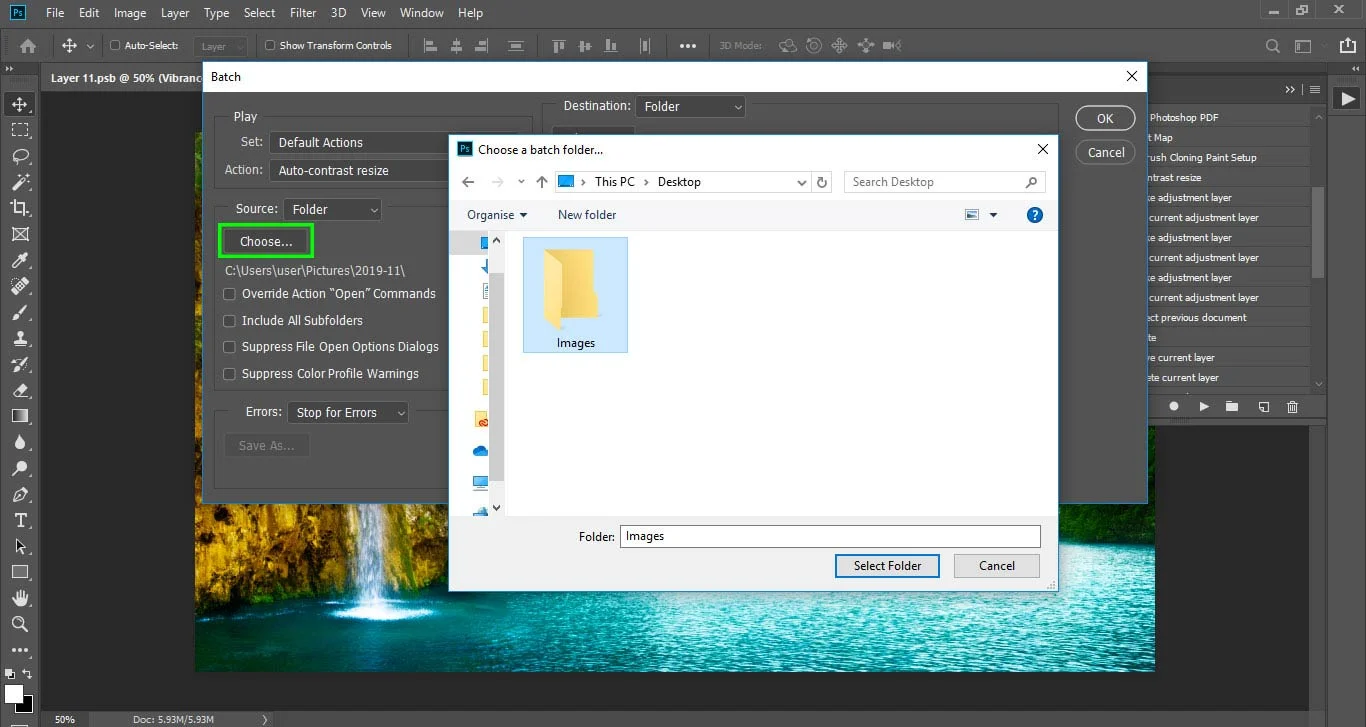
Step 11:
Select Choose as well as a folder containing the images you want to edit.
Step 12:
Choose to suppress the File open options and Color Profile warning. This will ensure that there’s no interruption during the batch editing process.
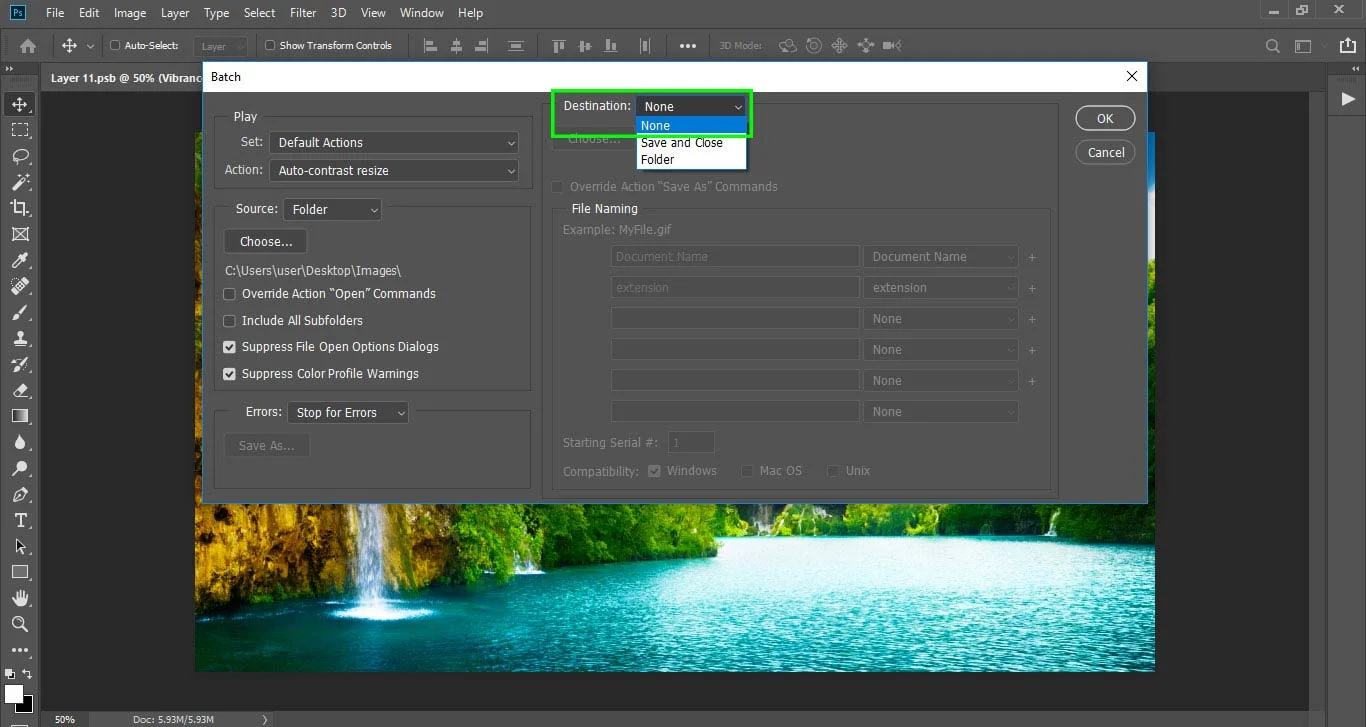
Step 13:
Go below the section and set the Destination to None. By doing so, you’ll choose the destination that is already recorded in the Actions. It will also ensure that the pictures are saved in the same folder.
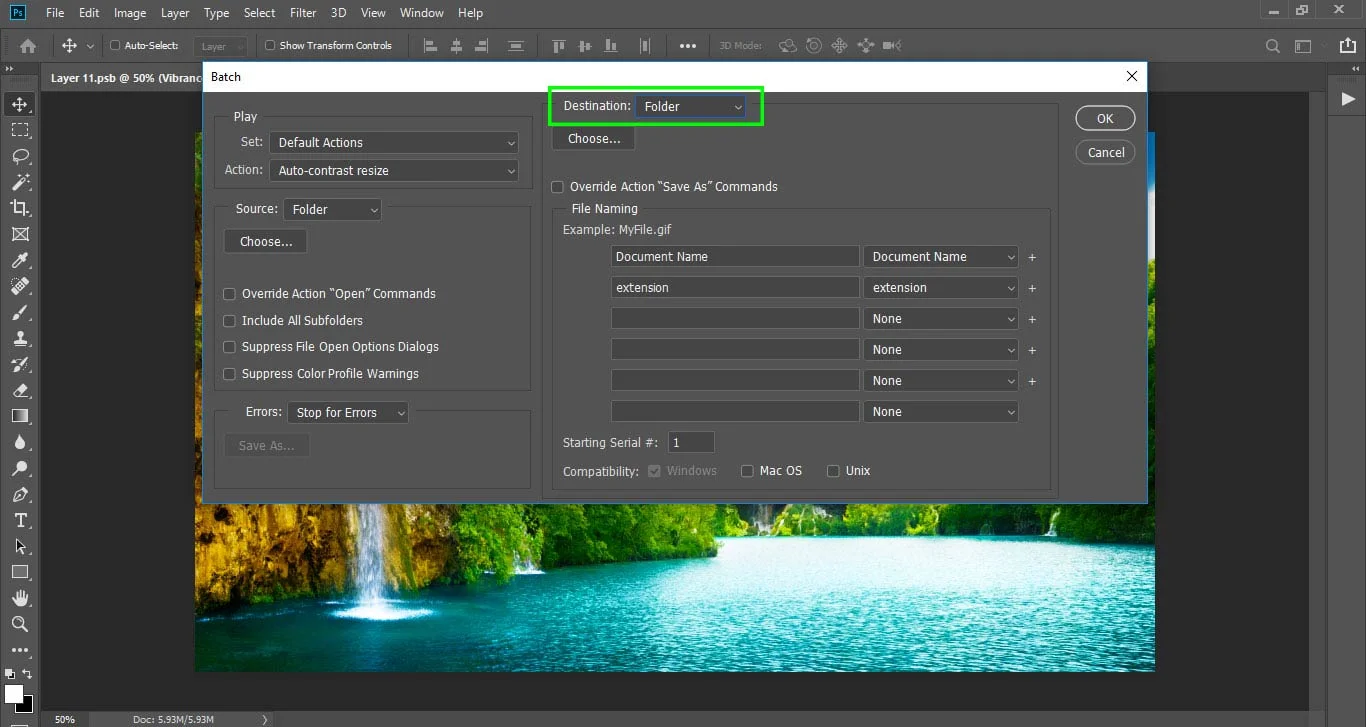
Step 14:
In case you wish to export images to a single folder, instead of setting the Destination to None try setting it to Folder. After that, you can select the destination folder from the Batch dialog on the fly.
Step 15:
Finally, click OK and batch processing will begin.


Alternative Technique for Batch Editing
There’s another way for batching editing in Photoshop. It’s done by converting files with an image processor. This technique can be helpful if you want to optimize your images for web use. The image processor can also help with editing a large number of files without creating an action. Follow the steps below to perform batch editing with an image processor in Photoshop.
- Step 1: Go to the File menu. Select Scripts and then Image Processor. A new window will pop up.
- Step 2: In the first section of the dialog box, click on Select Folder. It will allow you to select the batch of images you want to edit.
- Step 3: Decide where you wish to save the images. Clicking on the Save in Same Location button will result in creating a folder inside the initial folder. However, you may also choose a new folder to save your image files.
- Step 4: Choose the format of your images and then, perform all the required editing.
- Step 5: Finally, move to the fourth section of the dialog box and uncheck the Run Action option. Now, click on the Run button present in the top right corner.
Conclusion
Carrying out bulk editing in Photoshop is relatively easier as compared to other software programs. Also, it allows you to perform a variety of operations like resizing, cropping, sharpening, applying filters, and more.
So, try practicing these steps and give your best while you perform batch editing in Photoshop. With this powerful feature at your fingertips, you can take your photo editing techniques to a whole new level. Opting for a Photoshop service provider is also an option. But, if you’re willing to learn and excel in your editing, it is best to practice.