All types of photography require practice and patience. The same is also true when it comes to food photography. In this photography genre, still life images of food are taken for commercial purposes. Sometimes, it can be utilized for personal purposes as well. In commercial purposes, it is often employed for magazines, menus, advertisements, cookbooks, social media, websites, packaging, blog posts, etc. However, before it goes lives, you need to do another important thing, i.e., edit food photos in Photoshop. Not sure how to do it? Keep reading the article to learn the best way of doing it.
Why is Food Photography Important?
Professional food photography has the potential to take your marketing and branding to the next level. It is also a proven strategy to attract potential customers and sales. It works by grabbing the customer’s attention first and then subtly drives your instincts to stop, look, and wanting to taste it.
Many believe that it is not worth investing in food photography since they can take a decent snap with the help of their phones. However, if you really wish to make a selling statement, then don’t do it. There is a huge difference between the images taken by you and a professional photographer. You can take photographs yourself if you wish to employ it for personal purpose. But, when it comes to commercial needs, do invest in a professional food photographer as well as in food photo retouching.
Even though photo retouching is an important step in food photography, always keep in mind that you can only create an extraordinary image when the photography is good. Editing is more like accessorizing the images. Unless you have a strong foundation, you won’t be able to bring your food images to life.
Steps to Edit Food Photos in Photoshop
The different steps involved in food picture editing are simple. However, you need a bit of creativity and the right use of colors. While working with colors, do not go overboard and try to maintain a natural look in the images. We have also included a few other Photoshop tips for food photo editing in the steps below. So, use it well to enhance your food pictures.
- Step 1:
Open the desired image in Photoshop and create the layer by pressing Ctrl+J.

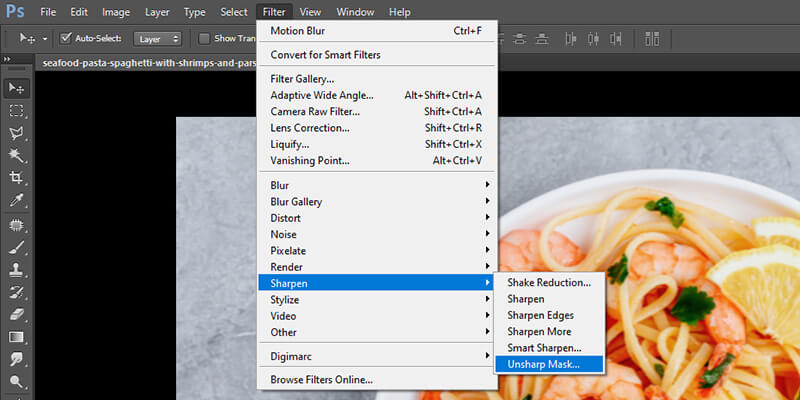
- Step 2: Click on the Filter option. It will be present in the top row. Now, scroll down and click on Sharpen. Also, choose Unsharp Mask.
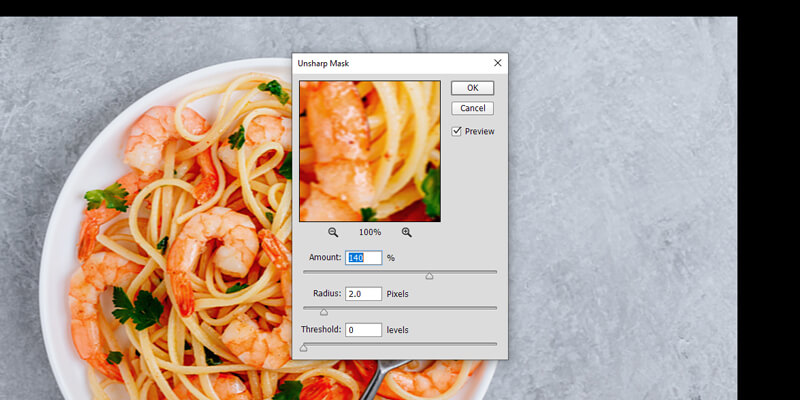
- Step 3: You will see a dialog box. You are going to use it for sharpening your images. Here, we have set the Amount to 170%, Threshold to 0, and Radius to 2 pixels. You can set the numbers according to your choice and finally press OK.
- Step 4: Go back to the Layer option and choose Flatten Image. This will help you manipulate the Shadows, Highlights, and White Balance.
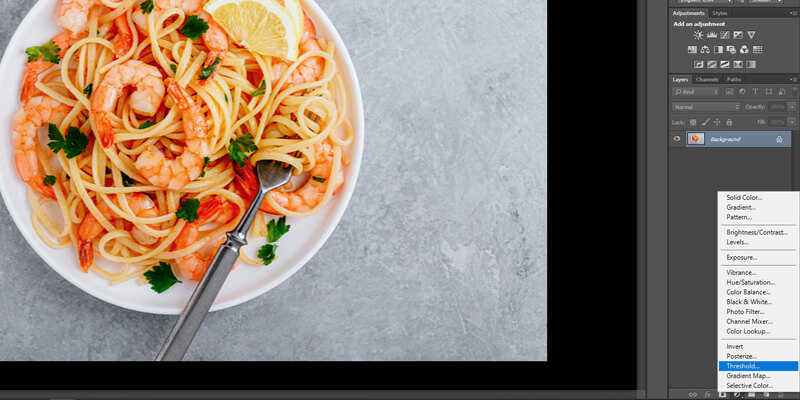
- Step 5: Now, check the bottom right corner of the Photoshop screen. A circle will be visible, which will be divided into two colors, i.e., Black and Grey. Right-click on it and then choose the Threshold option from the menu. It will add a funky look to your images.
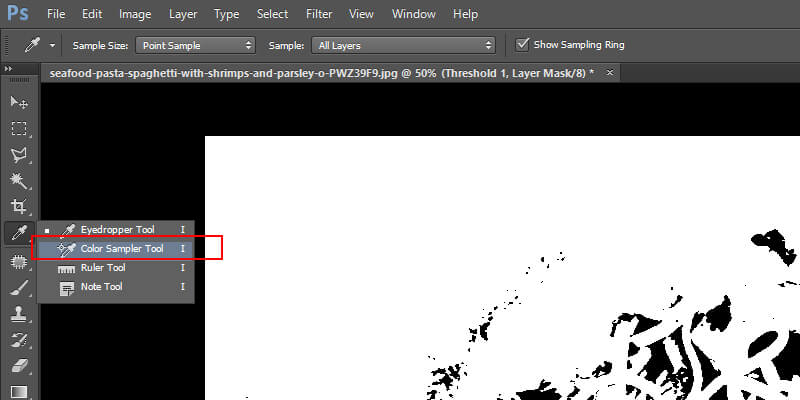
- Step 6: Click on the Eyedropper Tool. It will be located on the left. Now, right-click on it and then choose the Color Sampler Tool.
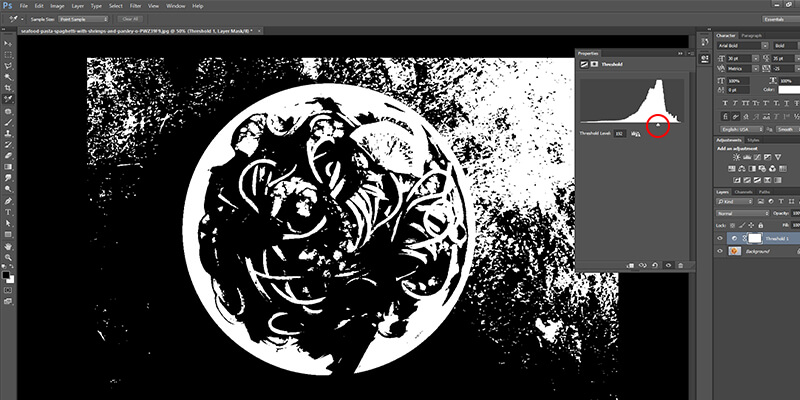
- Step 7: You will see a slider. Now, move it to the left. Again, move it slowly toward the right side unless you see dark patches on the photograph. Once you see the dark patches, stop and click on it.
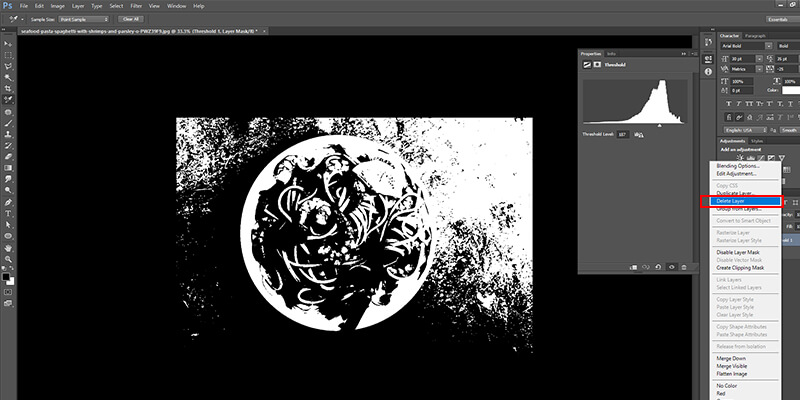
- Step 8: Now, right-click on Threshold 1 Layer and click Delete Layer. You will again have to repeat the process.
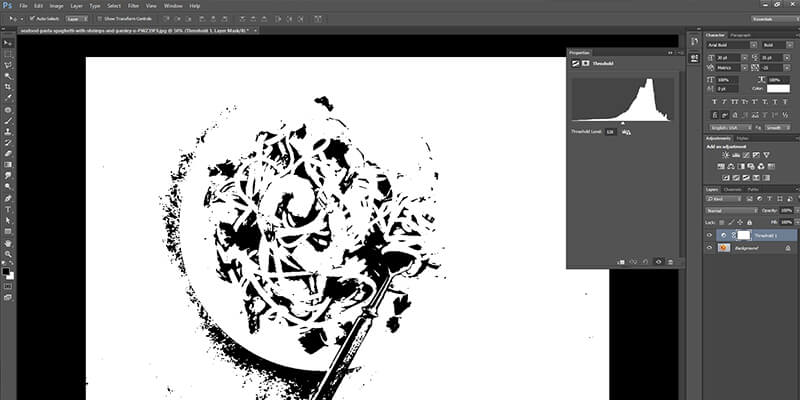
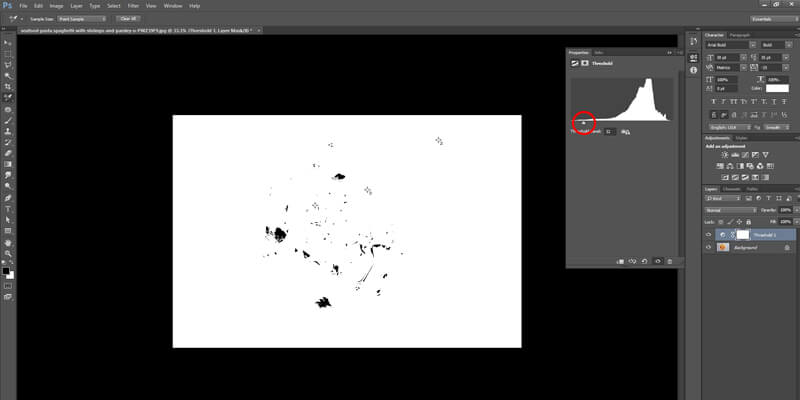
- Step 9: Go back to the circle present on the bottom right corner and right-click on it. Choose Threshold and move the slider to the right. Now, slowly move it to the left unless you see white patches. Now stop and click on the white patch.
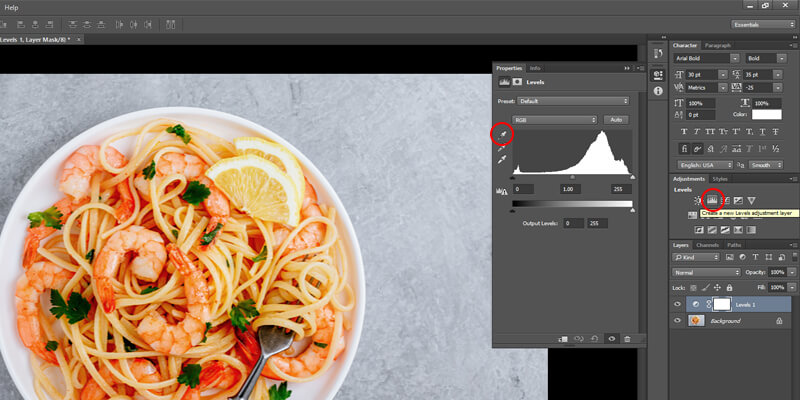
- Step 10: Again, right-click on Threshold 1 Layer and then click Delete Layer. You will see an icon resembling the photo of a graph, i.e., Levels. Now, click on it. You will see three different Color Sampler Tools. Now, select the one on the top. It will be a little darker than the other two.
- Step 11: Now, go back to your picture and click the target area with the darkest part. Go to the work area again and select the third Color Sampler Tool. Click on the lightest part of the image, which you have selected before. Now, let’s move to fix the light, shadow, contrast, colors, etc.
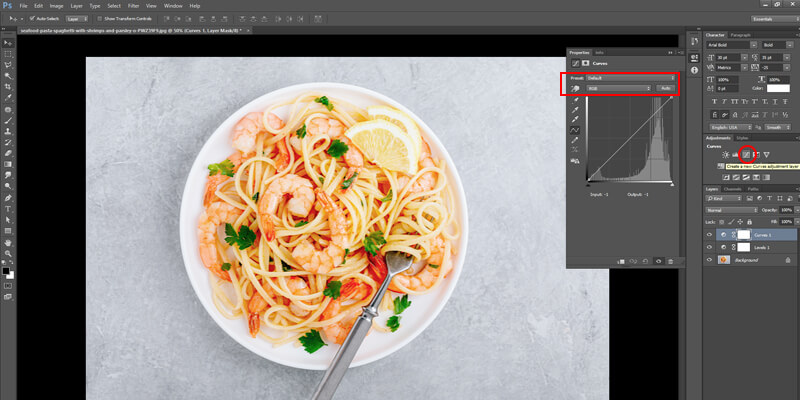
- Step 12: Select the Curves icon. Now, go to the work area and select Default. Click on the drop-down menu and choose Lighter (RGB). It will help in lightening the image. Also, move the line up and down to manage the lightness and darkness of your image.
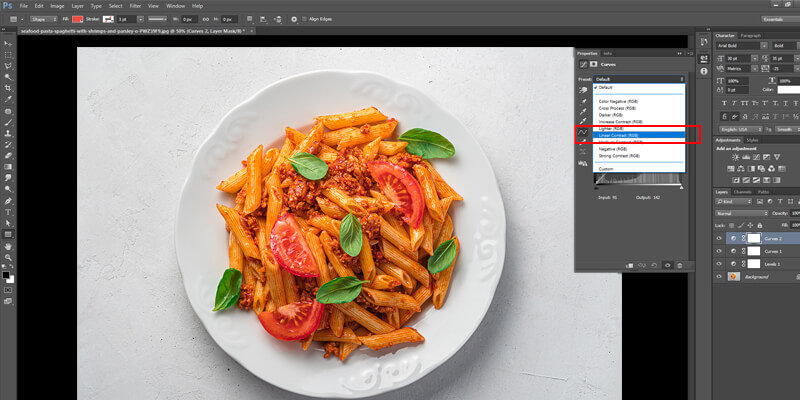
- Step 13: Again, select the Curves icon, go to the work area, and select Default. Choose Linear Contrast and play with it to see what looks better on your photograph.
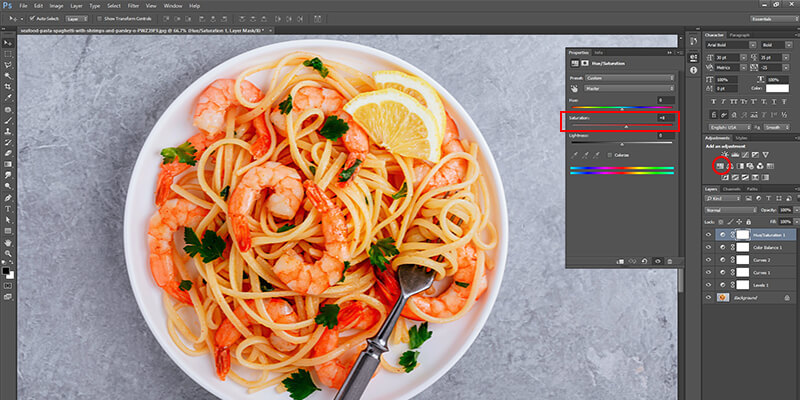
- Step 14: Correct the colors by selecting the icon that resembles a balancing scale. A tip to balance the colors is that if it looks yellow, add a bit of blue to it, and if it looks red, add a bit of green. If you want the color of your images to pop, use the Saturation Tool.
- Step 15: Click on the squared icon present at the left of the balancing scale. Move the slider to right for adding colors. Choose the number according to your needs.


Benefits of Retouching or Editing Food Photos
The benefits of food photo editing are many, especially when it comes to the food business. It is a great way of promoting and marketing your food items. Since people often spend a lot of time online, you can use it to your advantage and employ food picture editing to entice potential customers toward your brand. Besides, this technique can be implemented to promote eCommerce products as well. But, before posting the product images online, make sure to enhance its appearance with ecommerce photo editing service providers. Now, let’s discuss the various benefits associated with it.
-
Improves attraction
With food photo editing, you can make the food items look more polished and attractive. It will help in engaging the audience and will compel them to try your food.
-
Marketing
By employing the right editing, it is also possible to improve your business sales. Many add high-quality food images to their websites, blogs, or restaurant menu for marketing their business.
-
Removes Unwanted Things
You can remove unwanted items or things from your images that can steal the focus from the food. It is a common issue in photography, which can be eliminated with editing and retouching.
-
Special Effects
You can add special effects to the photographs to beautify it further. Motion effect is a type of special effects that can be added to the photos to get spectacular visuals.
-
Removes Stains or Dust
The appearance of blemish, stain, or dust in the food images can make it look unappealing. However, with image manipulation techniques, it can be removed, and the look can be improved.
Adding People or Props
Sometimes, to improve the detailing of the food photographs, you might need to add a person or object next to it. It will help in enhancing the food’s exquisiteness and attract more viewers.
-
Adjusts Exposure
Exposure is another common issue often seen in food photography. In that case, photo editors can make use of the best software and tools to handle the underexposed or overexposed images.
Conclusion
We hope that the article helped in providing you the right way to edit your food photos in Photoshop. Even though the steps discussed are enough to give an exceptional look to your food photographs, you can also take different approaches to create your own editing style or take help from food photo retouching service experts. However, be patient and give enough time to improve your photo editing skills with food photography. Also, keep in mind that the images need to look as natural as possible.