Photoshop is one of the most revolutionary software that is setting new heights in image editing with the unique tools and options it offers photographers and photo editors. This tool has multiple photo retouching options that make the editing work fun and give the best outputs beyond imagination.
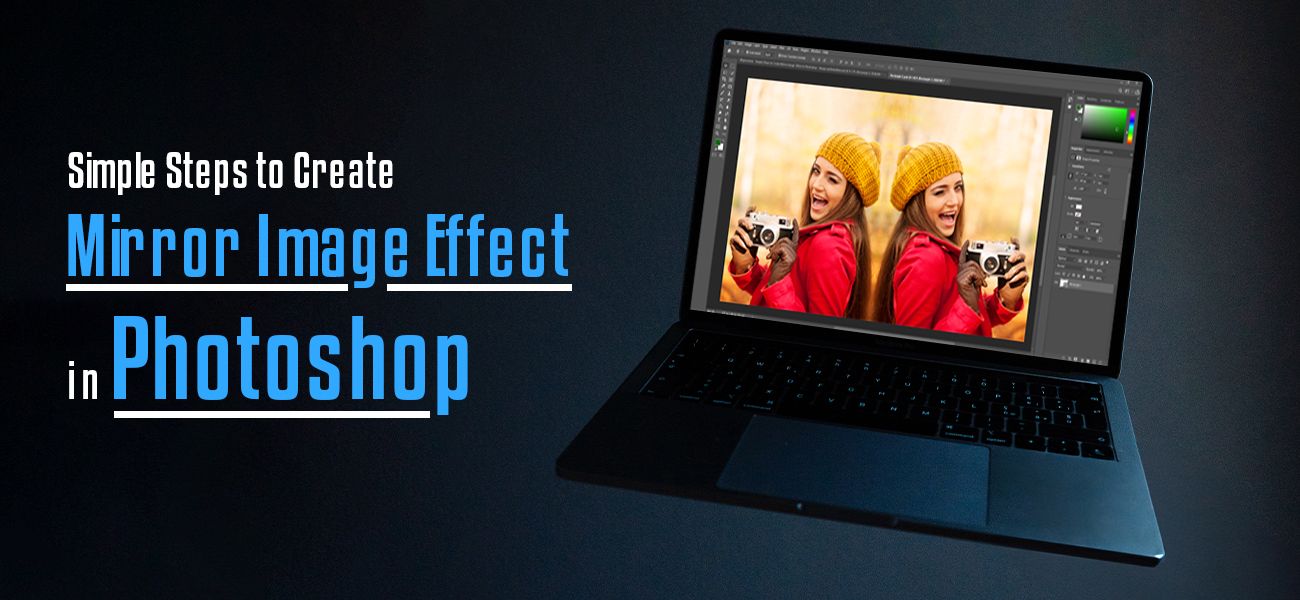
How to mirror image in Photoshop (Simple steps)
This is a step-by-step process of how you can make the most satisfying and surreal graphic effects by creating the mirror image using Photoshop software; here are the steps:
-
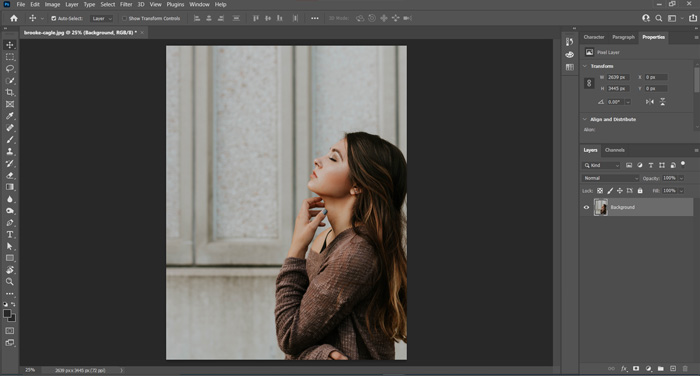
Step 1- Open the photo in Photoshop

The first and foremost step that this process includes is selecting and opening the file or photo you want to work on to create a mirror image. First, open the software, choose the OPEN option available, and select the file you want to flip.
-
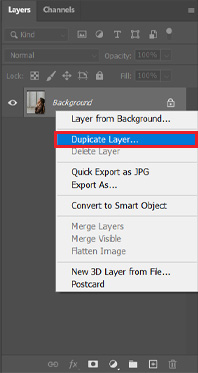
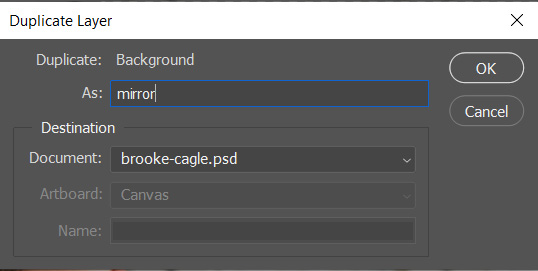
Step 2- Create a duplicate layer
Once the file is open in the software, the next step is creating a duplicate layer. This will help keep the original image intact, and all the editing work will be done in the duplicate layer; this will help curb an accident like editing in the original image and save the mirrored version over the original photo.
When creating a duplicate layer, it is always good to name the layer as ‘Mirror’; this will help differentiate the layers and make editing easy.
-
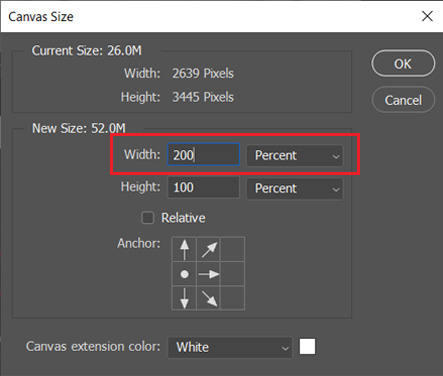
Step 3- Expand the canvas
When a duplicate layer is ready to be edited, it is time to expand the canvas to have more working room. Click the IMAGE tab in the top toolbar and select the size of the canvas from here.
Here, you can use the drop-down menus to get the exact canvas size you want by changing the units to Percent and setting the width to 200 because we need to double the canvas size.
This percentage will help expand the canvas more to the horizontal side, and it will simultaneously fit both the original and the mirrored image area.
-
Step 4- Add the mirror image (Horizontal/vertical side)
You created a space for the image to fit in the horizontal area to give a mirror-like feel, and for that, here are some options using which you can achieve that-
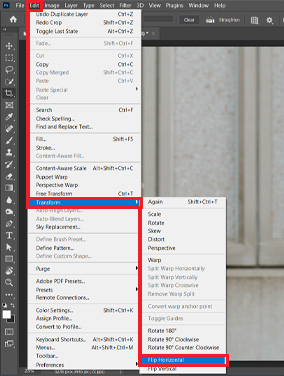
- Click on the top panel where you will find the EDIT option, choose this, and
then select the TRANSFORM option followed by FLIP HORIZONTAL or FLIP VERTICAL
(As per the requirement)
- Once you have done step one, it's time to go to the Photoshop menu at the top of
the screen. Here, select VIEW, then tick mark the SNAP option to make it active.
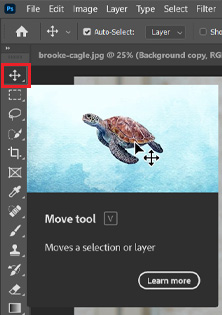
- Now select the MOVE option in the left toolbar, or if you are a shortcut key
ninja, then V is the answer.
- Now that all the options are selected, and the image is about to be placed, all
you need to do is hold the SHIFT KEY to drag the image as per the requirement.
- Photoshop allows the image to be placed in the correct position using SNAPPING.
- Click on the top panel where you will find the EDIT option, choose this, and
then select the TRANSFORM option followed by FLIP HORIZONTAL or FLIP VERTICAL
(As per the requirement)
-
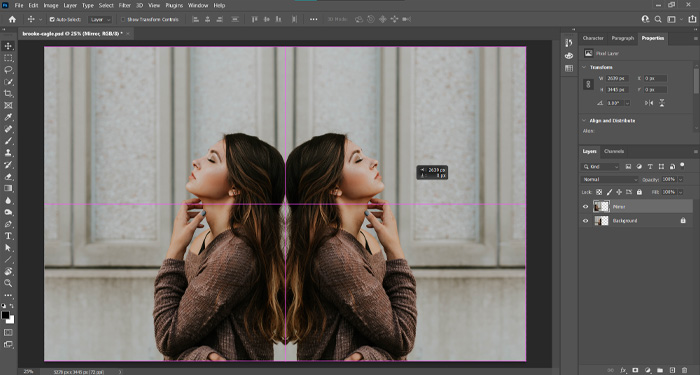
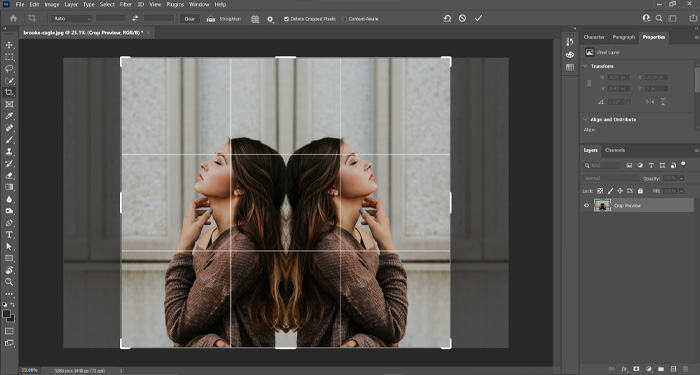
Step 5- Crop the unwanted spaces
Once the image is placed symmetrically to the original image correctly and close to being like a mirror image, it is time to remove all the negative spaces using the CROP option from the menu.
Using this, you can remove all the negative and unwanted space that is creating a distraction in your image result.
Note: Make sure that the DELETE CROPPED PIXELS option is on before you crop the unwanted space.
-
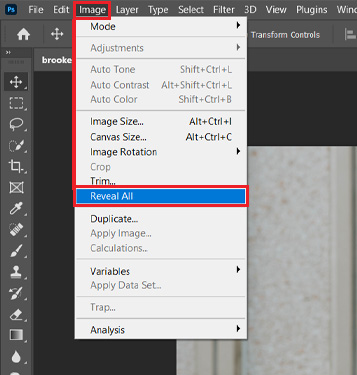
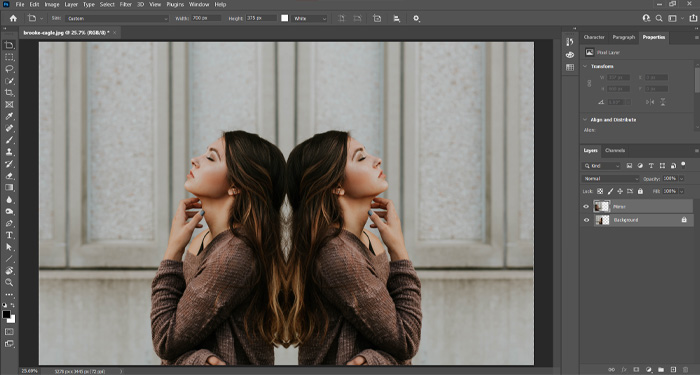
Step 6- The final REVEAL ALL command
Once you are done with all the steps to reflect an image in photoshop, it is time to get the final result of what you have created. This can be done by selecting the REVEAL ALL command in the IMAGE menu.
This command is like magic that reveals all your work, and you will have the mirrored image of what you have created out of a single photo.
Now the work is done, but one step is still left to give that one last final touch to your masterpiece.
Remember: Your mirrored image should fit the entire effect screen, and to achieve that choose the FIT ON SCREEN command available in the menu. Or use the shortcut key on the keyboard.
For Windows- Ctrl+0
For Mac OS- Command+0

Conclusion
Now you are ready to showcase your masterpiece using the simple steps we helped you with. Follow the detailed steps mentioned above and keep practicing. With time, you will be able to master the toughest Photoshop techniques, augmenting your editing process and outcome.
So over to you now. Start practicing the steps to create the perfect mirror effect in Photoshop today.
So, if you require expert assistance or professional photo editing services, don’t hesitate to outsource. Several expert service providers are there who can deliver the best quality Photoshop services. Find the right partner, and hire them. And impress your clients with stunning edits.