There are a lot of factors responsible for the expansion of the printing industry. According to a recent market study, it was confirmed that the steady growth of traditional prepress services and Epublishing were the two main factors that led to this expansion. As compared to the earlier days, the way in which people are consuming print media is rapidly changing over time. That is why it is highly essential for prepress experts to stay updated with the latest changes in the print publishing industry.
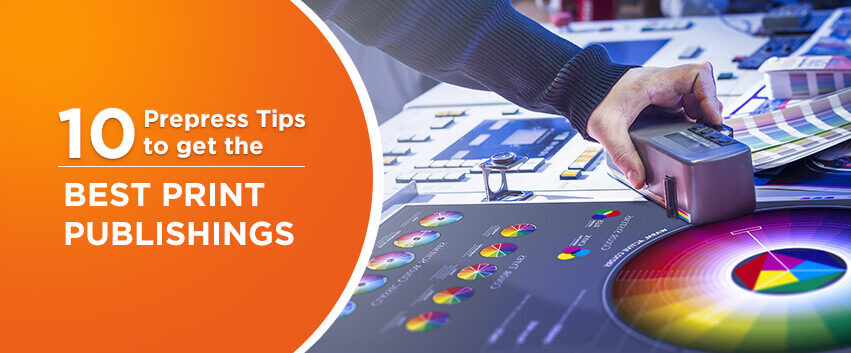
In this article, we are going to give you the 10 best tips that can help you to get the perfect print publishing files while also guaranteeing that it will run across various media and platforms.
The tips mentioned below cover all the important aspects of correcting the artwork so that the final document is free for any kind of error before it is sent for publishing or printing.
-
Selecting the quality and size of the image
One of the common mistakes made by the prepress operators is selecting the wrong image resolution. You must choose an image that is having a resolution more than 72dpi. It is because anything below that won’t be able to reproduce the exact resolution or colors on the paper as it would online. Sometimes, it might also look blurry due to bad pixelation. That is why it is important to choose the image resolution somewhere between 250-300dpi unless there is any special requirement.
-
Going for the right color mode
Another important step that you need to take care of is the selection of the right color codes for printing and publishing your project. Veteran designers who extensively work in the paper and print industry mostly use CMYK color chart for printing. CMYK mainly stands for the colors Cyan, Magenta, Yellow, and Key, i.e., also known as Black. However, today, the designers who are associated with the e-publishing domain are attracted more to the RGB workflow for print. It is mainly because the Red, Green, and Blue colors look better online and remain true to the original.
But, what is the best color profile for printing? Printers usually require the pictures to be present in CMYK format since the output will be on a piece of paper. In that case, you can either directly send the CMYK files or provide raw RGB files that can be later converted to CMYK. Regardless of what you choose, make sure you know the requirements for end usage first before selecting the color profiles.
-
Setting the right colors for printing
Specifying the right color setting for printing is imperative if you wish to use an RGB picture in Adobe InDesign. Besides, choosing the appropriate setting and application is easy with Adobe Bridge. Follow the below steps for choosing the color setting:
- Select the Edit option.
- Choose Suite Color Settings.
- Select the desired region. In case your region isn’t showing in the dialog box, click on Show Expanded List Of Color Settings Files. This will be present at the very bottom.
- Then, click on Apply.
-
Simulating CMYK even while working with RGB
Even though you are using RGB for printing bright colors, Adobe can showcase the CMYK equivalent for each picture. It can only happen if you have specified the desired color setting in Bridge. The specifications mentioned there will be used by InDesign for precisely showcasing each RGB picture after its conversion to CMYK color mode. For this, you can follow the below steps:
- Select the View option.
- Click on Proof Setup and then choose Custom.
- A pop-up menu will appear as Device to Simulate. Choose the desired output device and click on Simulate Paper Color.
- Now, click Okay. The page color will change while making the image appears less saturated and darker.
-
Correcting the color of your monitor
Color correction of the monitor is also an important step because all your efforts related to CMYK or RGB color workflow will go into vain if it is not done. Here, you need to make sure that the images look 100% accurate and use the same language for colors. It is crucial to color correct the monitor at least once a month, either manually or by using color correction hardware and software. Unless your work does not involve advanced color correction like maintaining white balance, monitoring room light, controlling granules over gamma, etc., it is not required to use the hardware. However, if you are opting for it, SpyderELITE and ColorMunki can be a better option.
-
Proofreading the text or content
Before a manuscript goes for printing, two of the most important processes are proofreading and copyediting. Prepress operators need to pay immense attention to these two prepress processes during the typesetting. It is important, just like your book layout design. Thus, expert typesetting service providers must be hired for the job since this needs professional eyes. These external agencies have typesetting specialists who offer the best proofreading services. Publishers can avail themselves of these copyediting services at nominal charges and a fast turnaround.
There is a high possibility that errors might creep into the document during the process of typesetting and design. Therefore, even if your content has already been proofread, it is better to go for another round with the help of a professional proofreader. They need to check the text with a fine eye for details, i.e., either for a misplaced block of texts, text overruns, or hidden text behind the picture. Doing this before finalizing the content layout can ensure that the final print-ready file is free from all glaring errors. Different software is also available to help you with calculation or modifications if you wish to save paper and time.
-
Preflight before you
Once the project file is ready to be printed, preflight it and go through a final check. Make sure that everything is okay by manually performing the preflight procedure. If not, you can also choose software like FlighCheck for ensuring it. The procedure will help you to determine incorrect colors, image resolution, font usage, transparency, etc. and can effectively save your money and time.
-
Defining the trim and bleed marks
Trim marks are usually the thin lines seen around the image layout’s edges. These are also called as Crop marks and are used to point out how a paper should be trimmed after printing. The bleed area is the document’s extra part that won’t be visible in the output. Therefore, by defining both the trim and bleed marks, you can ensure that your document is perfectly trimmed and printed. However, if you fail to define those areas and remove them, chances are that you may experience unwanted expenses and time delays. Besides, it may also destroy the image since papers shift when it is run through the press.
-
Optimizing the files before printing
Before sending the document for printing, optimize all the files for ensuring that the printer has all the desired resources to carry out the procedure. You can also make a note of the following things.
- Get the copy of your final file hard and laser-printed as a high-resolution PDF.
- Source file should contain the desired fonts which the printer can use.
- Each of the images, regardless of whether they are embedded or not in the document, should be send separately.
- Look after any other requirements of your printer.
-
Getting the final PDF in high resolution
A good rule of thumb is to never employ the built-in settings of Adobe InDesign or Adobe Illustrator for exporting the file into PDF format. However, if you need to do it, then change the built-in settings of the software. It is because the final PDF should be in high resolution since most of the printers have different specifications for the final document that is going to be printed.
Conclusion
The premedia and prepress industry has undergone a lot of changes and is also expected to evolve with each passing day. Therefore, if you are related to the digital prepress, printing, or publishing domain, then it is inevitable to stay updated with the latest innovations to thrive in the industry. You need to regularly keep an eye on the updates and work on it to improve your skills. Also, utilizing the tips mentioned in this article will help you to avoid unnecessary expenses, save time, and create a flawless file for print publishing. In case you are not planning to do it on your own, then you can associate with a prepress service provider that not only understands your needs but is also aware of the intricate details of the industry.