The Background Eraser tool is used by editors to erase the pixels in a layer to make the image transparent by dragging in the desired area. For example, photo editors would use this tool to separate the sky from the rest of the image while being able to retain the trees that come in between the sky and the remaining part of the image. You should note the fact that even though this tool is named as “Background Eraser”, it can be used to remove any part of an image, not just backgrounds. This is Photoshop’s color eraser tool that can be applied anywhere. You have to drag the tool over the colors that you need to erase and the tool would erase background in Photoshop only your sampled portion and leave the other colors intact. So when you use this tool, you would retain the trees while deleting the blue sky from the background.
Even though the background eraser tool is an effective tool in Photoshop to remove undesired portions of an image, but it is not a flawless tool and has a major loophole. When you use this tool to eliminate a certain portion from an image, the tool deletes pixels physically, which means that you would lose these areas forever. So you must make sure to take steps to protect your original image from getting damaged. One way to address this issue is to create a duplicate version of the background layer before deleting the pixels or alternatively, you may modify a separate copy of the image.
Steps on How to use the Background Eraser Tool
Selecting the Tool
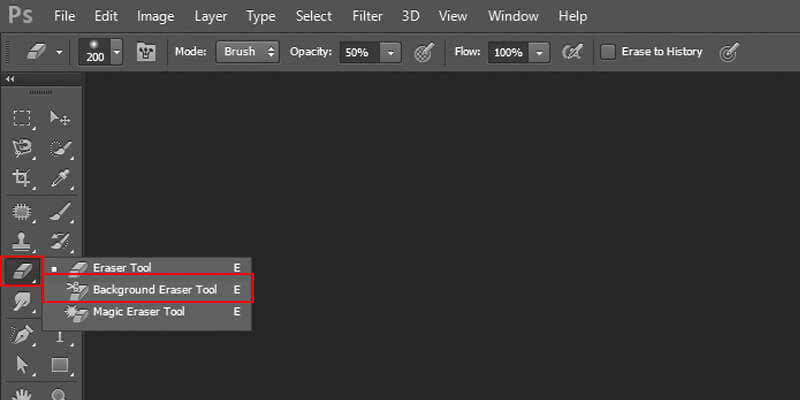
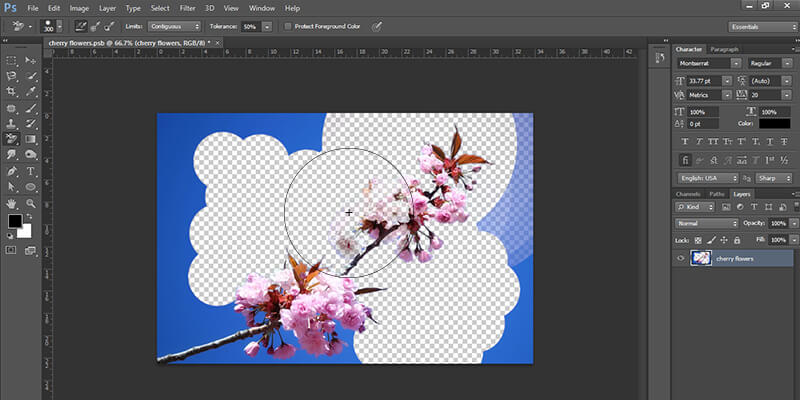
You would spot the Background Eraser tool in the Tools panel, just behind Photoshop’s normal Eraser tool. Select the tool by right-clicking on the Eraser tool and then access the fly-out menu to select the Background Eraser tool. At this point, your mouse cursor will transform into a circle featuring a minute crosshair at its center.
Adjusting the Brush Size

In its original essence, the Background Eraser tool is actually a brush and functions in the same manner as other Photoshop brushes. You can use your keyboard to adjust the size of the Background Eraser tool directly. You can enlarge the brush size by repeatedly pressing the right bracket key ( ]) and decrease the brush size by continuously pressing the left bracket key ( [ ). You may also choose to use the Shift key simultaneously to modify the hardness of the edges. Soften the edges by repeatedly pressing Shift+left bracket ( [ ) and harden the edges in a similar way by pressing Shift+right bracket ( ] ) repeatedly. Photo editors typically choose hard edges because of the fact that soft edges may often leave unfinished effects behind, instilling a rather untidy appearance.
How the Tool Works
The Background Eraser tool is easy to use, however, you need a bit of a practice in order to ensure that you are making an optimal use of the tool to deliver the desired outcomes.

The Layers Panel
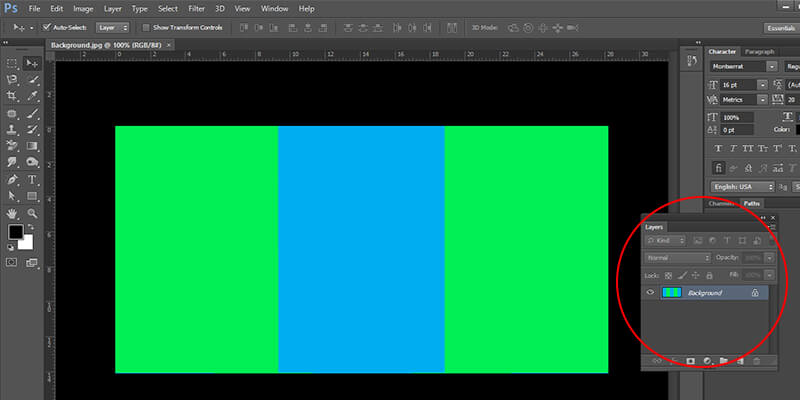
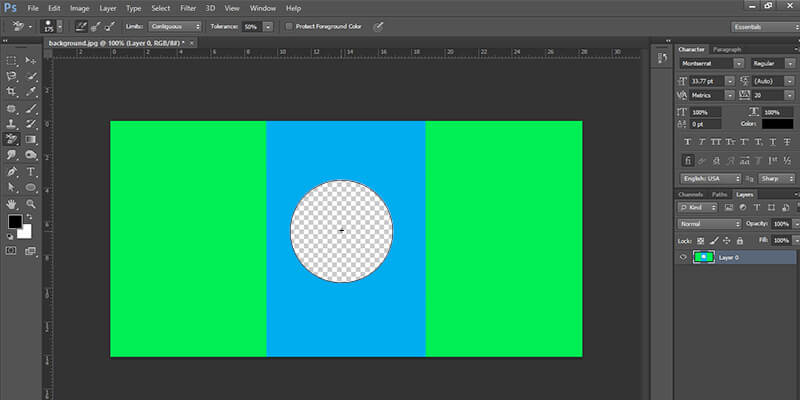
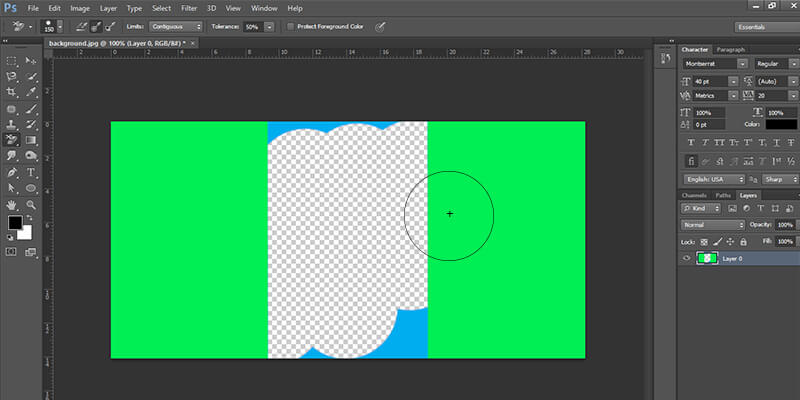
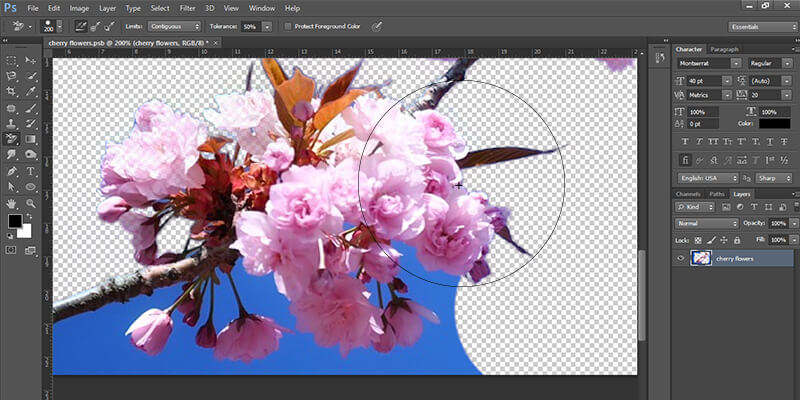
Let’s start with a simple image that features a blue column in the middle and green spaces on both sides of it. Imagine that you want to delete the blue column at the middle while retaining the green columns on the other sides. The tool works in the same manner as how Photoshop works on colors that lie directly below the crosshair. The larger circle that adjoins the small crosshair is the portion where the tool will delete pixels. Pixels lying inside the circle and matching the pixel-color that lies beneath the crosshair will get deleted. Place the cursor on the blue column and ensure that the crosshair is resting on the blue color that you wish to delete.
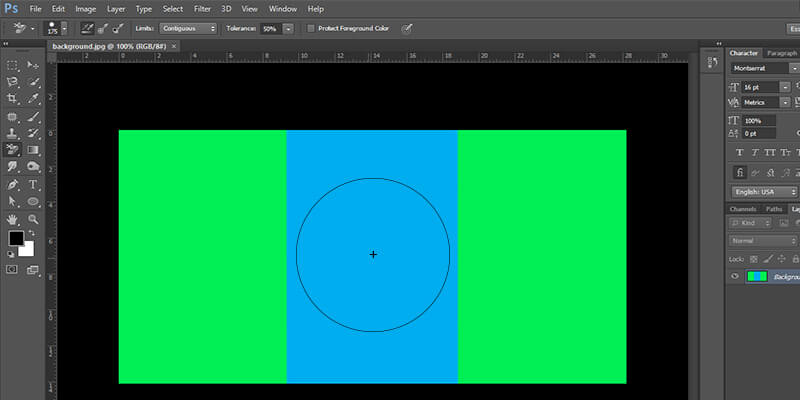
When you click on the mouse, Photoshop selects the blue color that lies below the crosshair and deletes other blue pixels falling in the larger circle.
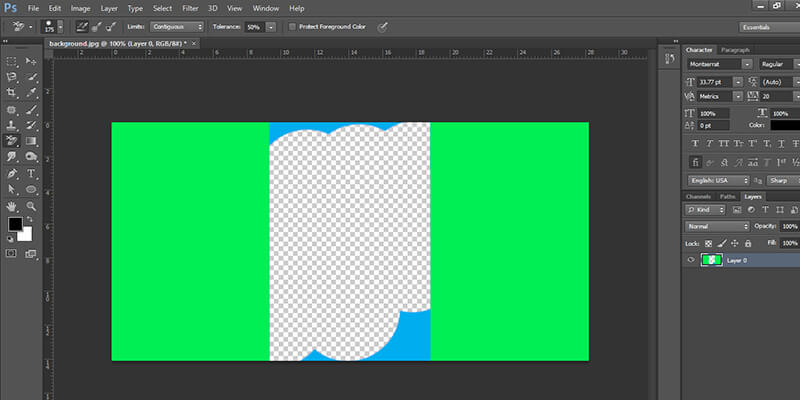
If you wish to delete a larger portion of the blue column, continue pressing the mouse button and drag the tool over a greater part of the area. You might notice that at times, the circle may stretch into the green columns, but the green parts would still remain intact given the fact that these pixels are different from the pixels that the tool has sampled. Photoshop would only target the blue areas as long as long as you keep the crosshair in the blue zone.
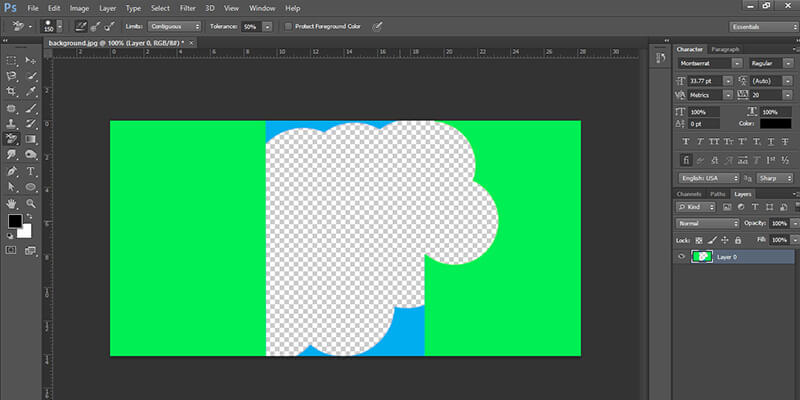
If the crosshair moves into the green zone by mistake, the tool will not start deleting the green pixels.
You can reverse the change by using the command Ctrl+Z. In case you need to reverse several steps, you should press Ctrl+Alt+Z .
Facts about the Background Layer That You should know
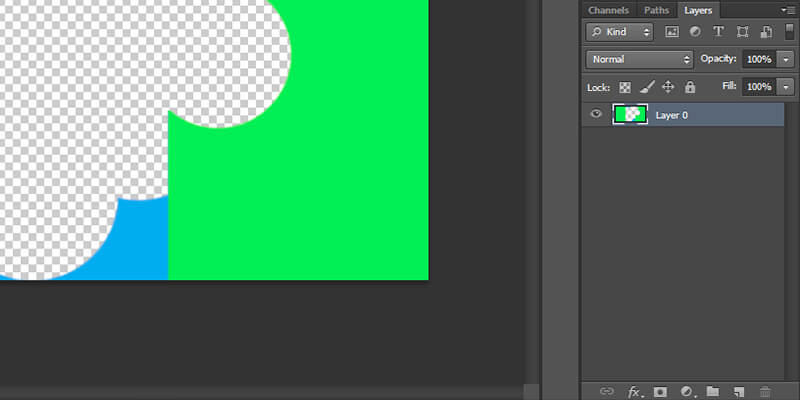
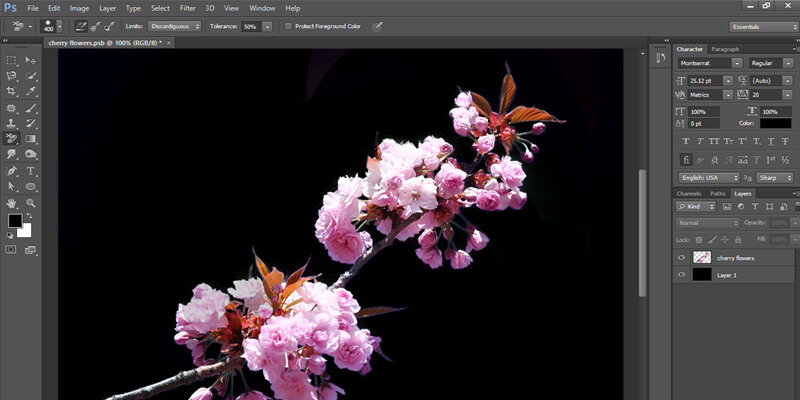
Consider observing the checkerboard pattern that appears in place of the portions that you have deleted. This is how Photoshop indicates transparency on a layer. Photoshop shows separate treatments for background layers and normal layers and has different sets of options regarding what we can or cannot do with these layers. For example, we cannot delete pixels on a background layer because Photoshop does not allow transparency on a background layer.
Then how would you erase the background layer? Well, you should note that Photoshop transforms the Background layer into a normal layer when you apply the Background Eraser tool on the background layer.

While we have discussed the way how the Background Eraser tool behaves, we should discuss about the settings in the options bar to understand what else we can do with the tool.
Sampling Options
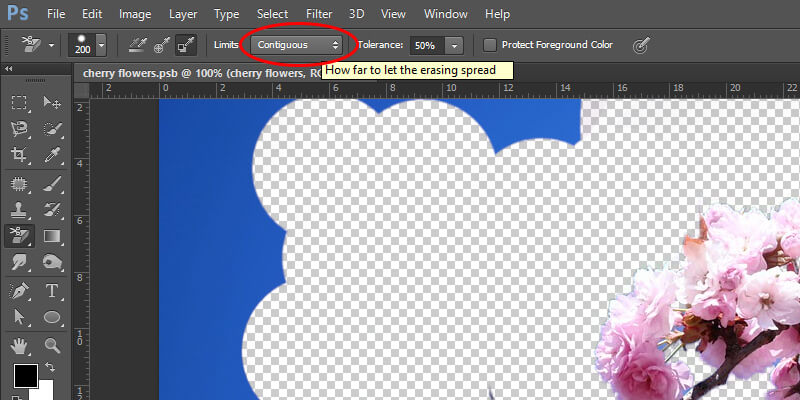
When you select the Background Eraser Tool, the Options Bar would showcase the different options that control the tool’s behavior. The Options Bar would allow you to modify how Photoshop selects colors beneath the crosshair. You will find three types of sampling options namely, Once, Continuous, and Background Swatch in the Options Bar.

Among these three options, the Continuous and the Once are the most widely used options. The ‘Continuous’ is the default option and so whenever Photoshop samples the color beneath the crosshair, it is actually using the ‘Continuous’ option. This option proves to be quite useful when the background that you want to delete features multiple colors. On the other hand, the Once option works better if the background does not have too many colors.
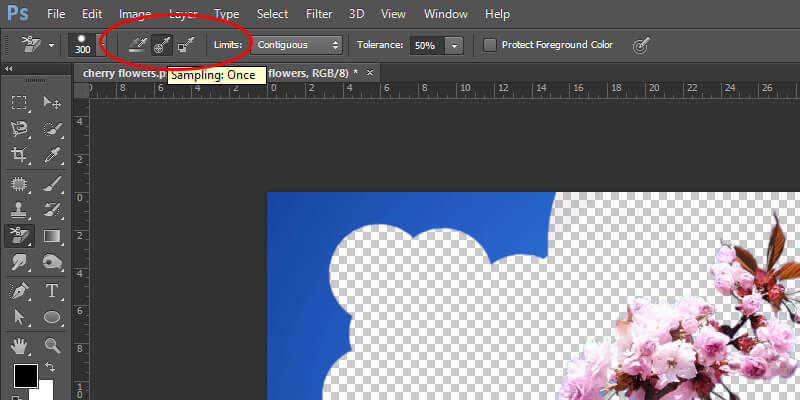
When you choose the Once option, Photoshop would only delete the color that lies under the crosshair even if you drag the mouse to the surrounding areas.

If you find it difficult to place the cross hair right above the color that you wish to delete, you should try using the Background Swatch tool.
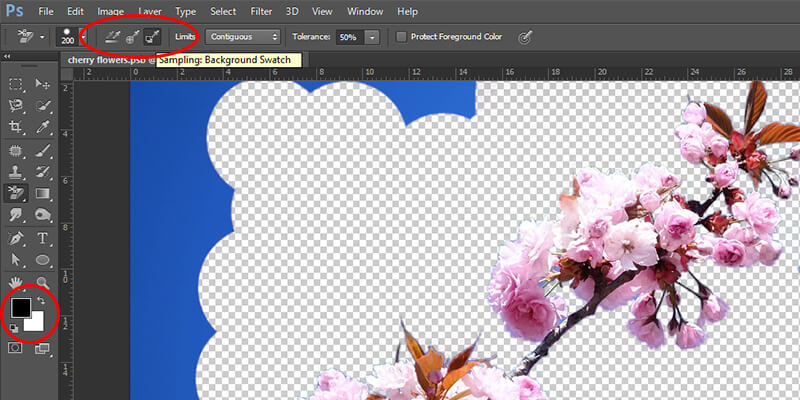
Select Background Color Swatch in the tools panel of the Background Swatch option. Access the Color Picker and choose a color that is almost similar to the color that you want to erase in the image. If you think that the chosen color is not appropriate, you may go on modifying the Tolerance value in the Options Bar till you delete the pixels.
Limits
‘Limits’ is another useful option in the Background Eraser Tool. When you sample the color that you want to delete, ‘Limits’ allows Photoshop to know where it can find the matching pixels so that it can delete them. The ‘Limits’ has three options- Contiguous, Discontiguous, and Find Edges.
Among these three options, Contiguous is the default option that makes Photoshop delete only those areas that are getting physically touched by the crosshair. So this means that you would not be able to delete isolated areas of pixels that lie between different elements in an image.
At times, you may find that Photoshop is failing to maintain sharpness of the edges that surround the subject. In that case, undo all the changes and select the ‘Find Edges’ option.
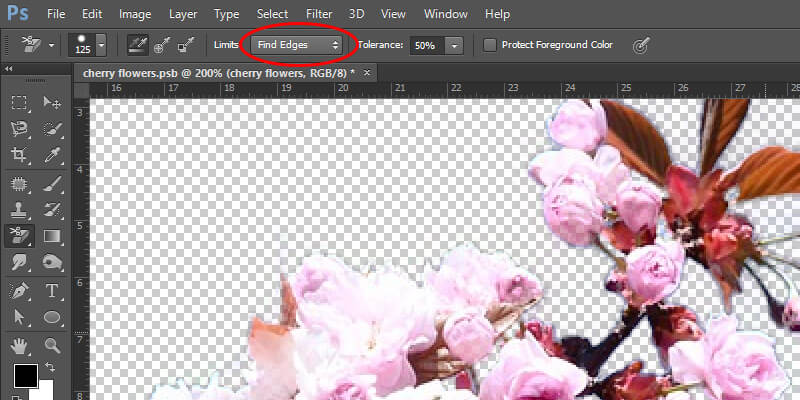
Find Edges delivers more precise results compared to the Contiguous option and works wonders to maintain edge-sharpness. This option is particularly useful when say, for example, you need to maintain the sharp edges of a building while deleting the sky. However, use of this option may slow down your background removal process.

The Discontiguous option allows photo editors to delete pixels that match the sampled color, from anywhere in the image regardless of the position of the crosshair. With this option, you would be able to delete pixels that fall within the larger circle surrounding the crosshair. For example, once you have set the crosshair in any section of the blue sky, you can drag the Background Eraser on trees to delete bits and pieces of the sky that is getting shown through the leaves. At this point, select ‘Once’ as your sampling option so that Photoshop does not change the color that you need to delete.

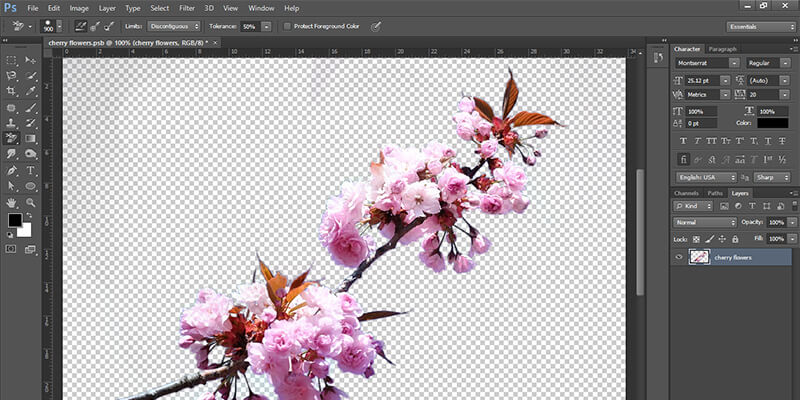
However, the Discontiguous option has its own limitations. For example, it will not be able to address the color variations in the sky and so it might happen that the darker blue shades would be left behind in between the leaves. Issues such as this can be addressed well with the use of the Tolerance option.

Tolerance
Tolerance is one of the major controls in the Background Eraser tool. Using this control, you can define how dissimilar a color can be from the chosen color for the Background Eraser tool to delete it. You can spot the Tolerance option at the right of the Limits option.
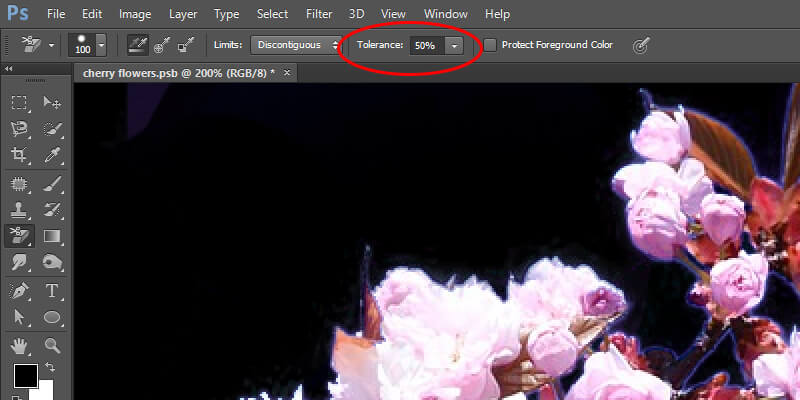
Set your default Tolerance value to 50 percent and this is a good starting point. However, you may go for a lower Tolerance value if the subject’s color is quite similar to the color of the background because in that case, Photoshop tolerance in Photoshopmay end up deleting a part of the subject. On the other hand, go for a higher Tolerance value if you observe background color jutting out of the edges of the subject. For example, when you are trying to separate the blue sky from the trees, you can set the Tolerance value to 70 percent because the two colors are strikingly different. Select an area of blue sky with the crosshair and with a higher Tolerance value, you can make the Background Eraser tool to work effectively to get rid of the blue fringes along the borders.
Protect Foreground Color
At times, you might find that even if you experiment with different Tolerance values, the Background Eraser is still deleting a part of your subject while erasing the background. If this is your case, you may want to try the Protect Foreground Color option. In its default form, it remains turned off, so you need to select it to turn it on.
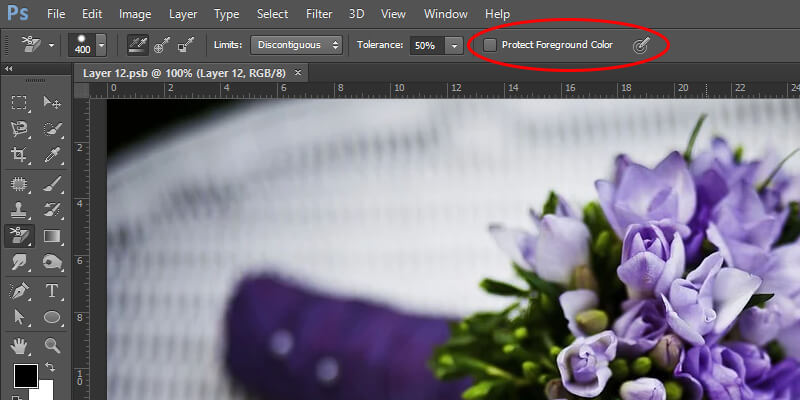
The Protect Foreground Color option would allow you to select a color from the picture as your new foreground color. With this step, you would prevent Photoshop from erasing your chosen foreground color. As a matter of fact, Photoshop finds it quite difficult to distinguish between similar-looking subject and background and to identify the edges.

You can address this issue by undoing your previous step by clicking on Ctrl+Z. Activate the Protect Foreground Color option by ticking on the checkbox.

While selecting a color from the image, you need to press and hold the Alt key and this would activate the Eyedropper Tool, which would facilitate color sampling. The color that you select would be the color that Photoshop would protect.
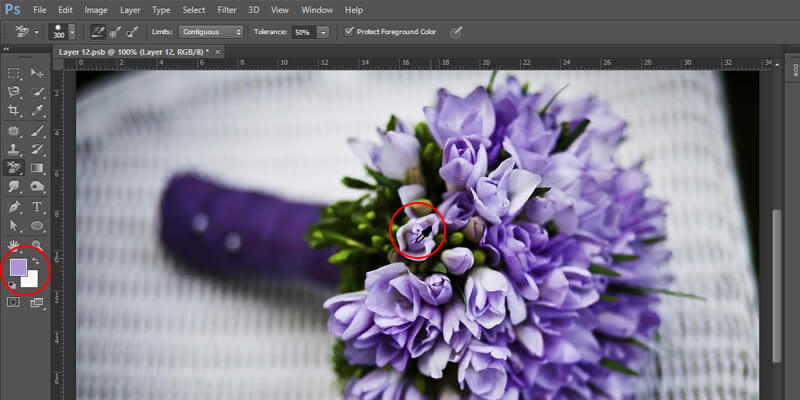
Take a look at the Foreground Color Swatch at the bottom of the Tools panel and you would notice the color that your selected color has now become the new Foreground color. You would now find your sampled color appearing in the Foreground Color swatch.
When the sampled color is protected, drag the Background Eraser on the other elements to remove parts of the sky in a neat way while keeping the leaves intact. However, you need to remember that you have to deactivate the Protect Foreground Color option when you complete your current task because you may get unexpected outcomes if you do not deselect this option before you use it again for another assignment.
Photoshop is a complex photo editing program and it comes equipped with a number of features and sub-features that needs thorough exploration in order to put them to their best use and generate the best photo editing outcomes. Every tool has its own set of individual characteristics and properties, which, when utilized properly, would give you the optimal results. Helping you remember the key steps in using Photoshop’s Background Eraser tool and in using it in an appropriate manner, we have created a quick summary that would let you recapitulate what we just taught you.

Background Eraser Tool: Quick Tips and Notes
- You can eliminate unwanted areas of an image using the Background Eraser tool.
- Right-clicking the background Eraser tool on the standard Eraser tool will open up the Background Eraser tool for use. If you are using Mac, you need to use Control-click to select the tool from the menu.
- Place the crosshair at the middle of the brush cursor over the color that you want to get rid of and click on the color to sample it. Press down your mouse button and glide the cursor throughout the image. Photoshop would delete all pixels that would match the sampled color.
- Photoshop would ignore the pixels that do not match the sampled color, thereby keeping them intact.
- You can regulate the behavior of the tool by regulating the Sampling Options in the Options bar.
- The Continuous Sampling option is a default setting that allows Photoshop to repeatedly select the color under the crosshair as you glide the cursor.
- The Once option would let you sample only the first color that you select. When you keep your mouse pressed down, Photoshop would not sample any other color even if you drag the crosshair over multiple colors.
- With the Background Swatch option, you would delete pixels that match the color of the background.
- You would allow Photoshop to decide where it should look for pixels to delete by using the Limits option.
- With the Contiguous setting, you would allow Photoshop to delete pixels in sections that are in physical contact with pixels under the crosshair. The tool would not delete pixels that match the selected color, but are bordered by areas of another color.
- The Discontiguous setting would allow you to delete colors that match the sampled color even if they are scattered through the image and are surrounded by different colors.
- Find Edges works in the same manner as the Contiguous setting, but it is much more effective at retaining the sharpness of the edges.
- The Tolerance feature allows you to define how different a pixel’s color can be for the Background Eraser Tool to delete it. When the subject and background colors are similar, you should set a lower Tolerance value. On the other hand, with higher Tolerance value, you can eliminate edge fringing issues when the colors of the subject and the background are similar.
- Using the Protect Foreground Color option, you can protect the foreground color from getting deleted. Continue pressing Alt if you are using Windows or click on Option if you are using Mac. Click on the subject to select a sample color and define it as the new foreground color.
- In case you make a mistake at any point of time while using this tool, you can press Ctrl+Z (for Windows) or Cmd+Z (for Mac) to reverse your last action with your brush.
Conclusion
And with this, we have come to the end of our tutorial on Photoshop’s Background Eraser tool. While using this tool may seem to be a confusing task for beginners, practice would make outcomes perfect. We hope that this tutorial would clear your doubts regarding the use of this tool and would allow you to become better photo editors.
There are several other ways by which you can edit image background edit and some of these clipping path techniques can be performed using other background removal tools in Photoshop.