Anything new you get started with seems challenging at first, the same goes with photo editing. Right from fine-tuning images, fixing colors, adjusting imperfections, or adding a creative element to your images, learning the basics of editing can make a big difference.
This blog will help you understand how to get started and make you aware of the fundamental techniques useful for photo editing for beginners to excel with their images. By the end of this guide, you shall find yourself more confident in terms of dealing with your images professionally or personally.
Basic Techniques of Photo Editing for Beginners
Let us explore some of the techniques related to basic photo editing to help you get started with your images.
-
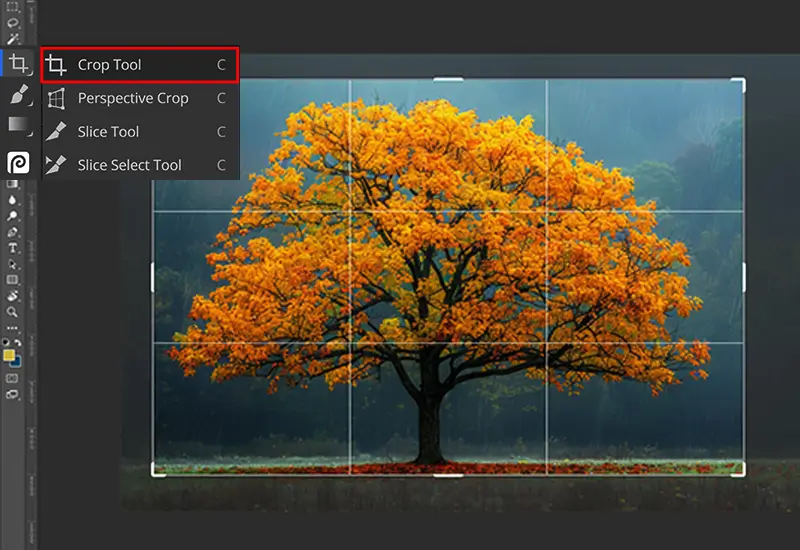
Cropping for Composition

Cropping is one of the simplest yet powerful methods of maintenance. This helps eliminate distractions and improves your overall image. For example, if you have a landscape with too much of the sky captured, you can crop part of it to highlight the main subject, like a tree or a building to create a better-spaced image for a stronger effect.
Most photo editing software like Adobe Photoshop and Lightroom provide easy-to-cut options. When planting, always consider the rule of thirds to ensure a balanced system, where priorities are placed on grid lines for optimal results.
-
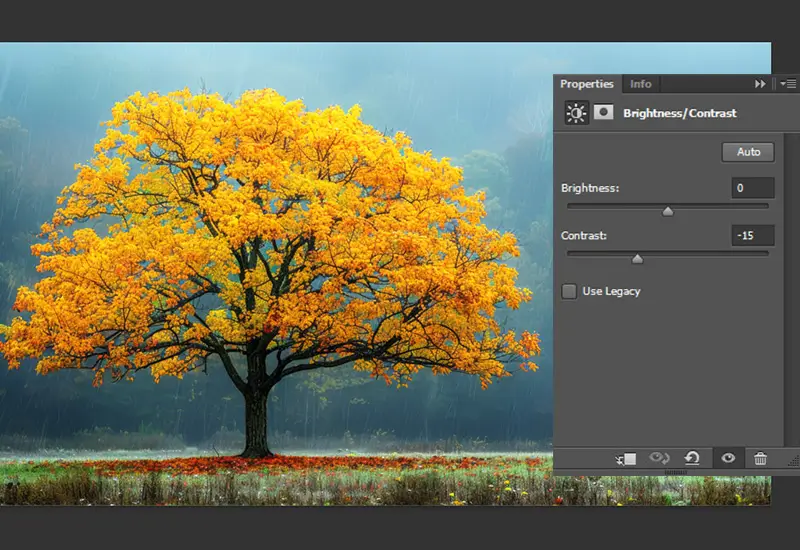
Adjusting Brightness and Contrast
Adjusting brightness and contrast is critical for making your image look good. With brightness, you can control how bright or dark the image appears, while contrast adjusts the difference between light and dark areas.
For instance, if your image looks a bit flat or dark, increasing the brightness and contrast can enhance it. Many editing software tools offer these options. However, it’s important to remember that excess can be detrimental. Too much brightness or contrast will make the image look unnatural or artificial. Subtle adjustments, on the other hand, can add visual appeal without compromising detail.
-
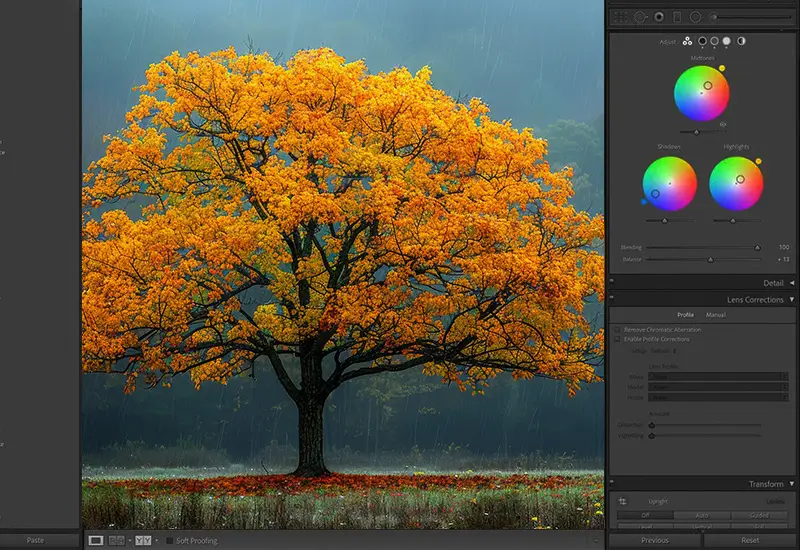
Color Correction
Color correction helps create a balance of tones in your photo. This can be especially useful if your image looks too warm (orange) or too cool (blue). Tools like Lightroom’s white balance settings let you adjust the temperature and tint.
For example, in case your outdoor image is blue owing to cloudy weather, you can adjust the temperature to give your image a more natural look. Color correction on the other hand also helps with saturation and vibration adjustment ensuring that the colors in your image can stand out without looking oversaturated.
-
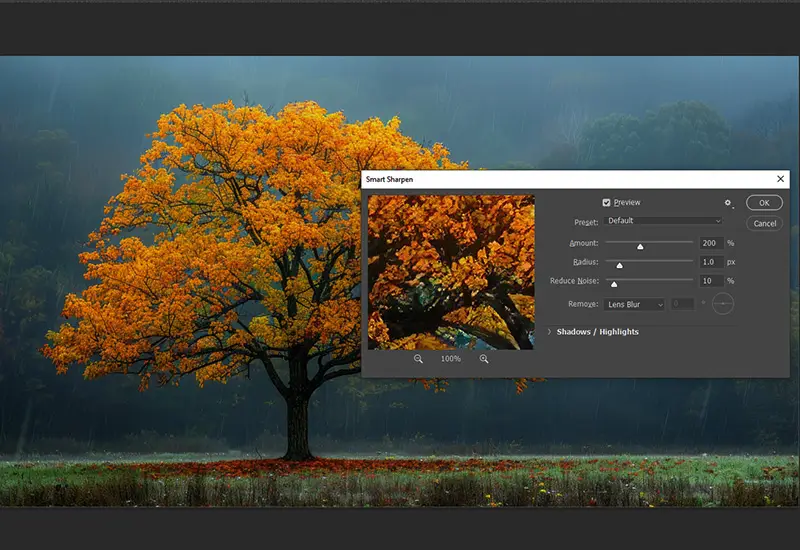
Sharpening the Image
Sharpening helps to give your image clarity and detail, giving it a smoother appearance. This is especially useful for images that look a little blurry or out of focus. Most image editing software has a simple slider that makes it more dynamic.
For example, in case you have photographed a building and the brick texture appears to be soft. This is where you can apply molding to bring out the texture and make it stand out. However, be careful as making your images too sharp can introduce noise and make your image look grainy.
-
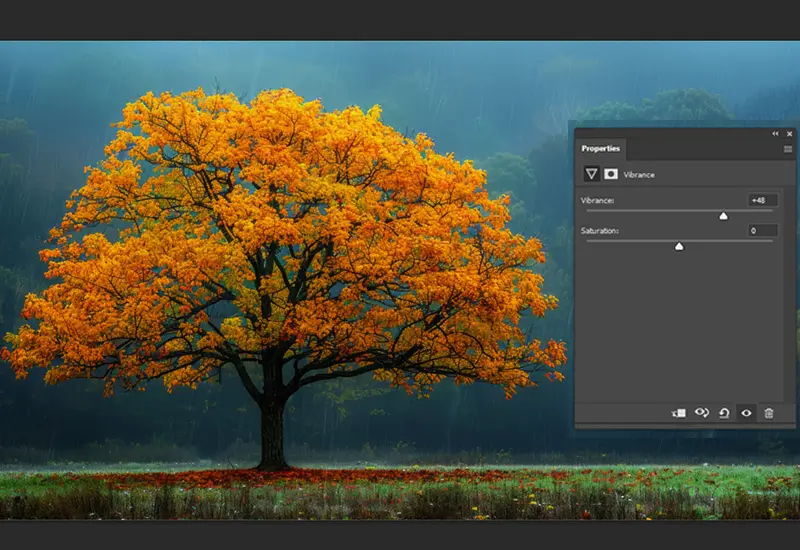
Saturation and Vibrance Adjustment
Saturation and vibrance are one of the important tools for enhancing color in your image. Saturation increases the intensity of all the colors of the image and on the other hand, vibrance focuses on enhancing less dominant colors, helping them stand out without overstating the overall image.
For example, in an image of a flower garden, increasing vibrance can make the subtle hues of the flowers stand out, keeping the overall balance of the image. However, it's important not to go for more saturation as it can make your image look overly edited and artificial.
-
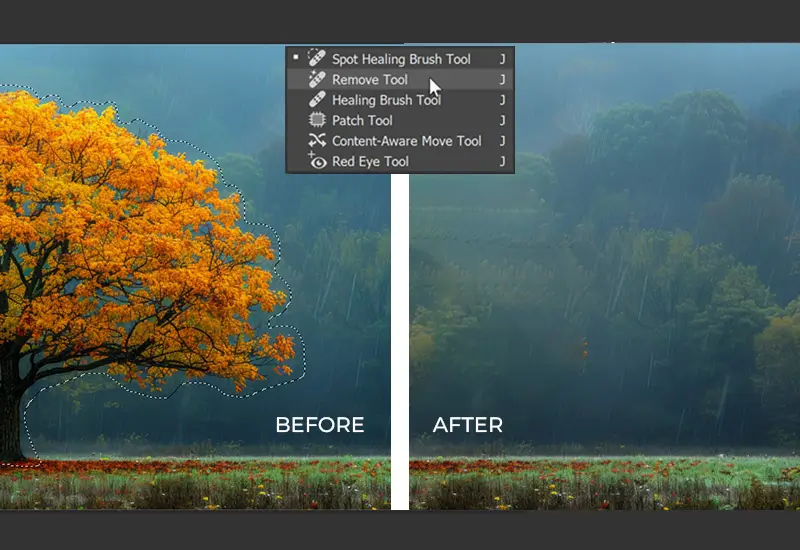
Removal of Unwanted Items
Great shots can sometimes be ruined by unwanted objects or external backgrounds. Photoshop's 'Spot Healing Brush' and 'Clone Stamp' tools make it easy to remove unwanted blemishes or effects.
For example, if there is an electrical wire that makes some things unsightly, you can easily wipe it off. This method is particularly useful for portraits, where you can remove skin blemishes or stray hairs. With the proper use of these tools, you can edit your images and give them a polished look.
-
Using Filters for Quick Edits
Filters are an easy and effective way for beginners to quickly change the look and feel of an image. Many popular editing or social media apps like Instagram and Lightroom offer preset filters that change things like exposure, contrast, and color tones.
Using a black-and-white filter, for example, can give your image a timeless, vintage look in just one click. Filters are especially handy for social media posts when you want to make quick changes. However, it’s important not to overuse them, as over-reliance on filters can sometimes reduce the quality and authenticity of the original image.
-
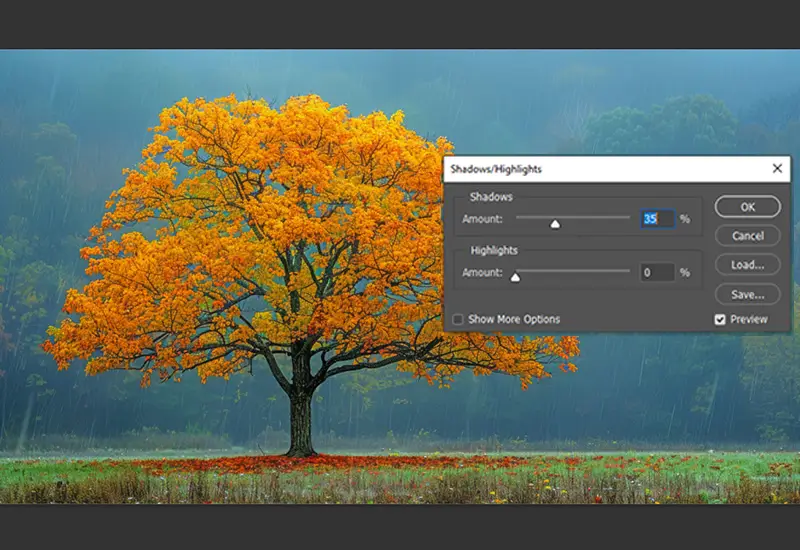
Adjusting Highlights and Shadows
Balancing highlights and shadows can dramatically change the dynamics of your image. Highlights take care of the brightest areas, while shadows fix the darkest parts. For example, if your image is too bright in the sky and there are a lot of dark areas in the foreground, the exposure can be balanced by adjusting the highlights down and the shadows up. Most tools set things up for sliders to help you fine-tune these areas. The result is a balanced image that preserves detail in light and dark areas.
-
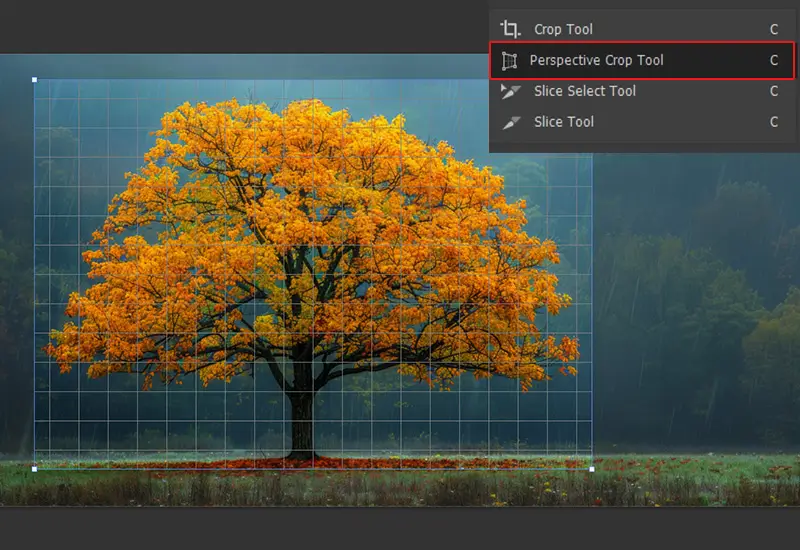
Straightening and Perspective Correction
Crooked skies or distorted perspectives can detract from an otherwise great image. Straightening makes your image more aligned with the horizon or vertical line.
For example, if you took a map where the sky appears to have slanted, correcting it can immediately improve the composition. Perspective correction tools can also eliminate distortions caused by the lens angles, especially useful for architectural images that appear to lean. Adobe Lightroom and Photoshop offer simple tools for straightening and correct perspective.
-
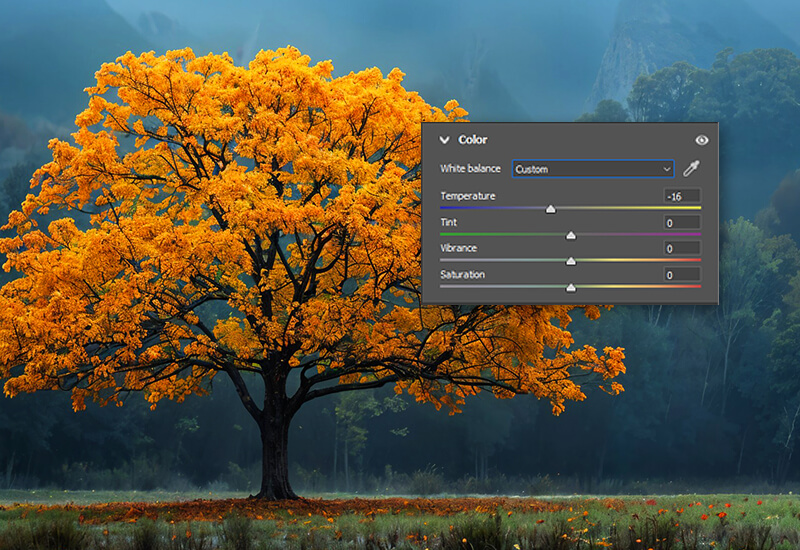
White Balance Adjustments
![]()
Light sources, their color temperature, and intensity differ depending on the location. If you are shooting outdoors, the light source will be the sun during the day and the moon at night. The light quality will also depend on the time of day and the weather. For indoor shoots, you’ll be dealing with artificial light sources. These, too, will differ depending on the color, wattage, location, etc.
Each light source has an impact on the overall look of the photos. Warmer lights will result in yellowish or orangish pictures. White lights may produce natural colors, although there are chances that the whites might appear a little bluish. Photos taken outdoors lead to more natural colors in the images.
Adjust the white balance to make the whites in the photographs look true white. Some software makes it easier to balance the whites by providing an eyedropper tool. Use the eye dropper tool under white balance and click on the objects you know to be white in the picture. When you click on the white object, all the colors in the image should ideally go to normal.
If you are color correcting, have a look at the overall image, and if you notice that the colors are still a bit off, use the color temperature and tint sliders to fine-tune the colors. If you are making creative adjustments to the overall picture, you can use the same sliders to make the image warm, cool, or tinted.
-
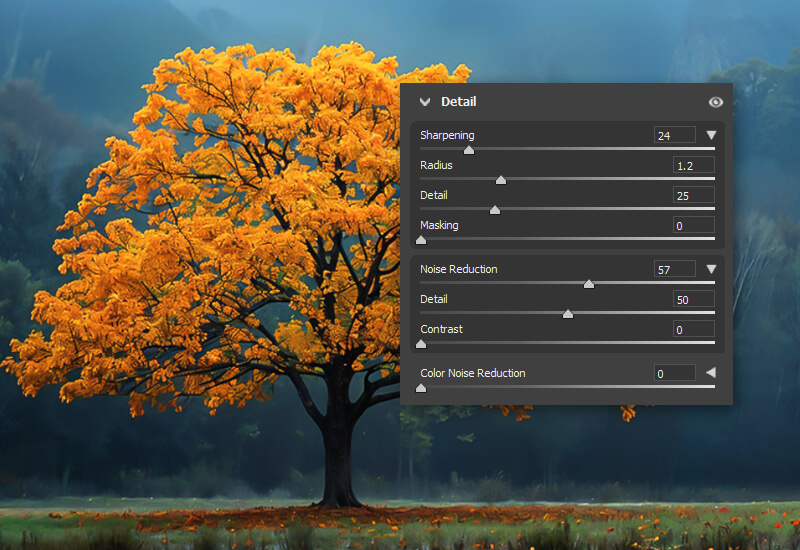
Noise Reduction
![]()
Also known as “denoising”, it’s a technique where you reduce the amount of grain in a photo. Pictures become grainy or develop noise when there is insufficient lighting, high ISO, long shutter speeds, and heat. There are basically two types of noise- luminance and color noise.
- Luminance noise : Grainy white and black spots appearing across an image.
- Color noise : Colorful grains appear in a picture.
Zoom into a picture to figure out what kind of noise you’re dealing with. The grains are more clearly visible once you are zoomed in. If you see white and black spots, you can get rid of them by using the luminance noise slider. If you see colored spots (usually red, blue, and/or green), use the color noise slider to remove them.
Be aware that if you reduce the noise too much, your photo will become blurry and look smudged. You can use the sharpness slider to counter this effect, but you must find a balance between the two so your pictures are not negatively impacted.
-
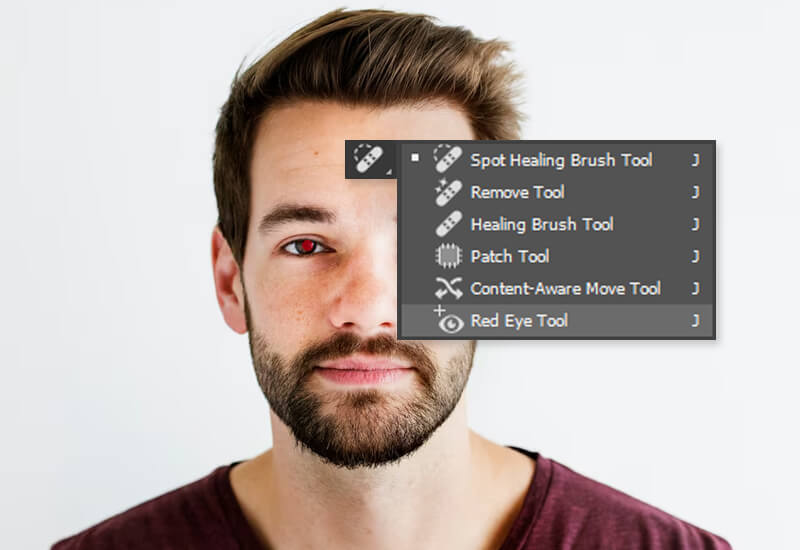
Red Eye Removal
![]()
Red eye is an issue where the eye(s) of a person looks red. Human retinas are mostly red in color. So when the camera flash hits the eye, it looks like the person has red eyes in the photograph. It’s a fairly common problem that occurs when you use the camera flash in low-light conditions. Most photo editing software come with a red-eye removal tool that detects and corrects this problem in photographs.
Conclusion
Enhancing your photographs can significantly increase their quality and appeal. As one of the leading photo editing companies, MAPSystems offers expert solutions to process your images, ensuring they meet the highest standards for clarity and color balance and it is filled with.
Whether it’s for marketing, e-commerce, or personal projects, our skilled team uses photoshop tools to eliminate defects, fix lighting, and highlight key issues. With a strong focus on accuracy and creativity, MAPSystems offers tailored photo editing services that meet your specific needs, helping you create visually stunning images that leave a lasting impression there forever.