Using a layer mask in Photoshop may seem difficult or advanced for beginners. However, these are easy and simple to use. It has several creative and practical implementations, which is why every photo editor must learn how to use it. Photoshop layer masks can help with transparency control. This means masking can hide the areas of a layer and allow the picture information to show through from the lower layers. So, masking photo layers can help you to hide and reveal certain portions in the layers that you want.
In this article we will guide you in a step-by-step manner to teach you the process of adding a layer mask in Photoshop. We will also help you make a few modifications to suit your needs.
How to Add a Layer Mask in Photoshop?
As discussed earlier, Photoshop layer masking can help with hiding and showing layers. However, apart from that, it can be also used to base the masking on a particular transparency or selection. Finally, these can be painted carefully to hide specific portions and showcase the layers beneath it.
Steps to hide or show entire layer while masking pictures
Step 1: Unselect if any selected parts are there in the image by choosing Select > Deselect.
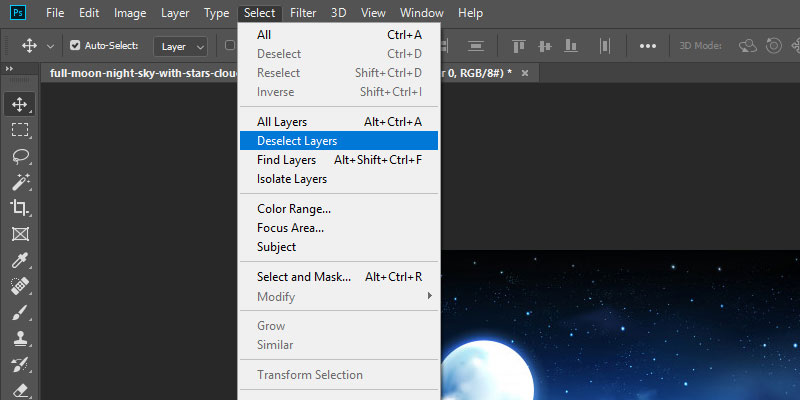
Step 2: Go to the Layers panel and choose a layer or group.
Step 3: For hiding the entire layer:
- Press Alt-click (for Win) or Option-click (for Mac)
- Click on Add Layer Mask
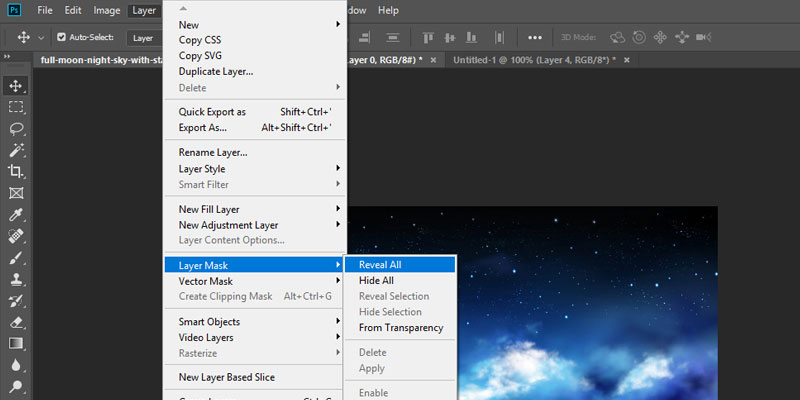
- Select Layer > Layer Mask > Hide All.

For revealing the whole layer:
- Go to the Layers panel and click on Add Layer Mask
- Now, select Layer > Layer Mask > Reveal All.
Steps to add layer masks for hiding only a part of the layer
Step 1: Go to the Layers panel and choose a layer or group.
Step 2: Choose the desired area for masking.
Step 3: Select the New Layer Mask present in the Layers panel for revealing
the desired section.
<OR>
Click on Alt-click (for Win) or Option-click (for Mac), and then select the Add Layer Mask button from the Layers panel to hide the selection.
<OR>
Select Layer > Layer Mask > Hide Selection or Reveal Selection.
Step 4: If you wish to edit the layer transparency further, then follow the below steps for creating a mask.
- Select Layer from the Layers panel.
- Now, click on Layer > Layer Mask > From Transparency.
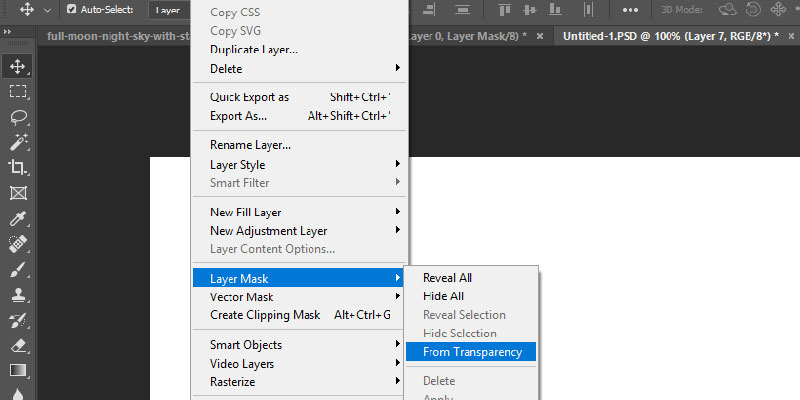
In this case, the transparency will turn into an opaque color, which will be hidden by the masking created newly. The color may vary depending on the filters and processing applied to the layers. The companies offering photo editing services widely use this technique for producing high quality image outputs.
Steps to apply a layer mask from another layer
To apply a layer mask from another layer, perform either of the following steps.
- Drag the mask for moving it from one layer to another.
<OR>
- Click on Alt-drag (for Win) or Option-drag (for Mac) for duplicating the mask and apply it from one layer to another.
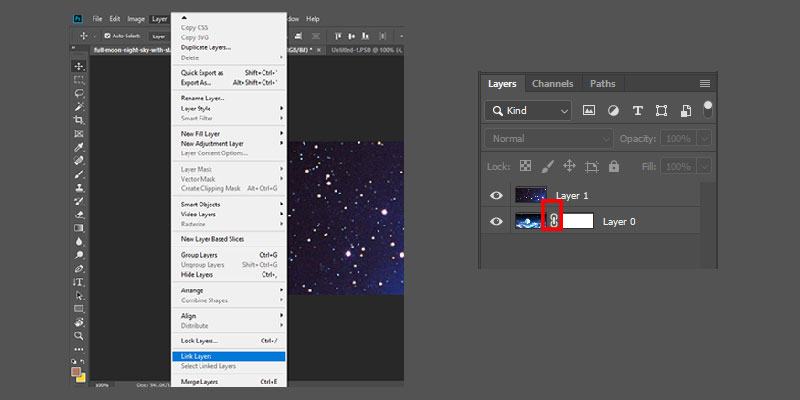
How to unlink the layer and mask?
A layer or group will be always linked to that of the layer or vector mask. This is also indicated by the link icon that is present in the Layers panel between the thumbnails. So, when you move either the mask or layer with the help of the Move tool, both move together. The unlinking basically helps with moving them and shifting the boundaries of the masking independently.
Here’s how you can do it.
Step 1: Go to the Layers panel and click on the link icon.
Step 2: For reestablishing it again, go to the Layer’s panel and click
between the thumbnails of layer and mask path.
How to disable or enable the layer masking?
Here’s what you need to do if you want to enable or disable the layer or vector masking:
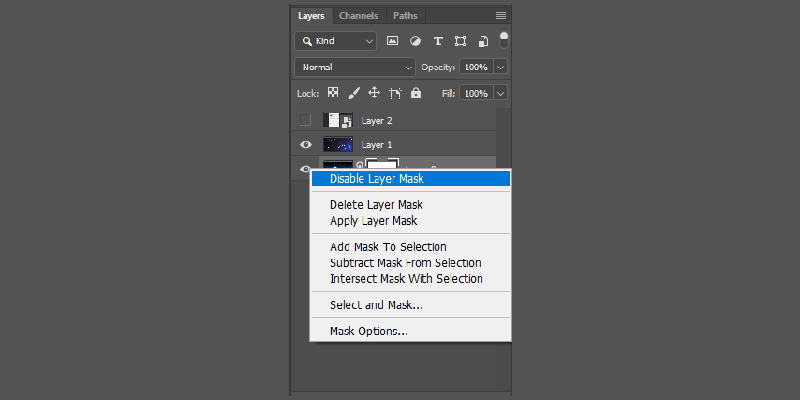
Step 1: Choose the desired layer in the masking which you want to enable or
disable.
Step 2: Go to the Properties panel.
Step 3: Now, click on the Disable/Enable Mask button.
<OR>
Step 1: Go to the Layers panel.
Step 2: Shift-click the thumbnail of layer mask.
<OR>
Step 1: Choose the desired layer you want to enable or disable.
Step 2: Select Layer > Layer Mask > Disable/Enable.
How to apply or Photoshop delete pixels using mask?
During pixel masking, remember that the pixels are not deleted but hidden. However, it is possible to apply or delete the hidden parts of the layer permanently. Below are the steps you need to follow:
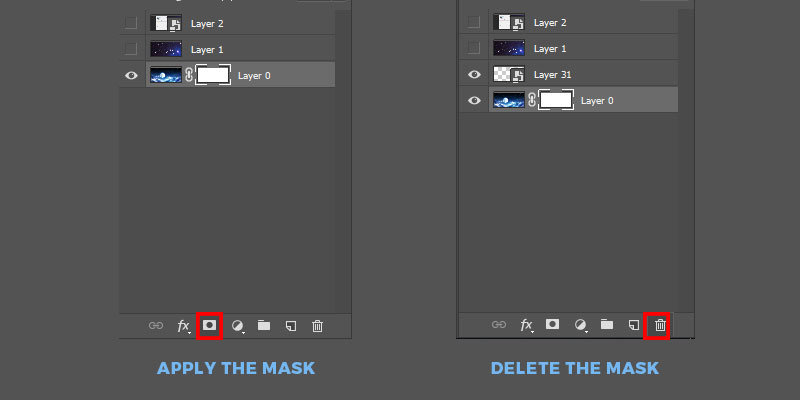
Step 1: Go to the Layers panel and select the desired layer.
Step 2: For applying the masking:
- Go to the Properties panel and choose the Apply Mask icon.
For deleting the masking:
- Go to the bottom of the Properties panel, and click on the Delete button.
Alternatively, the Layer menu can be also used to apply or delete the layer masks.
Conclusion
From this, we conclude that layer masking offers more flexibility. With it, you can easily hide different parts of the layer without even affecting a single pixel in the photograph. Besides, there is nothing permanent when you carry out image masking using Photoshop. It means you can redo and rework again if something goes wrong. This gives a lot of confidence to beginners while editing.
Alternatively, you can also choose a company offering photo clipping services. This option is suitable for those who are not interested in carrying out the task themselves. These companies usually have ample knowledge to accurately use a layer mask and produce the best outcomes through layer masking services.