The Image Processor application can be used for batch processing in Photoshop and to convert multiple files together. The tool allows you to process files without requiring you to create an action first and this is a mechanism that works in a different manner from how the Batch command works. When you use this application, you can perform the following operations:
- Get files converted to JPEG, TIFF, or PSD formats; you may also get files simultaneously converted to all these formats.
- Use the same options to get a batch of raw images processed.
- Get images resized as per chosen pixel dimensions.
- Incorporate a color outline and get files converted to sRGB; save them in web-friendly JPEG formats.
- Allow converted images to bear copyright metadata.
Notably, the Image Processor can be made to function smoothly with JPEG, PSD, and camera raw image files.
You may consider taking any of the following steps:
-
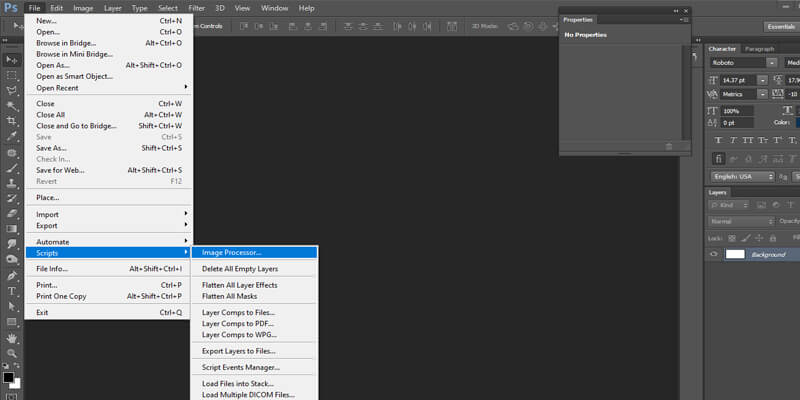
Select ‘File’, then select ‘Scripts’ and then go to Image Processor in Photoshop.

-
Select ‘Tools’; next select Photoshop and then click on Image Processor (Bridge).
-
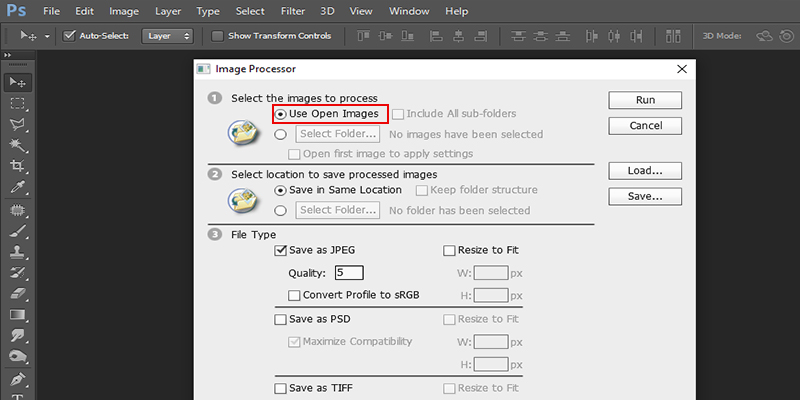
You can start by selecting the images that you have to process. Any open file can be processed for which you need to select a file-folder to process.
-
This is an optional step. You can choose the option “Select Open First Image To Apply Settings”. With this command, you will be to apply the same settings to every image.
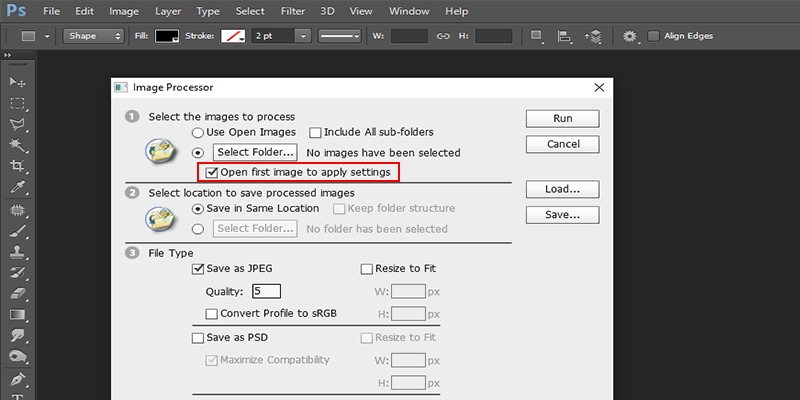
When you process a set of camera raw image files that are clicked under the same lighting conditions, you can modify the image settings in the first photo and then you can apply the same settings on the other images. It may happen that your working profile does not match the color profile of the file. In such a case, you can apply this option especially if you are working with JPEG or PSD source images. You can opt for a color profile on the basis of which you can get the first image as well as other images in the folder converted.
You should note that the Image Processer-enabled settings are temporary and are specific to the Image Processor only. Normally, you can use an image’s existing camera raw settings to process it unless you modify the settings in the Image Processor.
The following steps are involved:
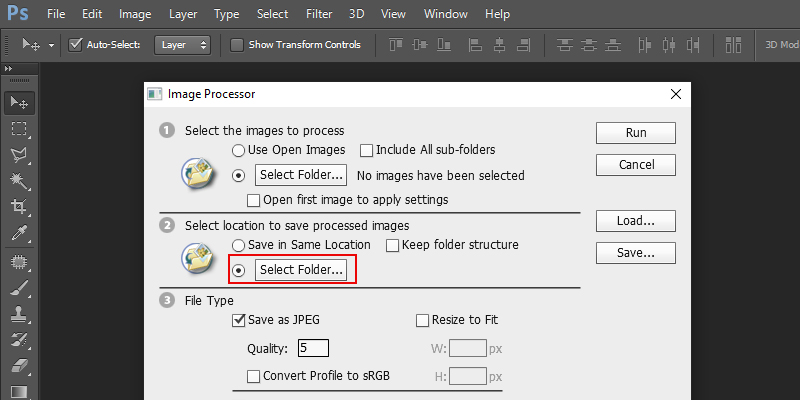
- Start by selecting the location where you need the processed images to be saved.
- When the same file gets processed several times, each file gets stored with its own name and overwriting does not occur.
- Identify the files and the options that you need to save.
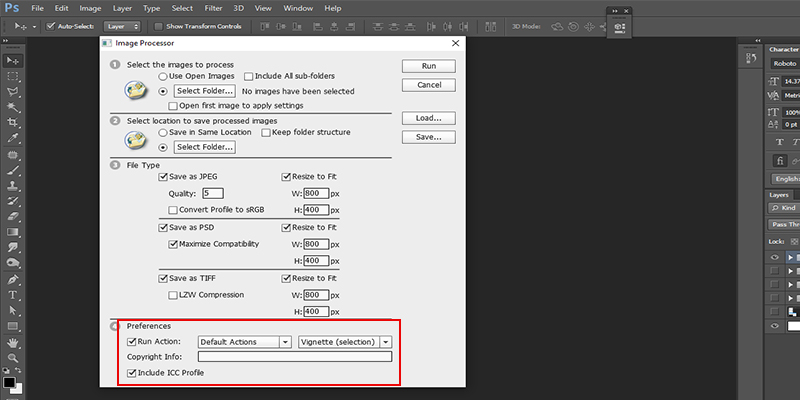
Here’s a list of options that may be useful for you:
- Save As JPEG
This allows you to save images in JPEG format within the destination folder.
- Quality
With this option, you can the quality of JPEG images between a scale of 0 and 12.
- Resize To Fit
Using this option, you can alter the width and height of images and make them fit within your preferred dimensions.
- Convert Profile To sRGB
This option allows users to transform color profile to sRGB. You should select the “ICC Profile” if you want the profile to be saved along with the image.
- Save As PSD
With this option, you can save images in PSD format in the destination folder.
- Maximize Compatibility
With this option, you can save composite version of a layered image in the target file.
- Save As TIFF
This option allows you to save files in TIFF format.
- LZW Compression
This is a compression scheme that allows you to save the TIFF file in compressed form.
Use other processing option carefully.
- Run Action
This option is used to run a Photoshop action. The action set is chosen from the first menu whereas the action is selected from the second menu. Load the actions in the Actions panel to make them appear in the menu.
- Copyright Info
This option allows you to include the texts that are entered in the file’s IPTC copyright metadata. The text that is entered actually overwrites the original file’s copyright metadata.
- Include ICC Profile
With this option, you will be able to embed the color profile in the files that you save.
Click Run.


Save the recent settings by clicking Save in the dialog box. Whenever you have to use these settings to process images, you can click load and then go to your saved settings in the Image Processor.
You can use the Batch command to run an action on an image folder. You can import and process several images with a single action if your digital camera or scanner comes equipped with a document feeder.
Note: Your third-party plug-in may not function during batch-processing if it was not made to import several documents simultaneously. You may contact the manufacturer for detailed information. PDF images from Acrobat Capture can be imported as well. When you process files in batches, you can choose to keep all files open, close them, save the changes or even save the newly modified files to a new location. When you save the refined images to a new location, you can create a new folder to save the processed images before you initiate batch processing. When you use multiple actions, you should generate a new action that would regulate all other actions. You can then apply the new action to perform batch-processing. When you want to batch-process multiple folders, you should create aliases in other folders that you want to process. Use the “Include All Subfolders” option. If you need better performance, you should minimize the number of saved history states and deselect “Automatically Create First Snapshot” under History.
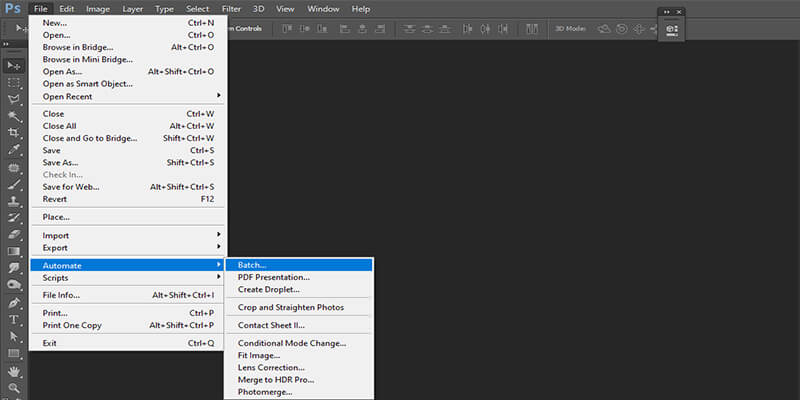
How can you batch-process files?
You can take one of the following steps:
-
Select ‘File’, then select ‘Automate’ and then choose the Batch option (Photoshop).
- Select ‘Tools’, then select Photoshop > Batch (Bridge).
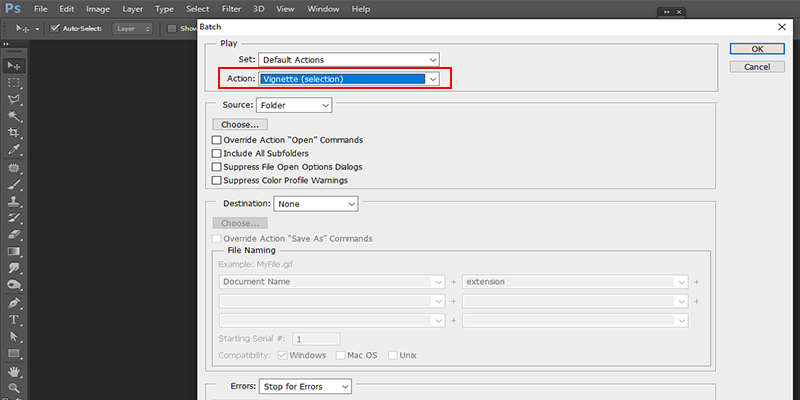
- Select the action that you need to use for performing image-processing from the Action
and Set pop-up menus. You will find those actions in the menu, which are found in the
Actions panel. In case, you are not able to find your action, you can opt for a
different set.
Files can be processed from the Source pop-up menu itself and you can make a note of the following Options available for you:
- Folder
With this option, you can process files in your specified folder. You can select ‘Choose’ to select the folder.
- Import
With this option, you can refine images directly from a scanner, digital camera, or a PDF document.
- Opened Files
With this option, you can get all open files.
- Bridge
This option will let you process selected files in Adobe Bridge. If you don’t select any file, the files in the recent Bridge folder get processed.
You are allowed to set options with regard to the processing, storing, and nomenclature of image files.
- Folder

Steps to Batch-process files into various formats in nested folders:
You should follow the same steps that you would take to process folders till you reach the Destination step:
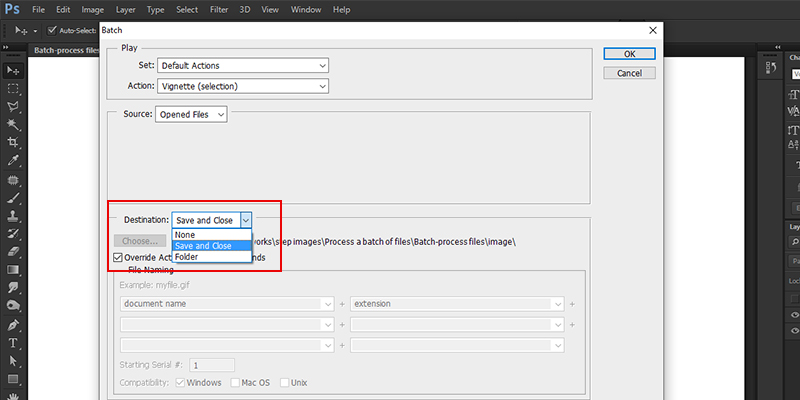
- Start by choosing “Save and Close” and specify the options for “Override Action”. Use
the "Save As" command to do the following:
- When the "Save As" step bears a filename, this name gets replaced by the name of the
document that you are saving; Notably, you must treat the "Save As" option in a way as
though it is saved without any file name every time.
You should note that you cannot use the Batch command to save files automatically and so the action should consist of a “Save As” step. This procedure can be used for image resizing, sharpening, and saving in their actual folders in JPEG formats. Users should set an action which features steps that allow for image sharpening and resizing and comes equipped with a “Save as JPEG” step.
How to generate a droplet from an action
When you use the droplet icon, you would be able to apply actions to several images or to an entire image folder that you pull to the icon. A droplet can be saved on a disk or on the desktop itself.
Actions form the foundations for droplets. In other words, you should generate the intended action in the Actions panel before you generate the droplet.
-
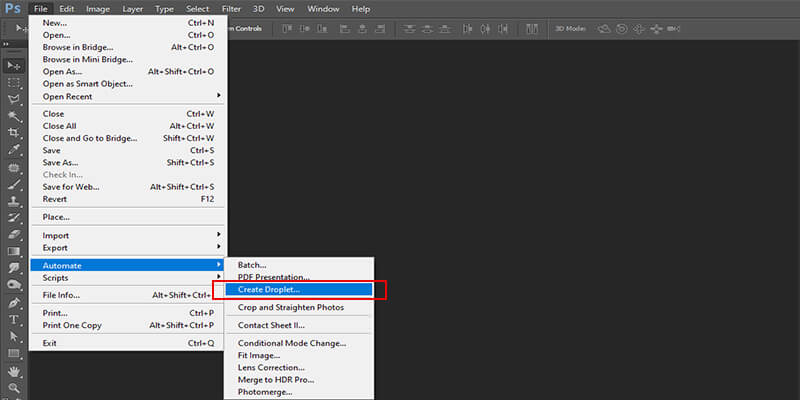
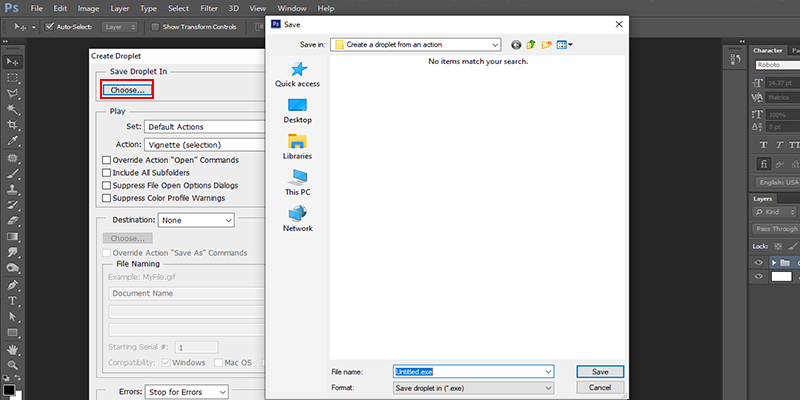
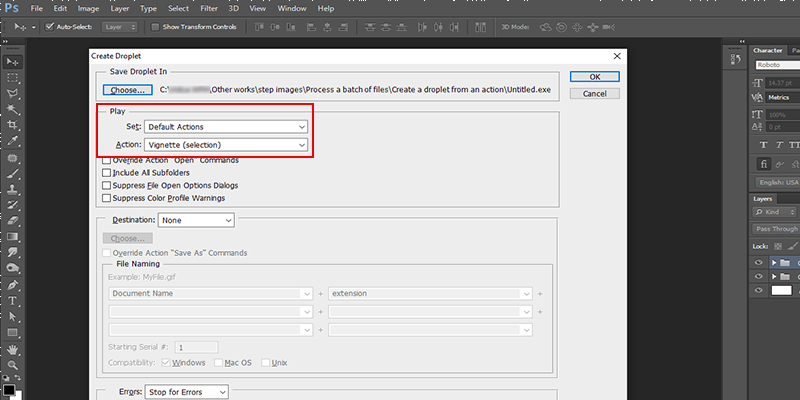
You can begin by choosing ‘File’, then “Automate”, and then choose the option “Create Droplet”. You should decide where you should keep the droplet saved. Select “Choose in the Save Droplet In” option in the dialog box and access the location.
- Click on the Action Set and specify the action that you want to use within the Set and
Action menus. Simply put, you must select an action in the Actions panel before you
preselect the menus in the dialogue box.
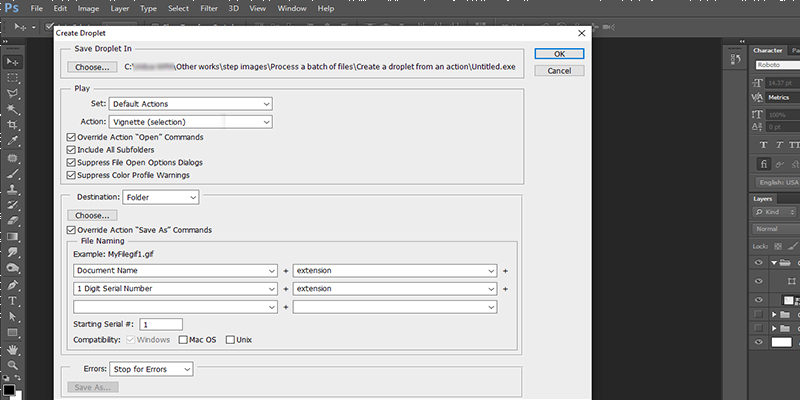
- Determine options for image processing, storing, and file naming.
Cross-platform droplets: What you should know
You should consider the following compatibility issues when you create droplets for Mc OS and Windows:
- When you shift a Windows-based droplet to Mac OS, you should pull the droplet on your desktop’s Photoshop icon. Photoshop keeps the droplet updated in Mac OS- compatible droplets.
- Filename references do not have compatibility between operating systems. If a file or a folder name gets referenced in an action step, the execution will come to a halt and you would be prompted to provide a filename.
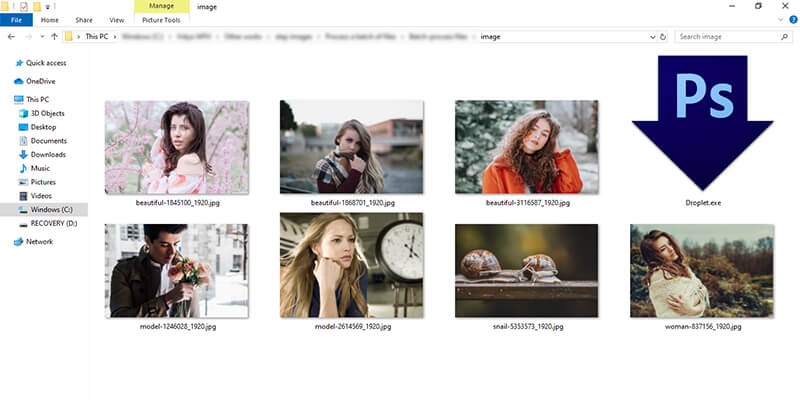
Step to use a Droplet to Process a file
- Pull a folder or a file to the droplet icon. Photoshop gets started if you were yet to
start it.
Options for batch and droplet processing
You should set the following options in the Droplet as well as the Batch dialog boxes.
Override Action "Open" Commands
This would ensure the processing of files that you chose in the Batch command without having to open the file that you have specified in the Open command. If there’s an Open command in the action, which opens a previously saved file, the Batch command will process the file that was used to record the Open command.
So if you want to use the option, there should be an Open command in the action. Else, you will not be able to use the Batch command to open the files that you want to be batch-processed. You may choose to deselect this option if you preset an action to work on an open file or if the action features Open commands for particular files that the action needs.
These are the main options within this category:
- Include All Subfolders
This is used to process files in subdirectories of a particular folder.
- Suppress Color Profile Warnings
This would turn off the showcasing of messages related to color policy. This comes in handy if you are presetting actions on raw image files. The previously set settings will be used.
-
Destination menu
With this option, you will be able to determine the location where you want to save the processed files.
-
None
With this option, you can leave the files open without having to retain the changes.
-
Save And Close
With this option, you can save files in the existing location while allowing for overwriting of the original files.
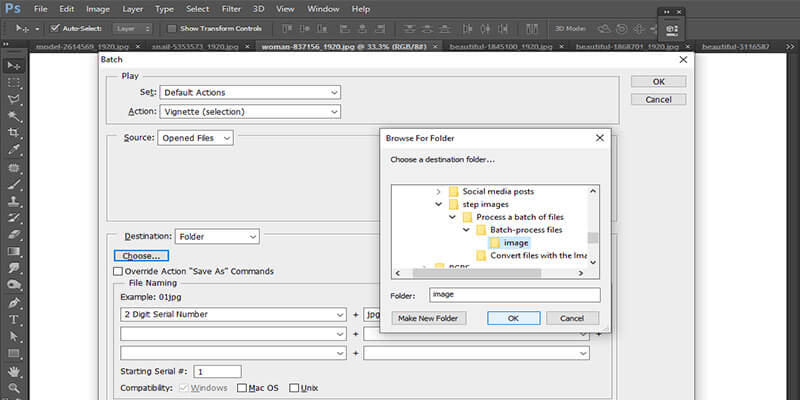
-
Folder
This option allows users to save processed files in a different location. You need to click ‘Choose’ to set the destination folder.
-
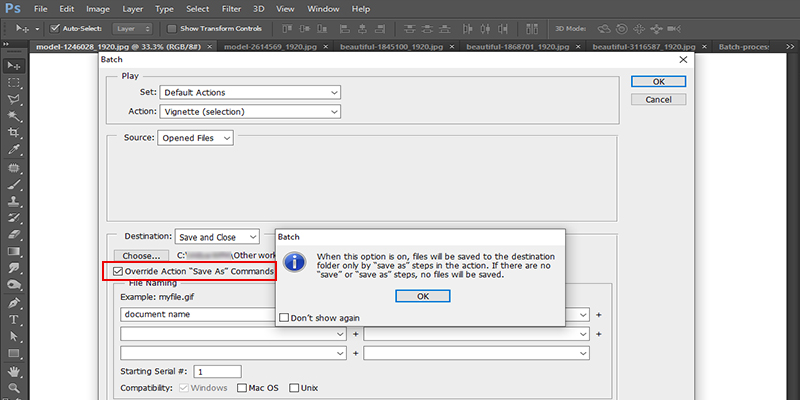
Override Action "Save As" Commands
With this option, you would ensure that processed files get saved to the destination folder that you have specified in the Batch command or in the original folder when you go for the Save and Close option. The files can be saved either in their original names or in the names that you suggested in the Batch dialog box’s File Naming section.
In case you don't opt for this option and the action consists of a Save As command, you will save your files in a folder that’s specified by the action’s Save As command, instead of the folder that the Batch command specifies. Additionally, if you don't go for this option and the Save As command specifies a filename, the Batch command will end up overwriting the same file every time an image gets processed.
This option will become activated if the action contains a Save As command. Else, you can’t use the Batch command to save the processed files.
Note: What you should note is that a few Save options may not be accessible in the Batch or Create Droplet commands (such as JPEG compression or TIFF options). If you want to use these options, you should first preset a Save As step in the action that features your preferred options. After this, you can apply the Override Action "Save As" Commands option to ensure that you save your files in your predetermined locations. Photoshop does not consider the filenames and path that are specified in the Action's Save As command and retains the Save options and new filename that is specified in the Batch dialog.
- Compatibility
With this option, you can make sure that filenames are compatible with Mac OS, Windows, and UNIX operating systems.
- Error menu
With this option, you can specify the error handling process.
- Stop For Errors
This option would allow you to pause the process until the error message gets confirmed.
- Log Errors to File
This option would allow you to record errors without suspending the process. If errors get logged to a file, you will see a message post processing. If you wish to review the error file, you should open it with a text editor after you run the Batch command.
Conclusion
So this was a detailed instruction about how you can efficiently and effectively use Photoshop’s image processor tool and how you can perform batch photo processing successfully. We hope you can now use the tool successfully. If you have any query or need help in batch photo editing get in touch with us.