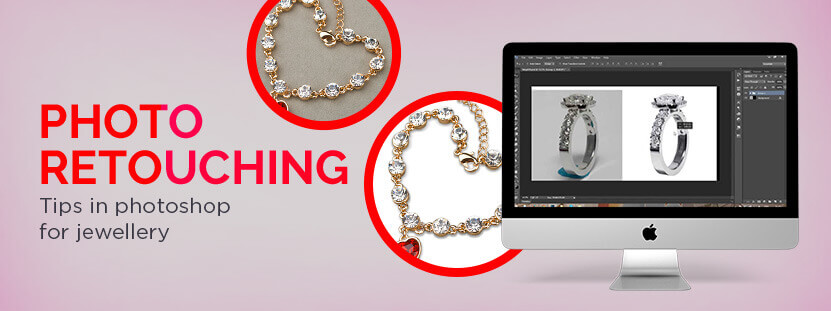
Jewelry photo retouching is the ultimate solution for jewelry business owners to stand out in the market. The industry hugely relies on visual grace. So, if you want your jewelry images to stand out, make sure that they are displayed in their best form.
Download PDF format of this article here ! Download
To edit and retouch your pictures, you can use the most renowned software, i.e., Adobe Photoshop. Photoshop is a boon to this domain and can be used not just to remove any imperfections but also to display the pictures in a magnificent way. Contrast settings, tone, brightness, and many other details can be altered to make the image perfect in all aspects.
This being said, Jewelry retouching techniques and the entire creative photo editing process is not easy. A meticulous approach has to be followed while retouching every piece of jewelry, regardless of its size.
Types of Photoshop Tools used for Jewelry Photo Editing
-
Standard Tools
The standard Photoshop tool helps to enhance the overall image appearance by adjusting the brightness, contrast, etc.
-
Brush Tools
These tools will help you to target specific areas without affecting the entire image. As compared to the standard tools, brush-based tools are easier to use and allow more control over editing.
Best Photoshop Hacks for Jewelry Photo Retouching
Adobe Photoshop is one of the best software for retouching an image.
Here are some effective jewelry photography editing tips to create a high-quality jewelry image.
-
Adjust the color balance of the image
The color balance option in Photoshop helps to adjust the jewelry color in the image to make it look more appealing. One can choose the desired color to be highlighted or used in the background.
- Firstly, open the editing software and import the image that you want to edit.
- Following this step, go to Image > Adjustment > Colour Balance
- Choose the preferred colors with the sliders in the box and select OK when done.
-
Balance the contrast or brightness
These settings can easily make the image more impactful.
Photoshop does a fantastic job when it comes to adjusting the contrast and brightness of an image. Just follow the steps mentioned below:
- Import all the images that you need to edit on the Adobe Photoshop.
- Make a fresh layer by selecting the adjustment layer.
- Then click on contrast or brightness.
- Make modifications according to your preferred contrast or brightness level.
- Click on OK to implement the modifications.
You may also choose to create an adjustment layer and work underneath it. On clicking the half-black and half-white circle of the pallet, the brightness and contrast adjustment layer will be created.
-
Creating natural shadow effects
When you edit jewelry images in Photoshop, you must produce a natural shadow effect to enhance the image's appearance.
While unwanted shadows can be a nuisance, it is important to use the natural ones through different shadow effects. This realistic impact can lead to an increment in sales, as it adds to the depth of the subject. The natural shadow effects also entice the shoppers, directing their attention to an intended area.
Reach out to the experts for photoshop jewelry shadow creation to create the needed impact. The experts usually have the right understanding of various photoshop retouching tools to create the best effects in the images.
-
Adjusting the levels
It is important to adjust the exposure of the image, which can be carried out with the adjustment layer.
- Choose the image.
- Select the image from the menu bar.
- Adjustment > Level
- Select OK to apply the changes.
To adjust the level of the exposure, a histogram box with the sliders appears. Adjust accordingly and then select OK to save the changes.
-
Removal of unwanted spots and dusts
Unwanted spot removal is a crucial step often implemented by the photography post-processing service providers. Clear and stunning visuals are extremely important when it comes to jewelry images. So, to make the image more attractive, you need to ensure that it does not have any flaws.
Sometimes, when the product is being photographed, the spots go unnoticed. But, when the images are being processed, these spots need to be consciously removed. To do the same, Adobe Photoshop has a few tools like Spot Healing Brush tool, Clone Stamp Tool, and Healing Brush tool.
Jewelry retouching takes time and attention to detail. The aim is to create something that looks exquisite and flawless. Adobe Photoshop has various tools that help to create the best versions of jewelry photographs.
-
Resolution upsizing of jewelry pictures
For resolution upsizing, check out the steps given below.
- Initially, open the image file in Photoshop
- Select ‘Image Size’ from the bottom section of the Image Menu
- The dialog box for image size would open up
- Check the ‘Resample Checkbox’
- From the menu, select ‘Preserve Details (Enlargement)’
- After completing the aforesaid process, navigate to the Resolution field
- Key in the resolution which would enhance the aesthetic appeal of image optimally
- The preview of the image with all changes done would be visible in Preview Window
- If the outcome is satisfactory, you can move ahead
- You can also conveniently upsize many images, all with the same size, at one go
- The custom size can be saved in Photoshop CC
- For this, choose ‘Save Preset’ within the ‘Fit To’ field
-
Neutralizing the camera shake effect
While capturing images of jewelry, the photographer’s hands may shake. Handheld camera stabilizers can minimize the distortion to a great extent. However, there's no guarantee that it would be completely perfect.
Besides, if an image is not captured in natural/ sufficient light, dark blurred/ hazy patches may also appear. Jewelry images with insufficient clarity may not trigger proper sales.
So, here's what you need to do to retouch a jewelry image for reducing the blur caused due to shaking or low light.
- Image can be polished from Filter Menu wherein ‘Shake Reduction’ option is available
- Apply it and the option would spontaneously carry on mess analysis
- Other messes created during image correction also gets cleared
- While the image is corrected, a progress bar would appear
- You can also preview the image getting refined to see the correction in progress
-
Layer-based flexible retouching
You can carry out jewelry photo editing immaculately with the help of layers. You may clone images, apply various filters and generate many versions of the photograph. Besides, the original image does not get damaged in any way.
Adjustments can be applied to selected portions of the image as per the requirement. This offers unparalleled flexibility while retouching the image.
If you are undecided about a particular aesthetics, you can experiment with various looks. Layers can help to produce many retouched versions of the image. You can easily choose the one that best complements your needs
Photoshop Actions
In Photoshop, you can go about experimenting with various photoshop actions. It might be possible that you are running short to devote time for retouching jewelry images.
In Photoshop, predefined tasks are available as batches provided for fixing common problems that occur during retouching. You can fix various issues related to overexposure, softening of skin tones, or adding more glamour to an ordinary image. You can easily add vintage effects, sepia tone, bleached effect, etc. to the jewels image.
How to photoshop jewelry images?
The following steps will give you a clear idea regarding the editing of jewelry images in Photoshop.
-
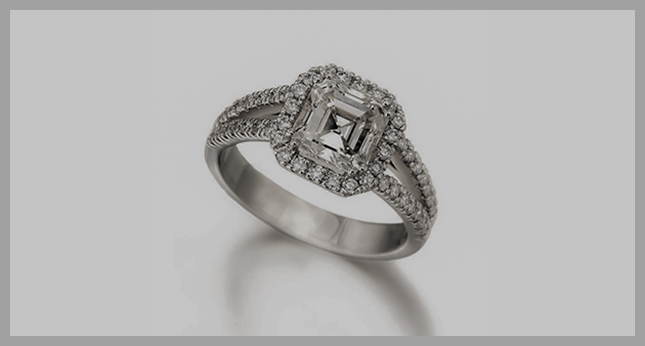
Step 1
- The jewelry images which you want to edit has to be opened first in Photoshop.
- Photos shot under normal light may appear dim, hazy, bland, and less shiny

-
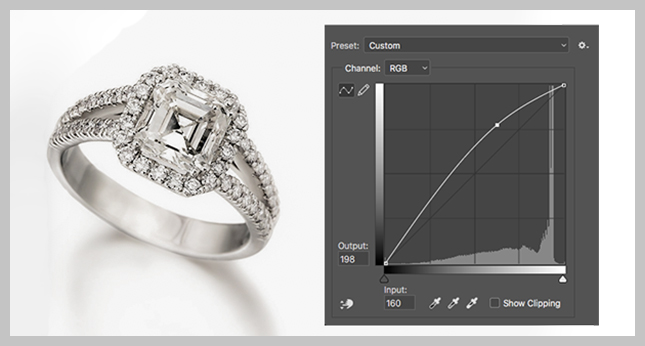
Step 2
- Navigate to ‘Picture ->Adjustments ->Curves’
- Enhance the lighting exposure of the image by grabbing the line’s upper part
- Move the upper part more towards the top
-
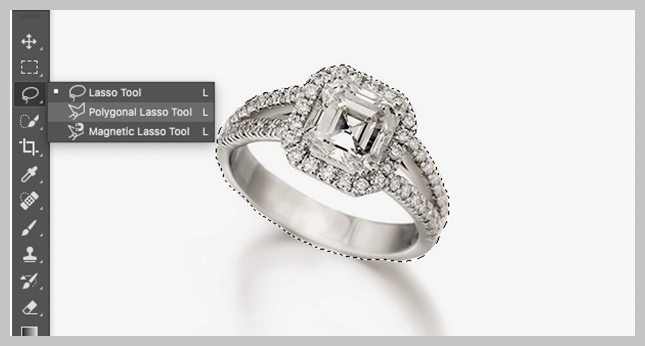
Step 3
- Click on the Polygonal Lasso tool ( you may choose other optional tool too)
- Next, move the tool across the background item for cutting it and press Ctrl+J on keyboard
-
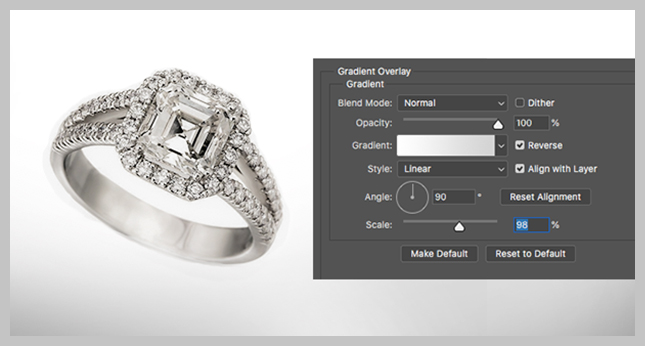
Step 4
- Create a fresh layer and then get this filled with shade of your choice
- Get this layer moved under the layer item which you had cut out
- Double click on the same
- The gradient background shade that has to be set must vary between white to light gray
-
Step 5
- The item has to be selected again
- If the shade is silver, then the saturation has to be lowered further
- Navigate to ‘Picture ->Adjustments ->Saturation and Hue’ to accomplish this
-
Step 6
- Navigate again to the Curves section
- Move the curve in the upward direction to make the item brighter
-
Step 7
- Navigate to ‘Filter ->Sharpen ->Little Sharpen’
- Clicking on the same would lead to sharpening of the jewelry image
- The filigree and other details would become clear and the look would be enhanced
-
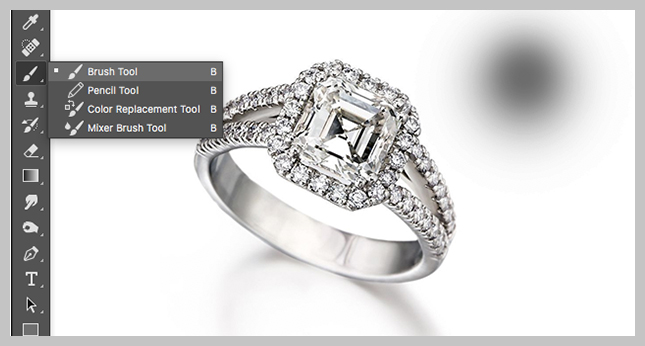
Step 8
- Create a fresh new layer
- Go to Brush tool and then opt for gray shading
- Make a dot at any location
- Navigate to Edit ->Transform ->Fatten for scaling the brushed dot
- Place the dot under the jewelry image and then reduce the capacity
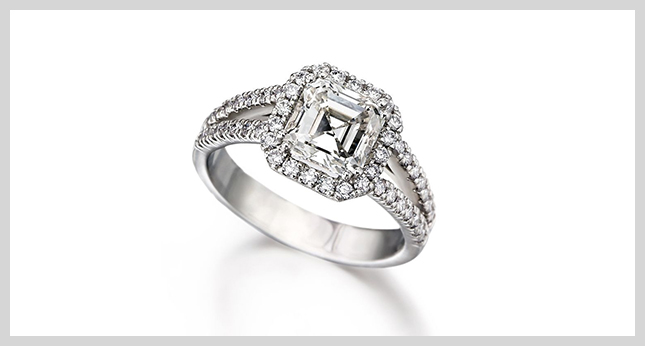
In this manner, you would be able to retouch any jewelry item and can eliminate scratches, spots, dust particles etc. with photoshop's help.


Conclusion
If you have reached until this point, by now, you have got a fair idea about the best hacks for editing jewelry photos in Photoshop. Well, there are many ways to produce the best-edited image; the trick is to keep experimenting. And these tips and tricks will surely help make your workflow more efficient. So get started and make the best use of Photoshop while you retouch those jewelry images.
Alternatively, you may turn to professional assistance in case you have too much to do. You may offload some of your editing gigs to an expert photo editing services provider. These expert agencies not only retouch jewelry photos in the best way, but also have a super fast TAT.