Photo manipulation, retouching, or changing is one of the vital aspects of photo editing. There are several instances where the color of a specific object or the overall image’s color scheme has some discrepancies. In such cases, manipulating the color to make the image look perfect is the only way. This article will give all the details of manipulating colors in Photoshop, using its advanced tools.
Stick with us till the end. Get to know the Photoshop color manipulation steps involved. As well as the tools used for color manipulation. Hope this insightful article helps all beginner or inter-mediate photo post-processing professionals fine-tune their color manipulation workflow.
How to change the color of an image in Photoshop?
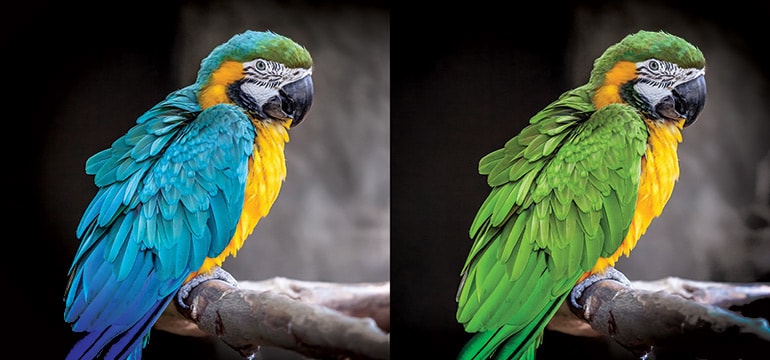
With photo editing, it’s always best to go deeper with color. Because vibrance, hue, and saturation are the leading trio that makes the color of an image perfect. Photoshop tools, mainly hue, saturation, and vibrance, if leveraged carefully, can make the viewer connect with an image.
One can drastically alter the color tone of the elements lacking in color. Such as enhancing the sky color, making the seawater bluer, or turning the brown lawn grasses greener. In the following segment, let’s take a quick look at the steps involved in changing an element’s or object’s color using Photoshop tools.
These steps can be the starting point for any beginner or novice in image post-processing.
- Step #1. First, go to the menu tab in Photoshop. Click the drop-down and select the Color Range. This will create a new layer mask.
- Step #2. Next, try different shades of the target color. Go to the Color Range window. Choose the eyedropper tool in the middle (on the right side with a “+” sign). Select the tool and start sampling the target color. This increases the selection range.
- Step #3. Use the Fuzziness Slider to refine the selection or select more colors. Click OK when you get an accurate color selection.
- Step #4. Go to the Layer menu and click Open. Select New Adjustment Layer > Hue/Saturation
- Step #5. Uncheck the Use Previous Layer to Create Clipping Mask option. Then press OK to save the Hue/Saturation adjustment layer with the mask.
- Step #6. Select the newly created masked Hue/Saturation layer. Go to the Properties menu and select the shades (Red, Cyans, or Blues) to be edited, from the second drop-down. Now, adjust the Hue and Saturation sliders to an optimum range. Click OK if the desired color tone is achieved.
Photoshop tools for manipulating colors
-
Hue/Saturation tool
This tool helps in changing the intensity and shade of different colours in the image. Also with this you can select various ranges from among the top menu.
Simply by clicking hand icon and then dragging side wise, saturation can be altered. Holding CMD/CTRL and dragging too can change the hue.
-
Vibrance tool
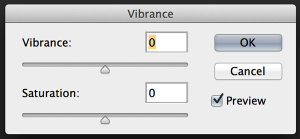
Vibrance is a highly effective colour-augmenting tool used by digital image editing companies for targeting less-saturated colours in images.
sing this tool can give amazing results with portraits as you can enhance cloths and at the same time be spared from overly saturating the skin tones.
-
Targeted adjustment tool of camera raw
This adjustment tool avails comprehensive options for controlling colour and tone. It operates by focusing on various ranges of colours in an image. Thus this is one of the favorite tools for many photo editing companies.
On right clicking the tool, you will see five parameters; you can alter tones, target colours according to luminosity, saturation or hue and conversion to Mono is also possible.
Once you choose the elements to adjust, just click the specific colour on your photo and by dragging up and down you can change it. Specific colour saturation can be easily boosted with this. It helps even better when certain colours are to be made lighter as in case of a dull landscape, like where yellow and green are to be diluted.
-
Gradient map
Using Gradient Map, a mix of two or even more colours can be applied to the tonal assortment of a photo.
You can add Gradient Map as an adjustment layer and click the preview for entering the Gradient Editor. For changing the colours, double-clicking has to be done on the boxes. On finding a blend that you like, try different blending modes and opacities of the layer.
Photo editing is a specialized role that professionals proficient in the use of Photoshop and other sophisticated software can perform while living up to your expectations. Companies delivering high-end photo manipulation services appoint expert photo editors who come with a wealth of experience in the field and are familiar with top photo editing software.
Checklist for manipulating colors in Photoshop
- Use a calibrated and profiled monitor. Otherwise, the outcome may appear different in different monitors and in printed form.
- Apply adjustment layers to alter your image’s tonal range and color balance. You can make repeated tonal modifications without having to modify data permanently from the image layer. When you use adjustment layers, image file sizes will increase and you will need greater RAM.
- You can also make adjustments directly on a layer. But some information may get discarded when you make a direct adjustment on an image layer.
- It is a good idea to work on a 16 bit image than on an 8 bit image to prevent data loss to a considerable extent. Information loss is higher in 8 bit images compared to 16 bit images.
- Create a copy of the original image. This would allow you to use the actual image in other projects.
- Eliminate flaws and marks before making adjusting color and tones.
- Make use of the Info and Histogram panels as they would provide you with feedback on your adjustments.
- You can do sampling or utilize a mask to apply color and tonal modifications to a certain section of a photo. You can apply color adjustments to single layers. With this approach, you will apply effects only on the elements on the desired layer.
Changing or manipulating the color of an image or a subject is done for several reasons. It can be for rebranding purposes, marketing campaigns, or simply to enhance the beauty of the image. Whatever the reason, leverage the potential of Photoshop and its feature-rich tools to give any color you want to an image.
Hope this resourceful blog has been able to give you all the necessary details about color manipulation. With the Photoshop photo retouching tools, steps, and tips mentioned, keep experimenting with the art. Alternatively, you can collaborate with a professional image editing service providers. These expert photo editing companies are backed by highly experienced and skilled professionals.