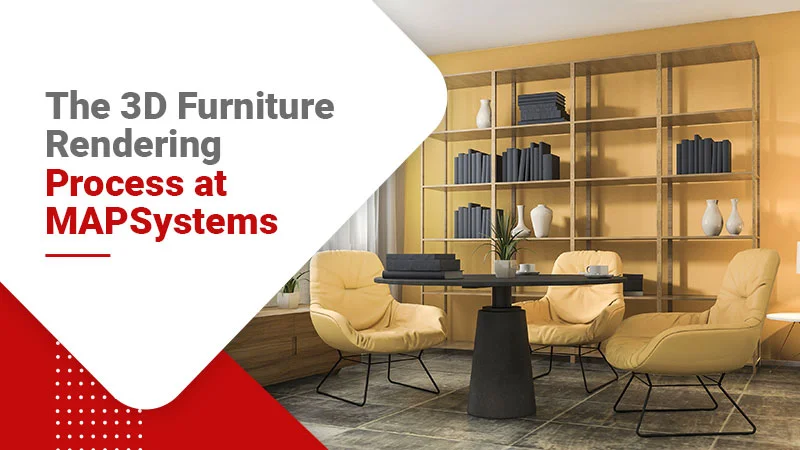
3D furniture rendering is an excellent option for those engaged in the design and manufacturing of furniture. With 3D renders, you can showcase the best features of your products and bring more sales. So, if you need help developing three-dimensional furniture renders, we can recommend our 3D furniture rendering services.
At MAPSystems, we have a team of professional 3D designers who are qualified and experienced in the domain. They employ cost-effective processes to carry out 3D furniture rendering and produce photorealistic outcomes.
Using 3D furniture renders can have numerous benefits for your business. However, certain things in the furniture rendering process can impact the overall cost of your project. Here, we’ll help you become aware of those things to keep your cost and turnaround times minimal.
We’ll discuss the 3D furniture rendering process we generally use at MAPSystems, no matter whether your project is small or big. Keep reading!!
-
Gathering information about the project
Despite being aware of the industry's best practices and standards, we need all the information regarding creating 3D models or furniture 3D renders. Providing as much data upfront can reduce the chances of revision, thereby minimizing the project's cost.
Here’s a list of the various things that make our workflow seamless:
-
Mood Boards
We create mood boards for lifestyle images or have reference images ready to support development.
-
Notes & Descriptions
The more notes or descriptions you provide for the expected outcomes, the better.
-
AutoCAD Files
Providing .dwg or similar file types for designs or related parts like lighting, hardware, USB ports, etc., can greatly help.
-
Finish Samples
Offering high-resolution samples can help us to create the exact match.
-
Existing 3D Models
We can work on 3D models of any format and carry out the needed adjustment.
The above information isn’t available to us all the time. However, our project manager and 3D artists piece every limited given information together to work on the projects. The speed of furniture rendering creation usually depends on the information we receive. We encourage figures and numbers instead of verbal descriptions.
-
Mood Boards
-
Offering quotes and finalizing prices
Before finalizing the project, we can provide you with quotes upon request. We consider the source files, project requirements, time needed for project completion, etc.
Besides, various aspects of furniture rendering can influence the project's cost. Knowing them beforehand will help you to plan appropriately and reduce extra expenditure. Here’s what the different aspects of furniture rendering are:
-
Use of Upholstery
Upholstered goods will need more time for 3D modeling than case goods. It includes custom stitching, tufting, throw pillows, slipcovers, etc.
-
Backgrounds Details
Developing 3D renderings on white backgrounds, otherwise known as silo image, are cheaper than creating lifestyle images that involve a furniture product displayed in a room having complementary décor.
-
Complexity of Finish
Creating a simple, natural finish will take less time than creating an antique finish that is rub-through and involves wire brushing.
-
100% Finish Match
If you need us to create the exact finish match, we’ll need the precise texture references for the furniture models. If the desired one isn’t available, we can build it based on your specifications or reference images.
-
Similar 3D Models
Rendering several furniture pieces from the same collection will be more cost-effective than rendering from different groups or collections. We can alter, scale, or stretch similar elements to streamline the 3D furniture modeling process.
Besides, you can rest assured that our quotes are available for free. If you need help keeping your project's cost to a minimum, our project manager can assist you with the same. They can suggest where to cut down the corners, how to creatively use the existing assets, and how to arrange the files.
-
Use of Upholstery
-
Creating 3D models
This is the most crucial step in the process of 3D furniture rendering. However, since the process is time-consuming, we check a few things before starting.
-
If there is any unnecessary information
CAD files are likely to contain lots of information. Some information will be relevant, while some will be irrelevant. In that case, you need to find the irrelevant information and remove them before sending the files for 3D furniture modeling. It will ensure that we don’t waste time creating unnecessary elements.
Our project managers will also audit the files before sending them to our 3D modelers. If we are confused about something being omitted, we’ll ask you. Skipping unnecessary information can also help to keep costs down.
-
If the reference files reflect the latest
version
Revisions are common to any development process. So, if changes are made to your design, you must save it, even if it’s minor. Not saving the changes will result in the 3D model being created with incorrect specifications.
-
If physical requirements are clearly expressed in the
source files
Project drawings don’t always contain every detail about the industry-standard design specifications. Assuming that we would include them while working on the project would be unfair since it is hard to predict what you know about your domain. That’s why all physical details must be clearly stated.
We mostly find the below details omitted:
- Score lines
- Hardware placements
- Edge chamfers and radii
- Drawer gap spacing
-
If there is any unnecessary information
-
Creating 3D scenes
After creating the 3D furniture models, we start developing the 3D scenes. The 3D scene is essential for developing the final renderings. It mainly involves three steps:
-
Step 1: Importing the 3D models
We import the three-dimensional models of furniture and start placing the objects. We can move to the next step if we have created the models. However, if you provide us with the models, then there are a few things you should consider. Check if:
- 3D models are available in a standard format
- Different units of 3D models were created in
- Availability of any physical model attributes that need a texture for representation
-
Step 2: UV mapping and material creation
In the UV mapping process, our 3D artists instruct the 3D furniture rendering software on how to use the 3D texture for the final image renders. This can further help control texture seams, scaling, or grain direction. The process is carried out manually. However, we employ a few custom 3D tools to speed up the process.
-
Step 3: Lighting and test rendering
After the UV mapping process, we create 3D materials and instruct the 3D program on how the texture should look in the final 3D renderings. This process can take a long time, depending on how similar you want the material to look, like the reference image.
Here are a few examples of the different material attributes developed in the furniture rendering stage:
- Transparency
- Glossiness
- Reflectance
- Grain texture
- Rub-through materials
MAPSystems has an extensive library of photorealistic materials that can be used for projects. Besides, we can also adapt to existing assets to meet your project needs within a short time. If you need the materials to be a 100% real-world match, it will involve significant test renderings and revision or approval cycles.
Since furniture 3D rendering looks much like real-world furniture photography, our 3D designers use a simulated camera and digital lights and even work on different aspects like perspective correction, the focal length of the lens, perspective correction, etc.
Each project we handle will undergo a test-rendering stage. In this stage, we’ll create low-resolution images to be further sent for feedback. Do know that the test rendering won’t guarantee revision or no revision but is best for avoiding significant modifications.
-
Step 1: Importing the 3D models
-
Final rendering and post-production
After test rendering and adjustments, we’ll submit the project for the network rendering purpose at full resolution. Based on the scene file’s complexity, the stage may also showcase a significant aspect of the project cost.
The largest rendering cost will be for animations, the next will be for lifestyle images, and the least will be for renderings on plain white backgrounds. After rendering the final images, our 3D designers will add finishing touches using software like Photoshop.
All the steps mentioned above are commonly employed for the furniture rendering process. However, we believe that each project is unique, so the steps are unique for each project scope.
At MAPSystems, we’ve worked on thousands of commercial 3D furniture renderings and residential 3D renderings for clients. With a clear work plan and objective in mind, we have successfully developed high-quality, photorealistic 3D furniture renderings without fail.
By serving the domain for over a decade, we’ve also gathered rich experience and know what’s in demand. So, visit our website for more information and avail our 3D design services if you wish to bring your furniture design concepts to life.