If you are new to Photoshop, here are certain guidelines that can be of help for you, especially if you often struggle dealing with shapes of the photo your capture. Correcting perspective using Photoshop requires thorough practice and expertise. The versatile photo editing tool enables users to change the shapes of images, where the dimensions and proportions need to be modified.

Take this instance. You had clicked an image with a surface area 5” by 5”. However, when you view the image, you find that it is looking slightly rectangular. Before you use the image in your project, you need to get the image back to a square shape. You may think of simply cutting off an edge, but it will not work out. Trimming the image will actually result in a reduction in the size of the length or breadth. It will come under 5”, which will again disturb the image. Correcting perspective in Photoshop enables you to deal with these issues.
Read on to know how to deal with these issues. This is one among the many steps that professionals offering photo editing services follow.
-
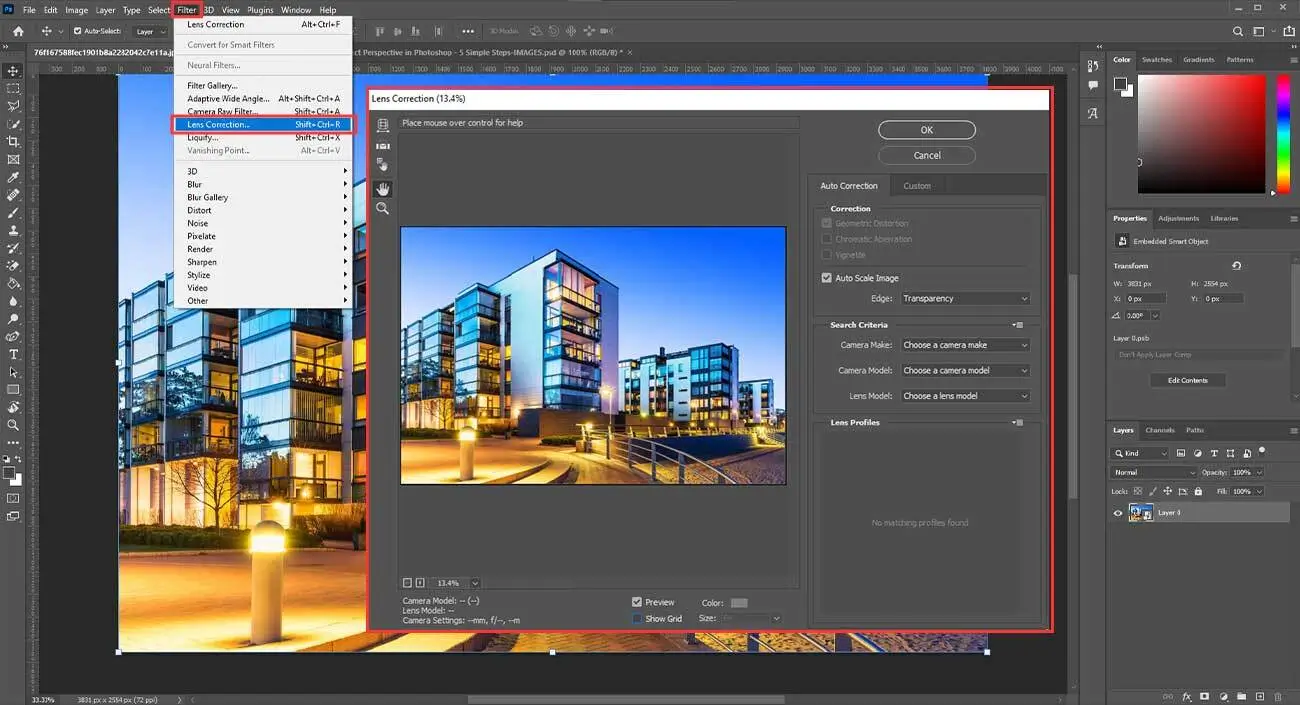
Step 1: Start the process

To start with the process of correction in perspective tool Photoshop , you need to first click on the ‘Filter’ option. Go to ‘Lens correction’ and then you will come across an option called ‘Correct Camera Distortion.
-
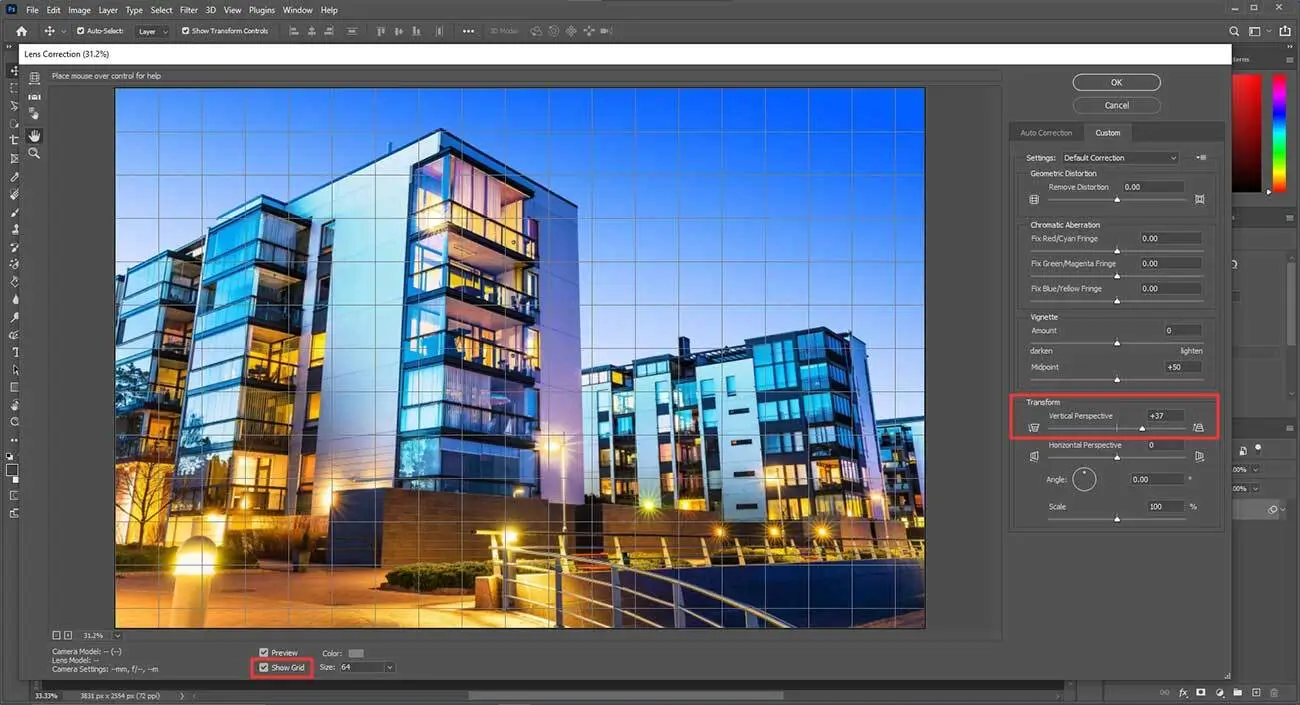
Step 2: Make necessary adjustment
Check out the ‘Show Grid’ option and make necessary adjustments in the size of the grid. It should be able to determine the straightness of the borders in the image. You will find the ‘Vertical Perspective’ option, which will do away with these issues. It is possible to increase the width by dragging it to the left. You can easily fix the incorrect perspective in this process.
-
Step 3: Lens distortion removal
However, incorporating these changes may result in certain geometric distortions in the image. In this step, you need to work on these distortions. The edges of the subject may look curled and it may suffer barrel distortion. You will find the slider called ‘Remove Distortion’. This will help to eliminate this problem. It may not be possible to eliminate the distortion completely, but you will be able to modify the image to a considerable level.
-
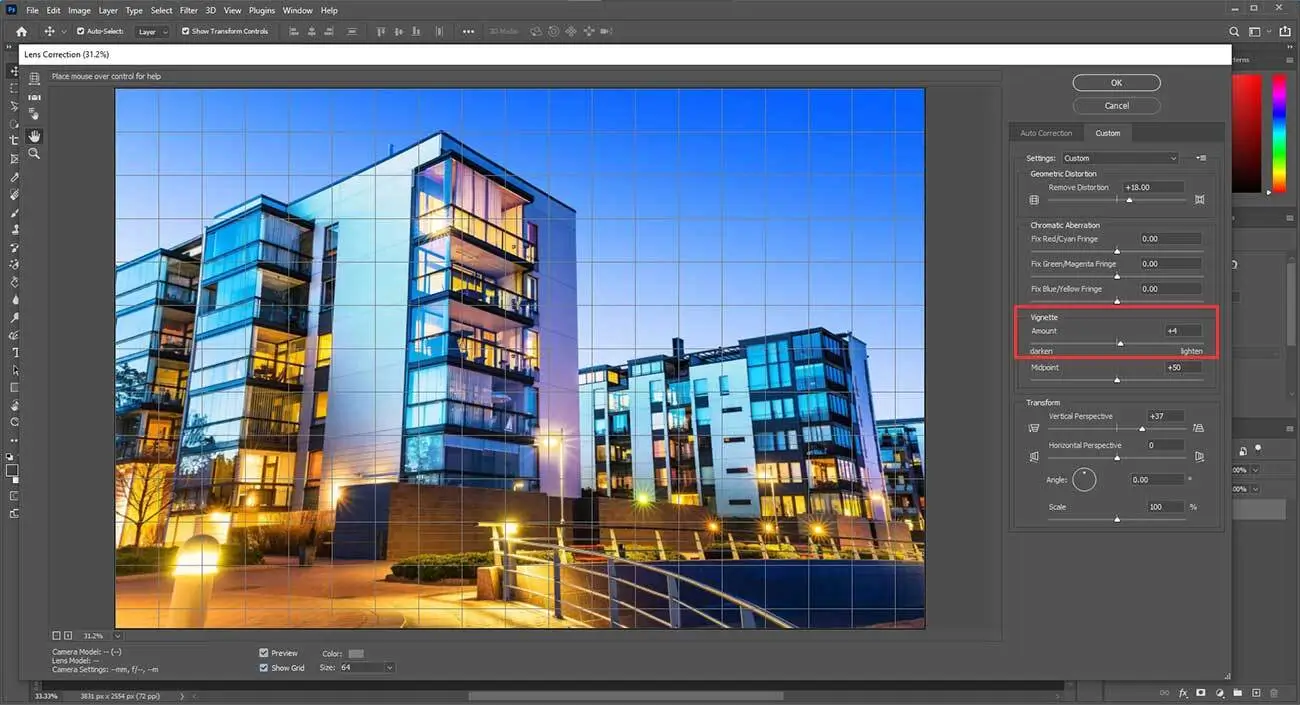
Step 4: Camera lens correction
At times, you may find that the lens in the camera causes dark vignettes around the corners. You need to use the ‘Vignetting’ slider to make these patches light. The slider has to be dragged to the right side slightly to make the image look better.
-
Step 5: Final correction
When you are done with these processes, simply click on ‘ok’.
You may still face a problem that you cannot fix through lens correction. The image may look stretched, making the subject appear closer than the original dimensions. You may use the ‘Move’ tool and drag it down or up, as necessary. This will modify the image as per your desired goals. In case you stretch your image beyond the present canvas dimensions of the image, you can go ahead with the process and then confirm this change. Then go to the option called ‘Choose Image’ and then on ‘Reveal All’. This will reveal the area that lies on the other side of the canvas.


Conclusion
This process can fix perspective distortions in the images to an appreciable extent. Although the distortion may not be completely fixed, it will make the image look better than the original one. Just having the right perspective correction software may not help; certain level of expertise is needed. Therefore it is advisable to reach out to an expert for professional assistance when you face similar issues and are in need of perfect real estate perspective correction services and the like.