In photography, you can have a single image created through combination of two exposures. This technique allows you to create mirror and ghost images for telling any story in unique manner, something that you cannot achieve with a single image.
When you take double exposures, you essentially overlay or superimpose 2 exposures in a single frame. For moving your audiences, you can leverage this technique for adding dramatic effects creatively or setting a particular mood.
Using Photoshop for creating double exposure effect
On magazine or music album covers, you must have seen images overlapping each other elegantly. With clipping masks and blending modes, you can create amazing Photoshop double exposure effect.
Multiple exposure images are created by opening the camera shutter multiple times for exposing the film to differing images. Such an effect can be recreated with Adobe Photoshop. After creating the wonderful effect, you may add gradient or color tone to the composition for completing the effect.
There are readymade photo editing actions which you can flexibly and creatively use for achieving double exposure effects. However, you will learn below how to create this effect in Photoshop from scratch.
-
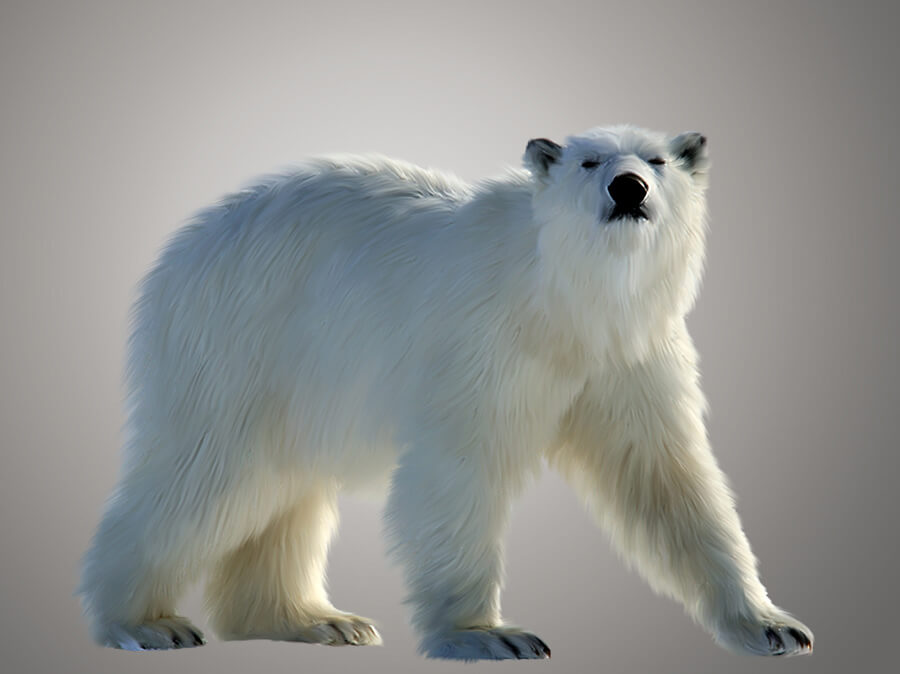
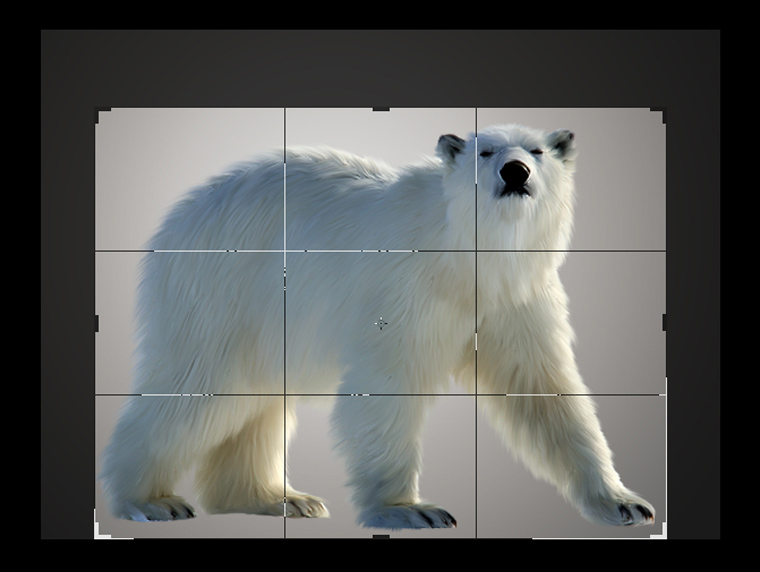
Start with the main image

Choose the base image whose background is almost neutral devoid of foliage, grass or distracting elements. Delete extra portions of image with Crop Tool.
-
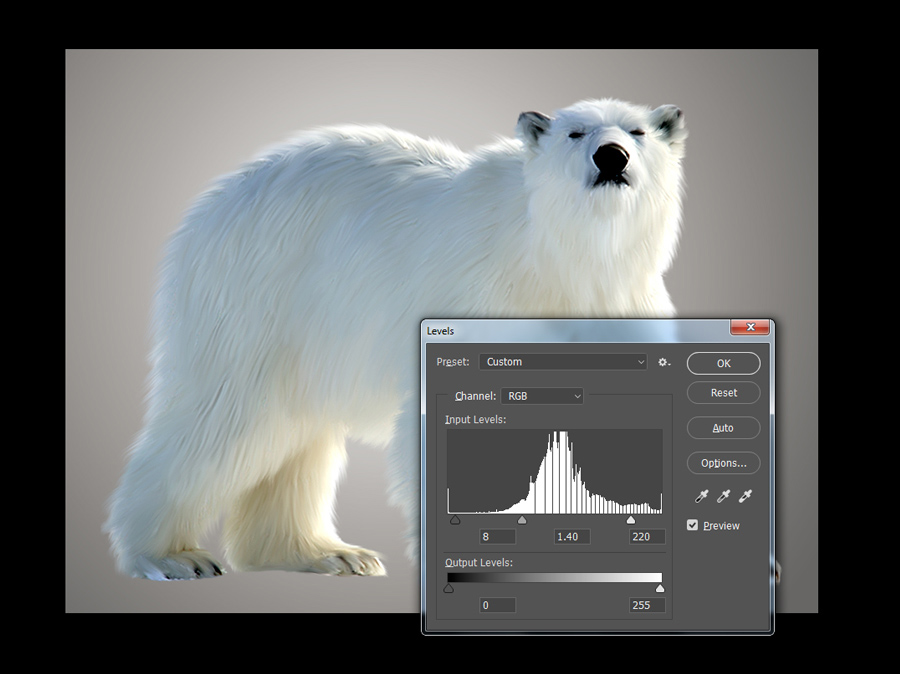
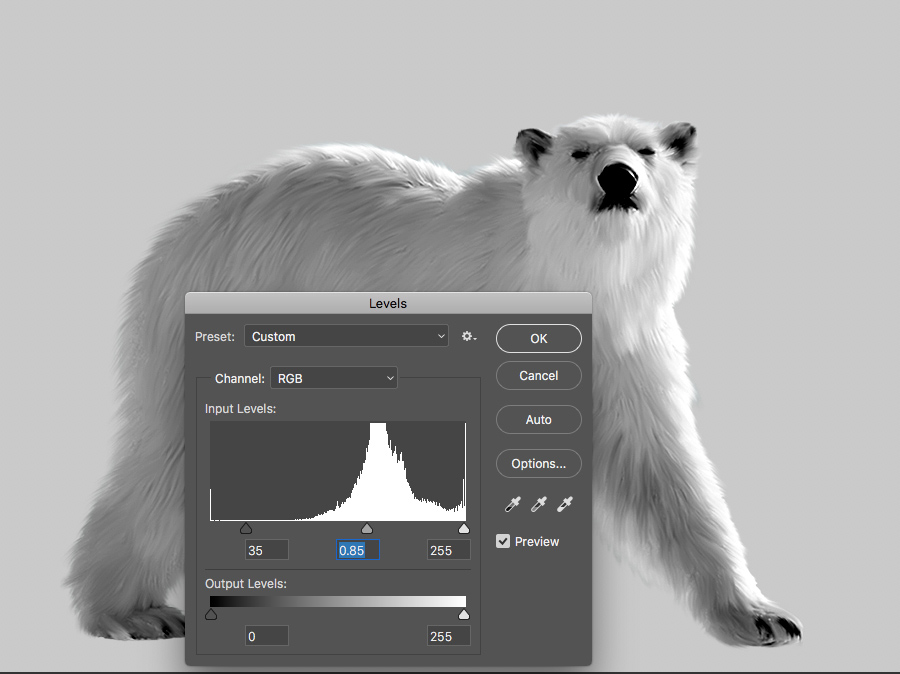
Adjust brightness and contrast
Navigate to Image > Adjustments > Levels menu (Ctrl+L). To make the image brighter, grasp the lightest slider and move it to left. For adding contrast, right move the left black slider. You may also key in the values i.e. shades of black -8, greys –1.40, and whites –220. Press Ok for applying these adjustments.
-
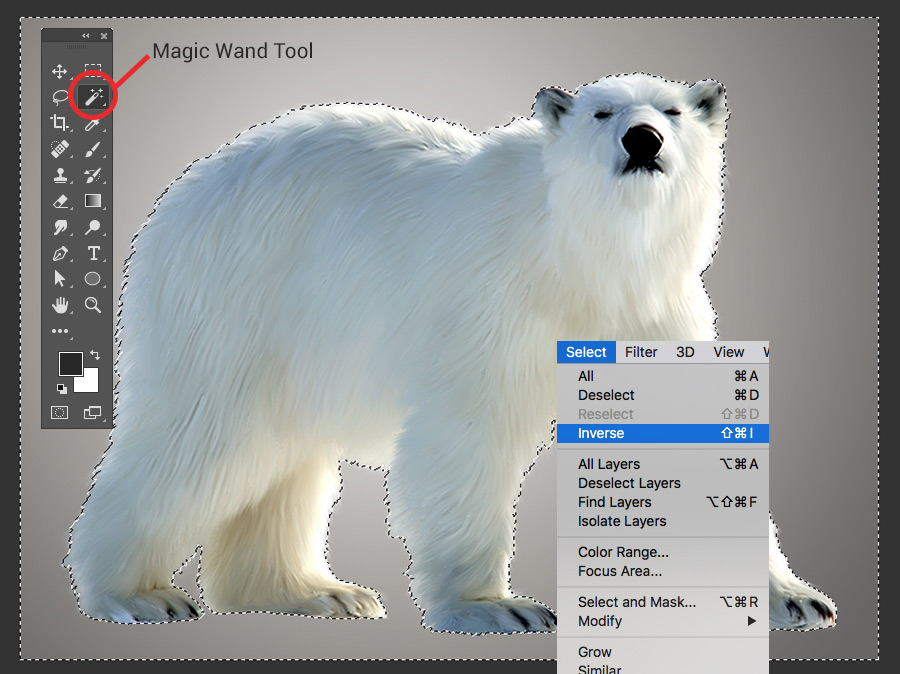
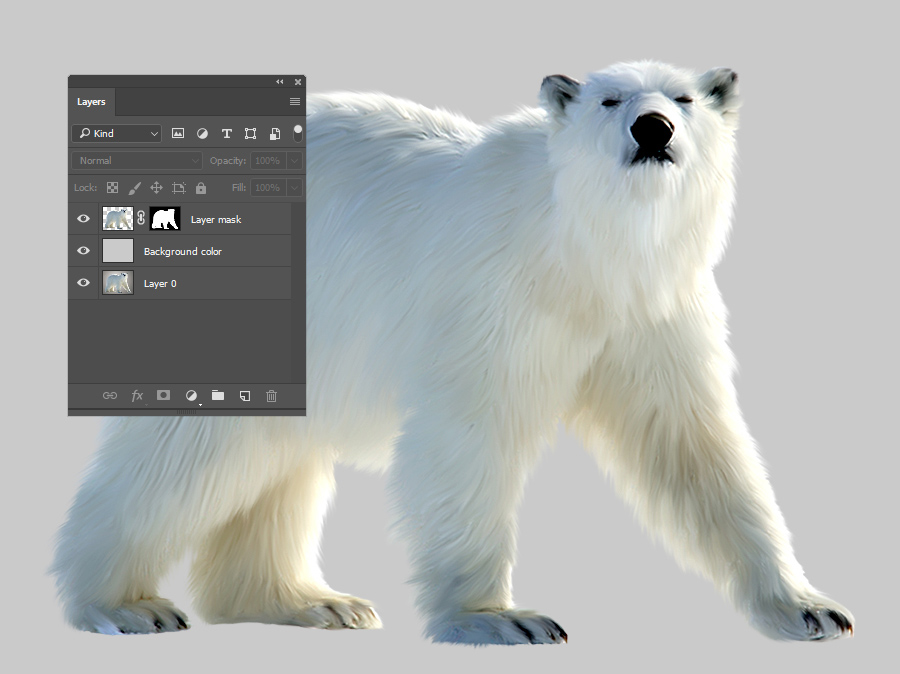
Clear the background
Click on the background after selecting ‘Magic Wand Tool (W)’. Navigate to Select > Inverse to move the selection from background to image’s subject. From control panel, click on ‘Refine Edge’ button to open the options window. From ‘View Modes’, you can modify image’s view by positioning the subject on transparent, black, white or background of your choice. This will enhance visibility of subject and make editing convenient.
Within ‘Edge Detection’, make the ‘Radius’ value 1.5 for decreasing the rigidness of edges and to reveal minor details like hairs on subject’s head. In options window’s ‘Output’ section, set ‘Output To’ as ‘New Layer with Layer Mask for creating your original image’s copy automatically. ‘Clipping Mask’ would hide the background.
Other options in ‘Refine Edge’ will smoothen or blur the edges. This will prove useful when sculpting out an element with messy edges from a cluttered or complex background.
-
Fill a neutral color
Underneath the subject’s portrait which you have cut out, create ‘New Layer’ and use ‘Paint Bucket Tool (G)’ for filling it with neutral greyish color with code #cacaca.
-
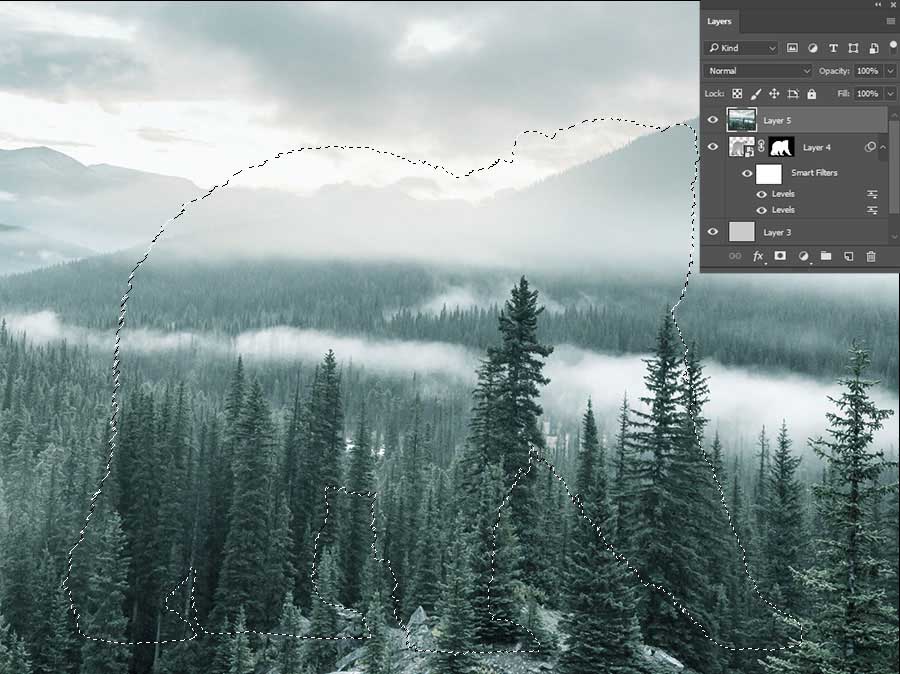
Combine 2 images
Now, select the second image for the double exposure photo manipulation effect. Position this image over portrait and keep new image layer selected. After pressing ‘Ctrl’ key, click on portrait layer’s ‘Layer Clipping Mask’. This will make marching ants selection mode surrounding the portrait’s silhouette.
Pressing the ‘Add vector mask’ at ‘Layers’ panel bottom would hide unwanted portions of the new image. For moving and rotating images within the mask without making the entire layer move, you may unlink the mask from layer. This will happen by clicking on ‘chain icon’ between the thumbnails of image and mask.
-
Render the portrait monochromatic
Start by selecting the layer that has portrait cutout with Clipping mask. Press Ctrl+J to make its copy for dragging and dropping the same over new image’s layer. For accommodating the color palette of new image, render the portrait monochromatic
While the portrait layer is selected, press Shift+Ctrl+I or navigate to ‘Desaturate’ under Image > Adjustments. This would make the image mode grayscale.
-
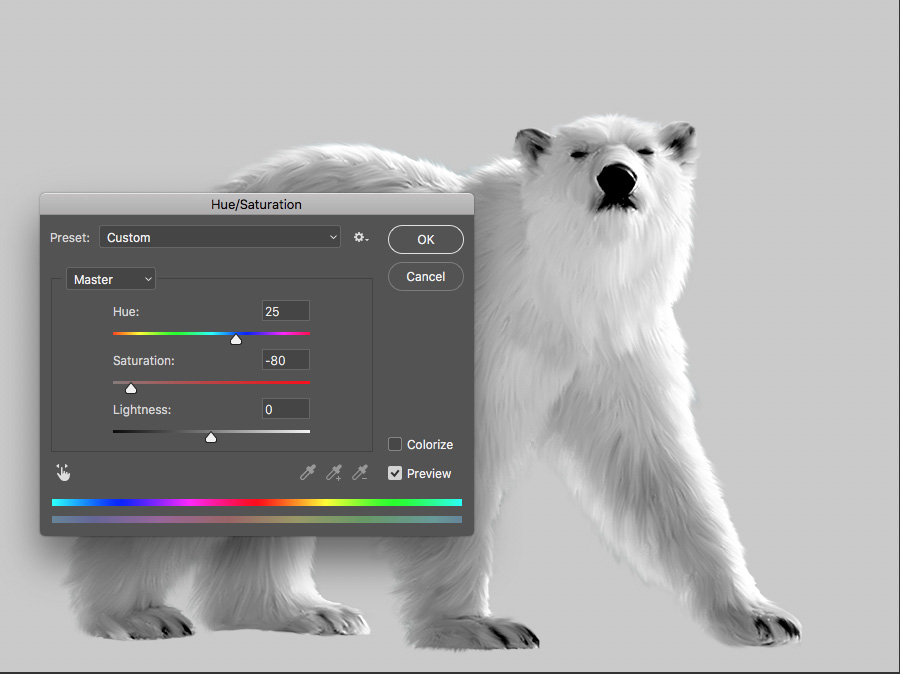
Make the image darker
From the ‘Levels’ options window, set the value of black slider to 35 or move it right to render the image darker. Next, navigate to Image > Adjustments > Hue/Saturation for ticking on the ‘Colorize’ checkbox at options window’s bottom right corner. For adding blue tint, move the ‘Hue’ slider right till the value is 25. For decreasing image’s vividness, make ‘Saturation’ level -80. Press Ok.
-
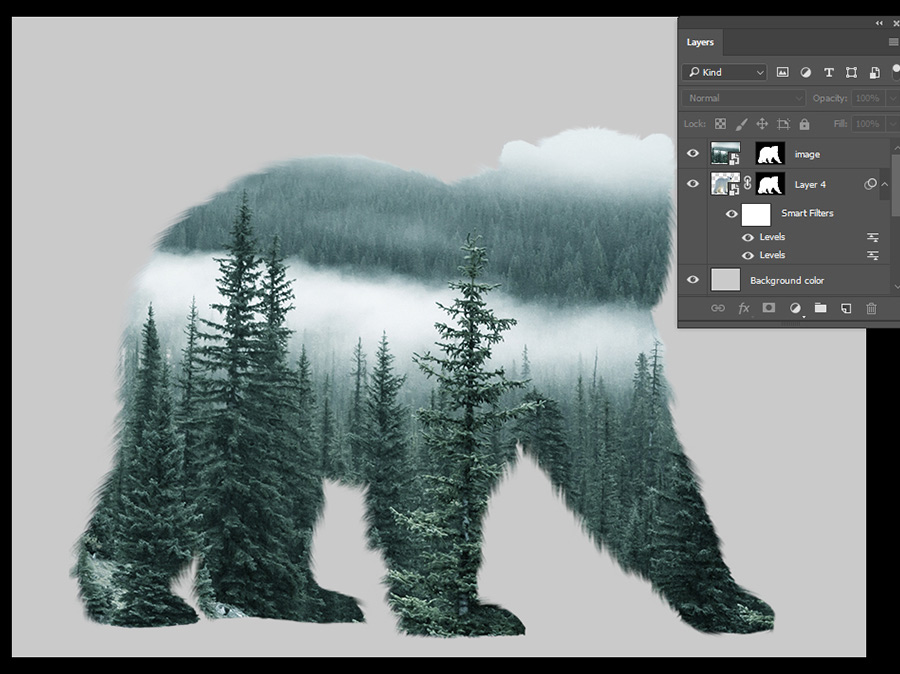
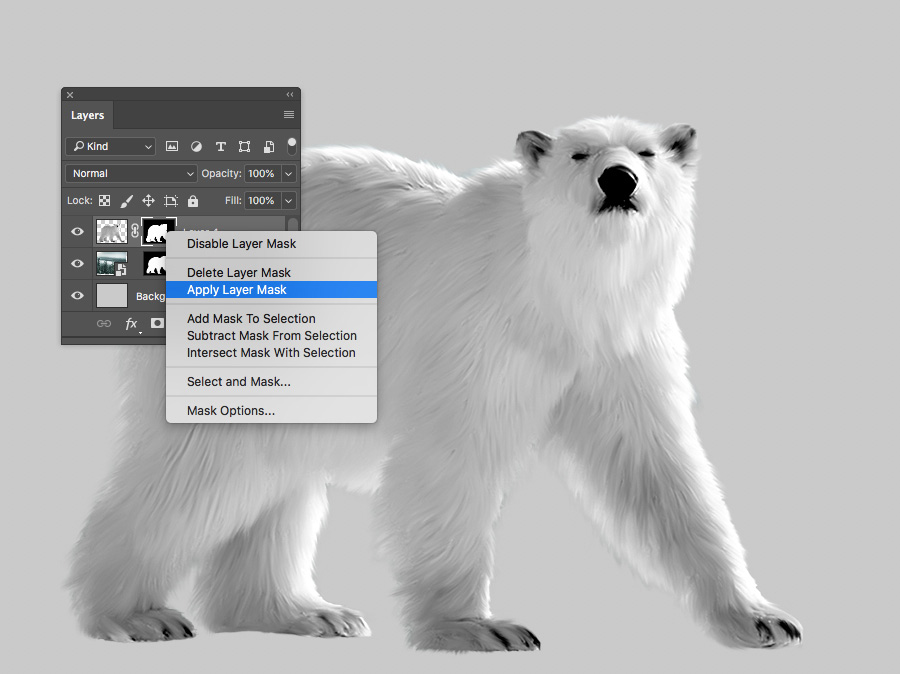
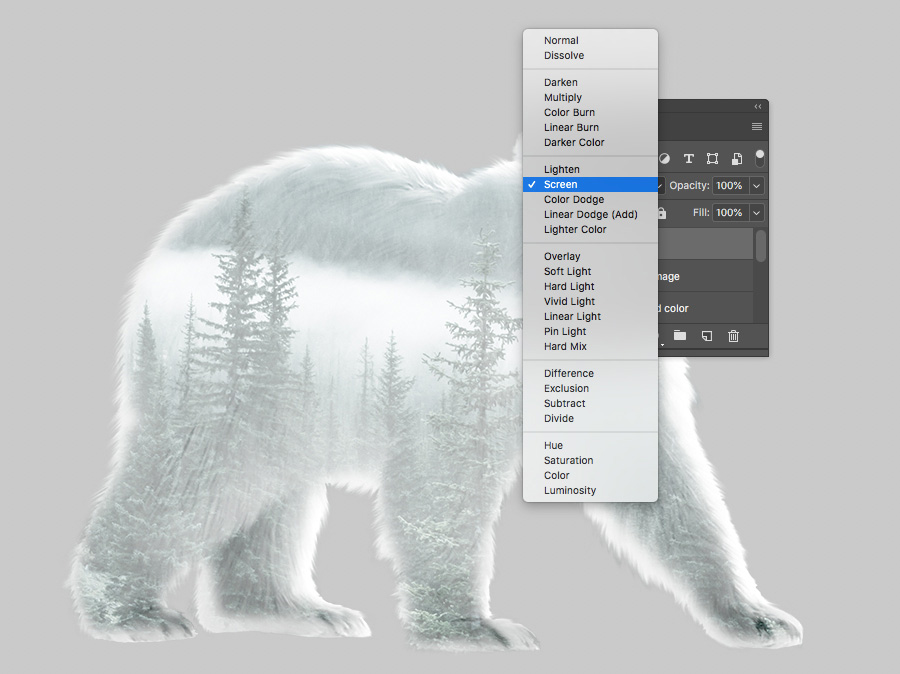
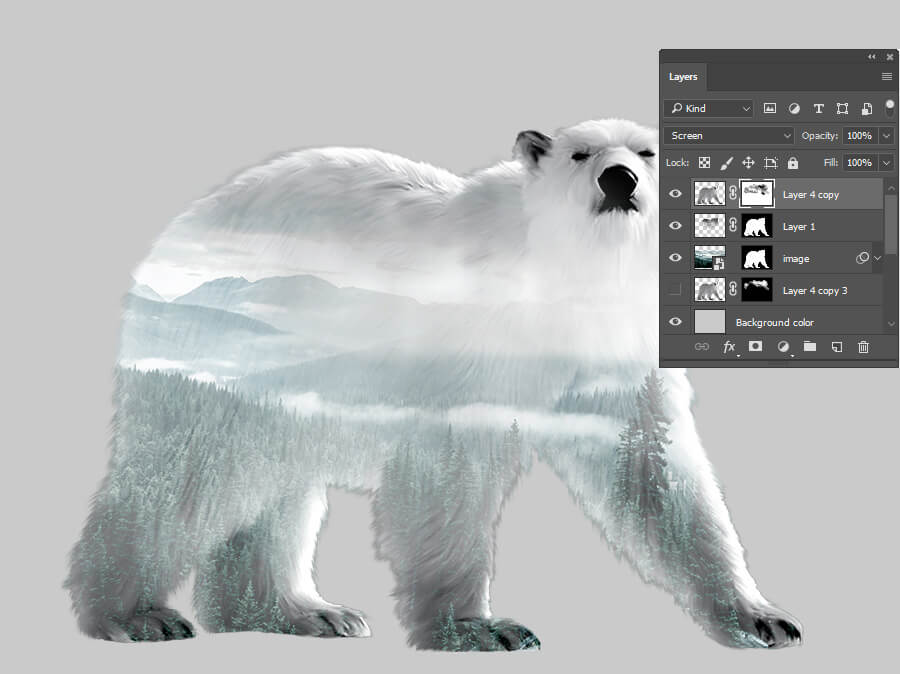
Arriving at the double exposure effect
Right clicking the portrait layer mask will allow you to use ‘Apply Layer Mask’ from dropdown menu. Upon changing the layer’s ‘Blending Mode’ to ‘Screen’, you can catch first glimpse of the double exposure art drawing. If you want just resize the image as per your requirement.
-
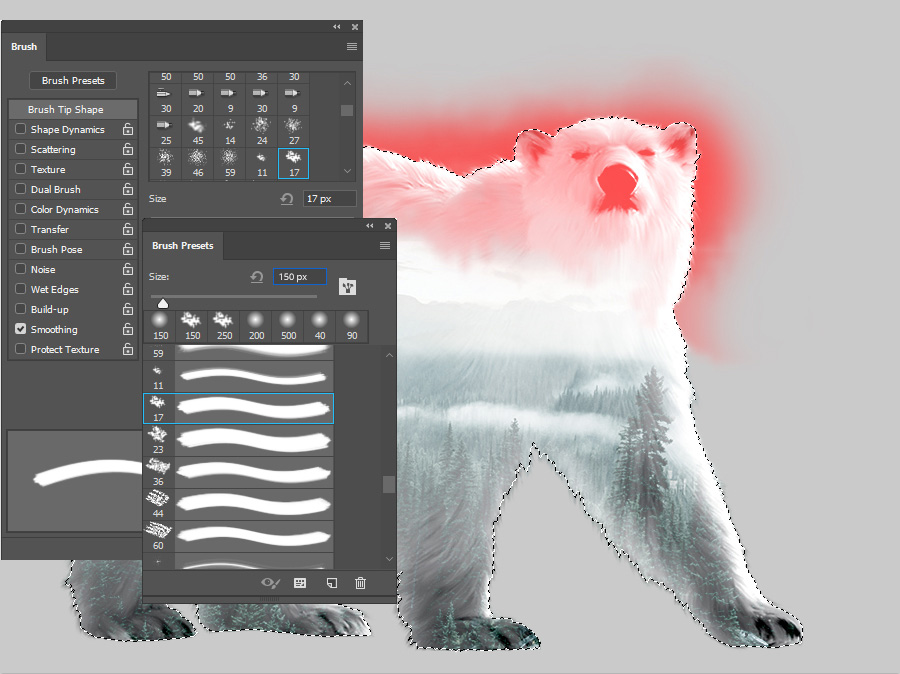
To give a surreal effect to the image
select ‘Airbrush Soft Round 17’ in ‘Brush Tool’. Pressing F5 in Brushes panel or right clicking it will drop down standard set of ‘Round Brushes with Size’. Apply the brush on portrait layer.
Choose the Layer mask of new image’s layer. Set its ‘Fill’ color as white. Soft painting over upper region of portrait cutout will erase unneeded parts and will add air on image’s top.
For removing distractions or noise, get a ‘New layer’ created under monochromatic portrait layer. Get the ‘Brush Tool’ and make appropriate color as the ‘Fill’ color with ‘Eyedropper Tool’ applied to portrait. You can now paint it over any area to make it more distinct. You may Ctrl+Click on layer mask of first image for creating marching ants selection pattern. This will help you draw within selected region without violating the borders.
-
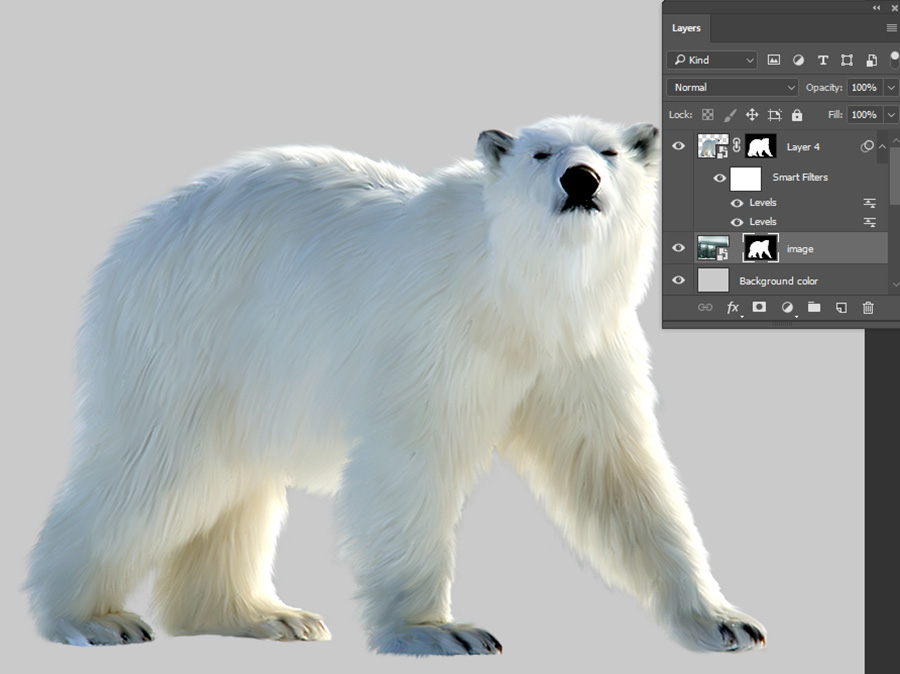
Add the finishing touch
After selecting the monochromatic portrait layer, click on the mask icon at Layers panel bottom to ‘Add Layer Mask’. With Brush Tool, make Fill color black for erasing image’s unneeded parts.


Conclusion
By now, you have come to know how to create Photoshop double exposure effect. You can combine 2 pictures seamlessly for getting a mesmerizing effect. You may follow latest photoshop trends to learn more about handy tricks of image manipulation. If you are interested in articles related to the above topic, then visit us as we have a vast repository of information on interesting concepts or subjects. However, if you are looking for photoshop service provider provider that can do the whole image masking services for your project, then we also offer comprehensive photo editing services you can rely on. Hence, trust us, and we will boost the quality of your images with professionalism and expertise.