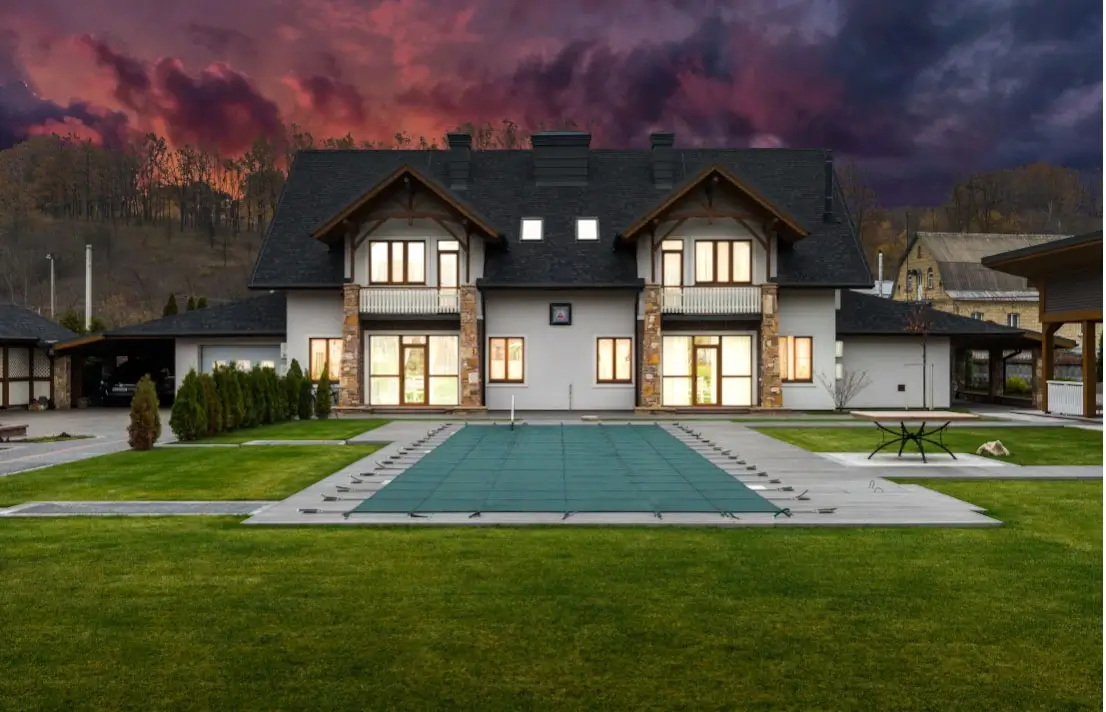
Marketing a property or boosting its listings requires more than mere photographs. Each of the photos must be top-notch and hook prospective buyers. One of the key tricks for enhancing real estate images is getting them converted from day to dusk. This implies the images should have a soft glow that adds a perfect scenic landscape to the photos. With day-to-dusk conversion, even simple images can transform into something magical.
However, turning daytime photos into dusk is not an easy task to perform. One must have thorough knowledge about the steps to create day-to-night real estate images using Lightroom and Photoshop. These steps are the fundamentals of replicating the setting sun’s warm, magical glow.
This article will give readers a detailed view of the processes involved. So, keep this blog bookmarked if you want your edited property images to stand out in the crowd. Let’s start with understanding the concept first!
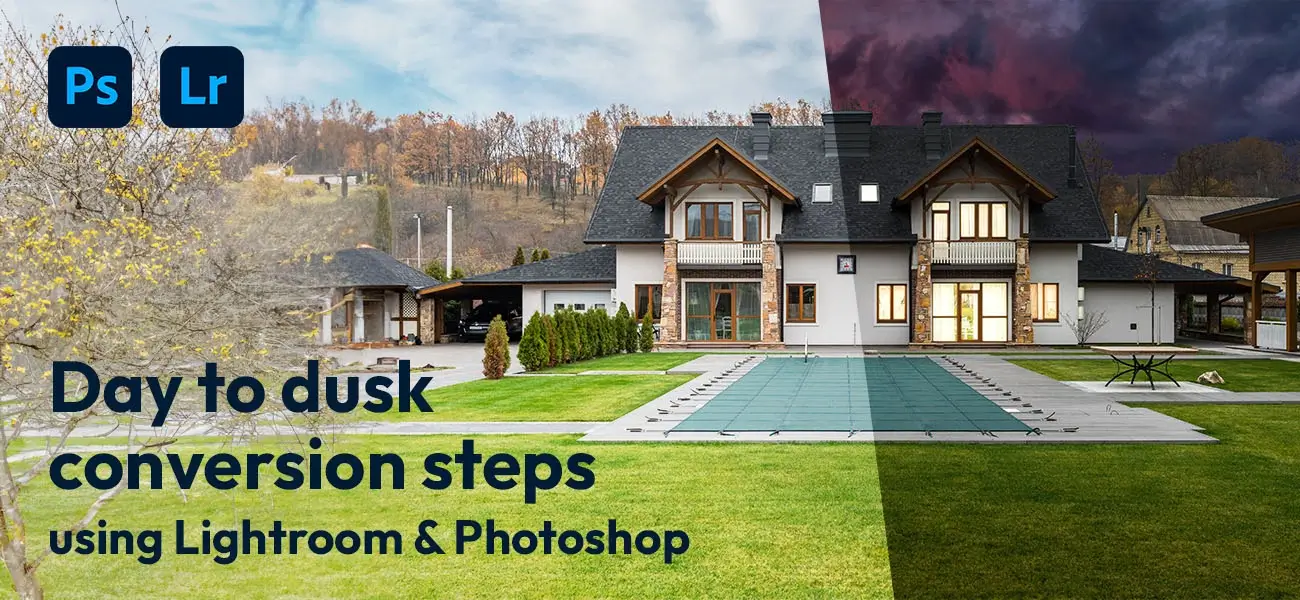
What is day to dusk real estate photo editing, and is it the same as twilight image editing?
Day to dusk photo editing is the digital procedure of converting an otherwise day-time property photo into a dusk setting. The moment is exact when the sun sets and the entire horizon is filled with a warm, glowy light. Professional photo editors are fluent with several techniques to achieve this perfection.
Considering the recent massive growth in the real estate sector, it has been a known factor in making property images more appealing to onlookers. That said, changing the aesthetic tone is paramount. This is where day to night digital conversion comes into play.
This concept of dusk photo editing is also called twilight image editing or retouching. Since the concept remains the same. An image gets its thematic appeal embellished with the magical illumination of the sunset. Moreover, the time of dusk is also called twilight. It is all about capturing the property or a plot to make it appear cozy to prospective buyers. This inspires positive emotion and triggers good feelings in them about the investment. They feel more inspired and connected with the property.
Usually, only professional photo editing companies with vast experience and expertise can execute this complex artistry with perfection. In the following segment, we’ll learn the steps involved in day to dusk conversion. Let’s begin!

How to create or edit day to dusk real estate images
Combining the power of both Photoshop and Lightroom, professional image retouchers carry out twilight post-processing. We have tried to break down each step into easy-to-understand information. Check out these simple and easy steps below and start editing images like a pro.
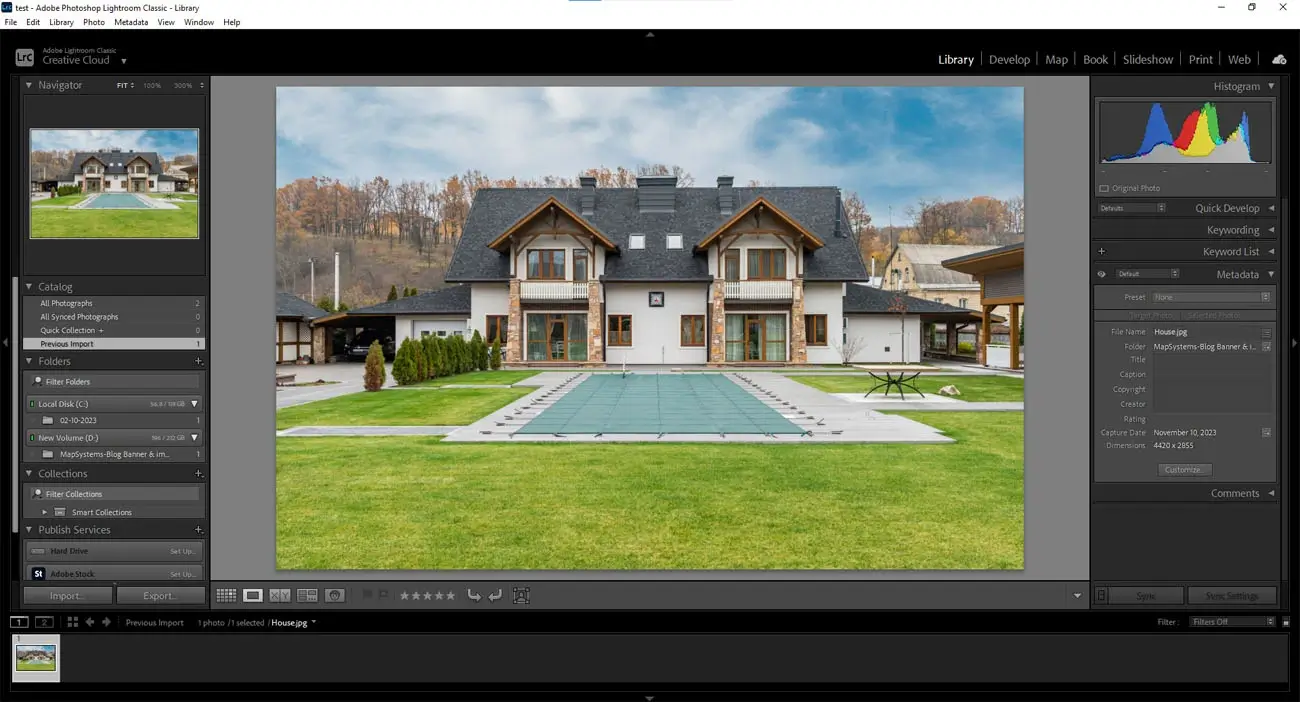
- Step #1: Open the Lightroom software and import the photo you want to edit.

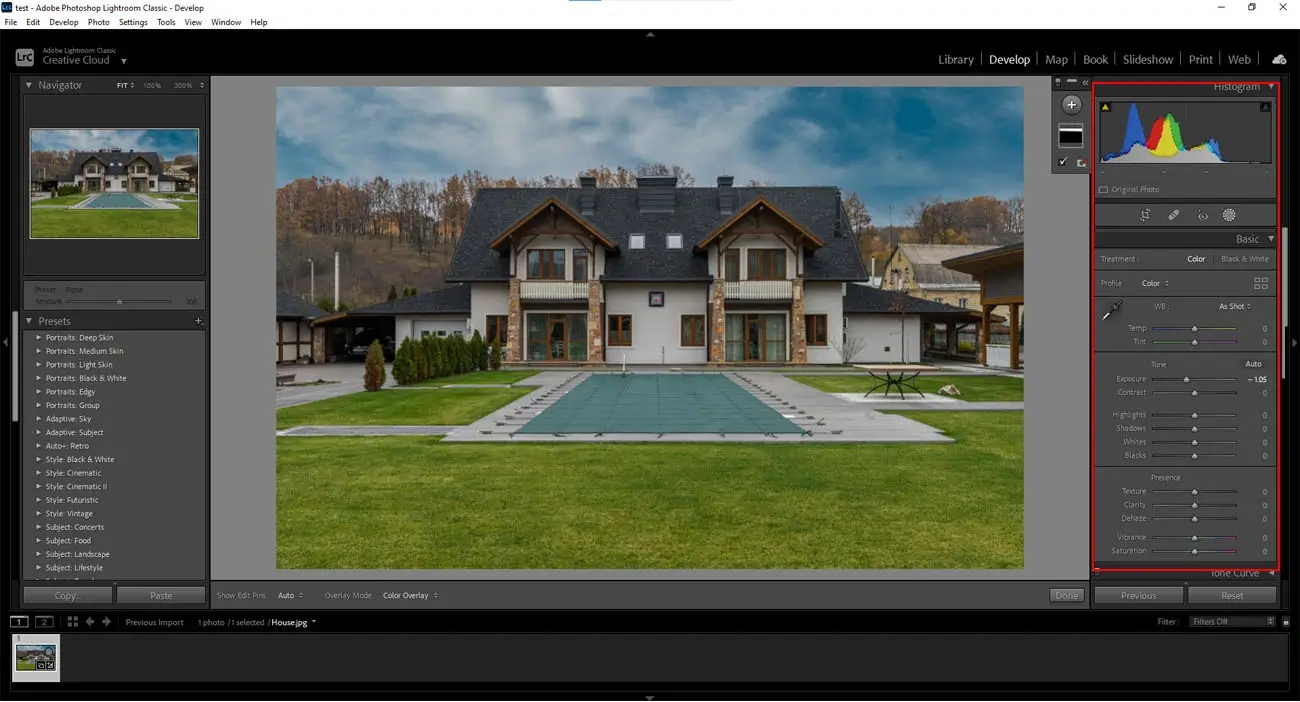
- Step #2: Make the adjustments and add a dark effect since dusk hours have to be replicated.

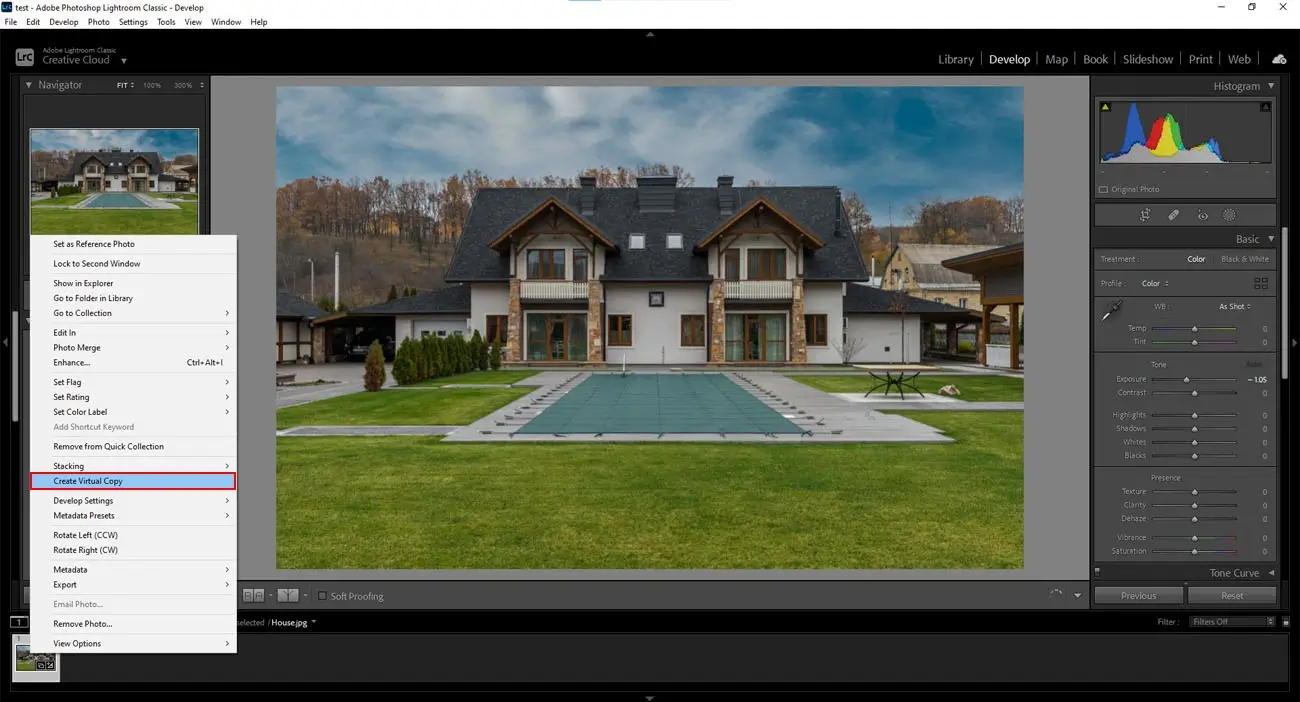
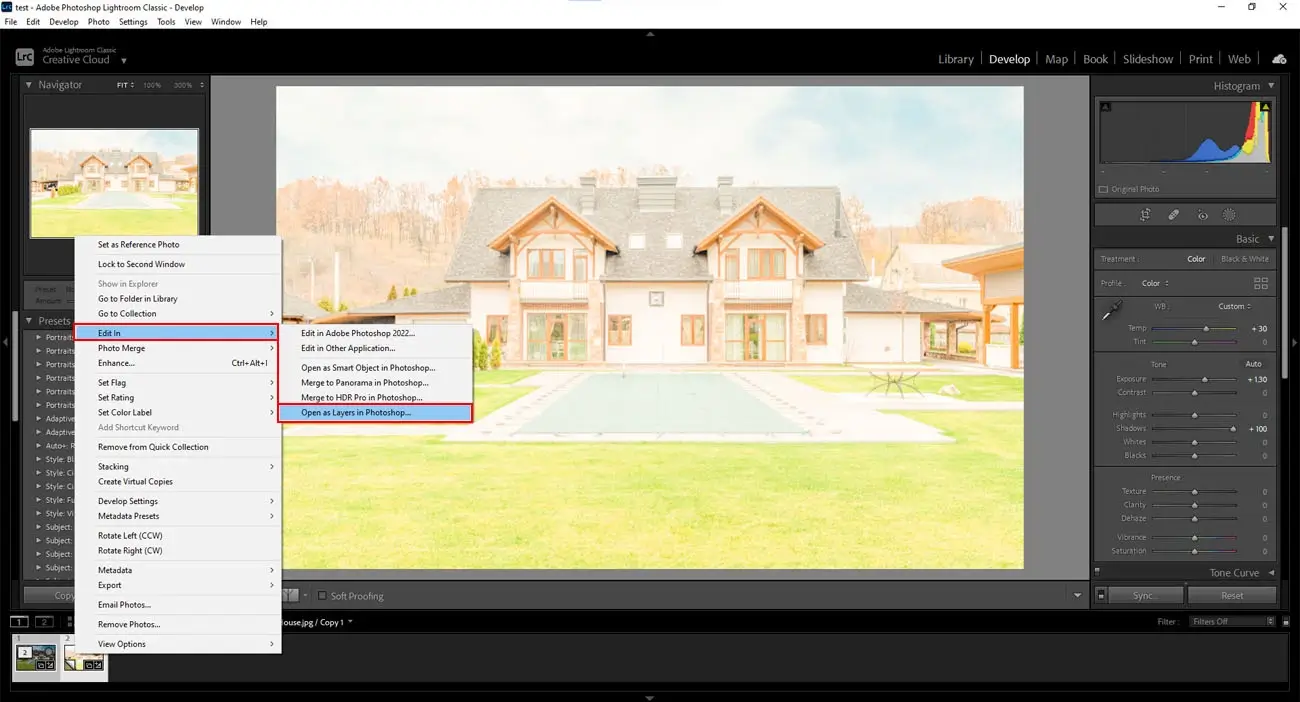
- Step #3: Develop a virtual copy or version of the photo.

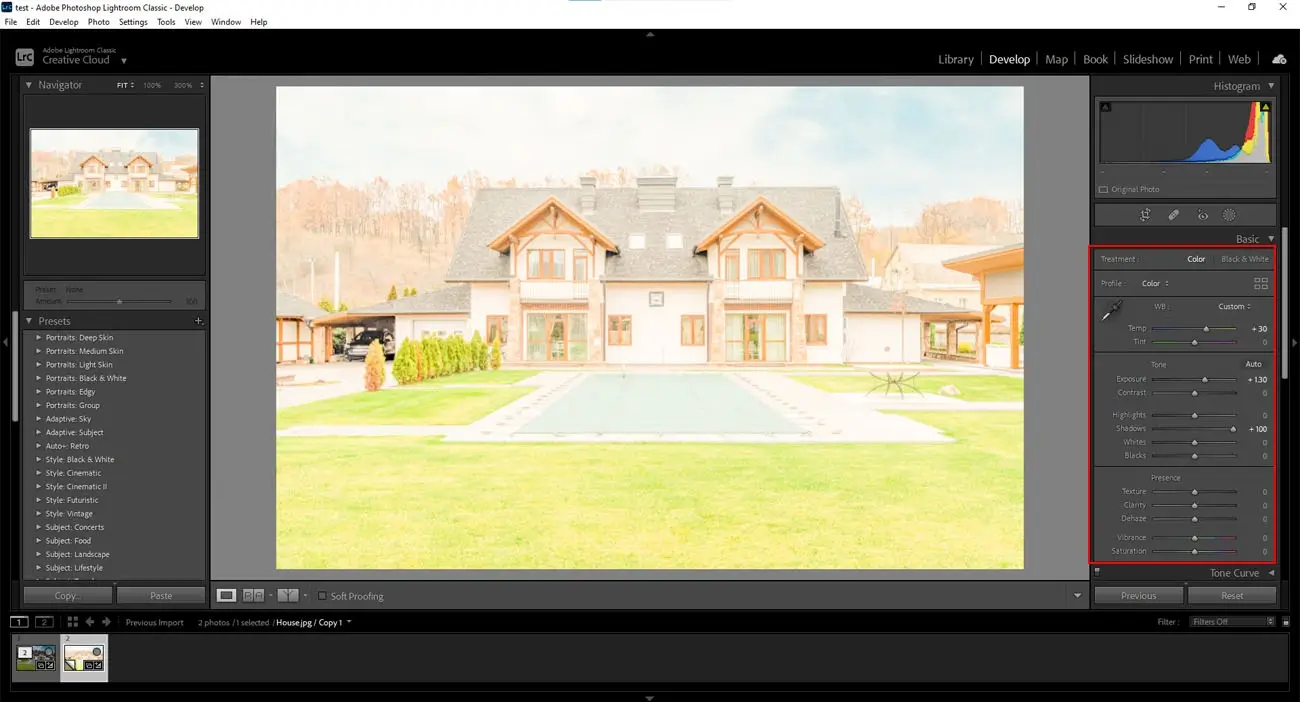
- Step #4: Moderate the glow of the specific area to show illumination. Enhance the exposure and temperature, creating a soft, glowy appearance.

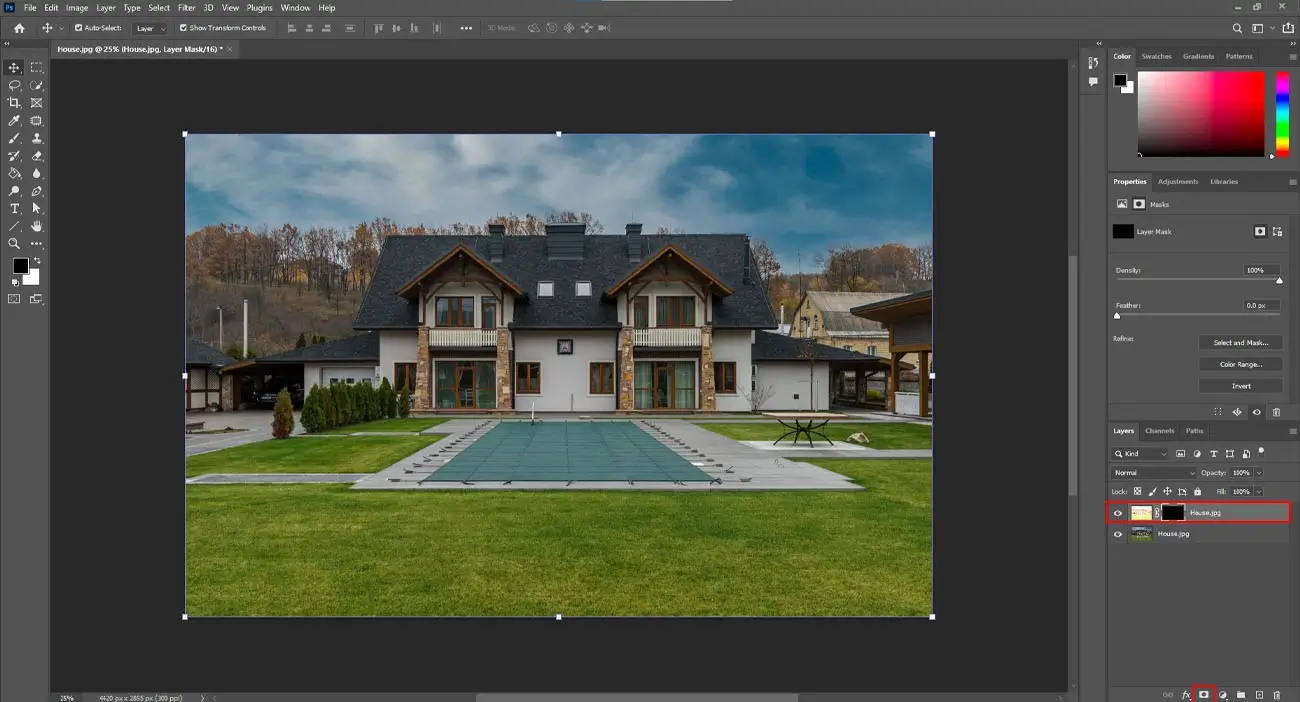
- Step #5:Now, import the photos as layers into Photoshop for the rest of the edits.

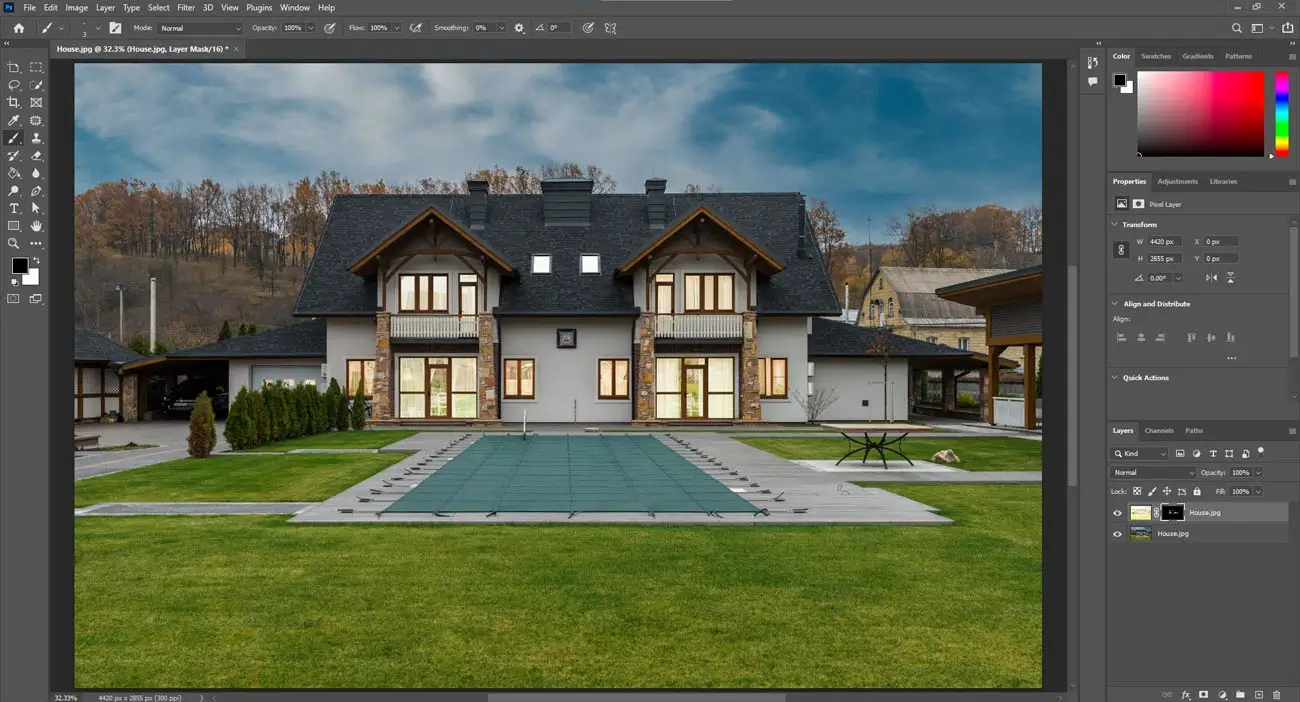
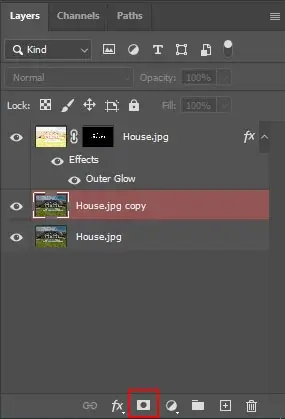
- Step #6: Arrange the already retouched window layer on top and incorporate an Inverted Mask (press and hold the ALT key)

- Step #7: Select the windows with the Pen Tool, click the Delete key.

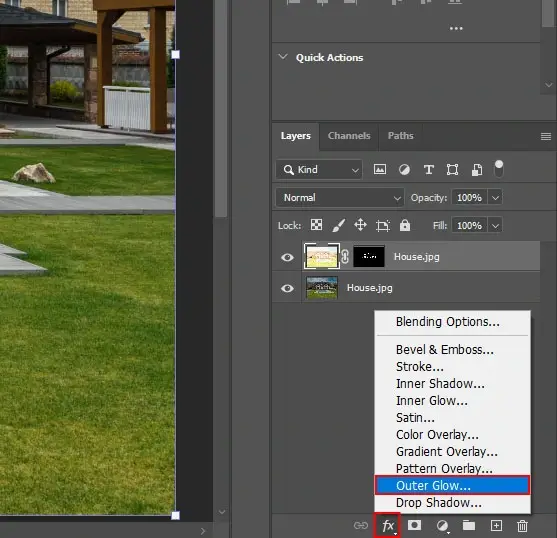
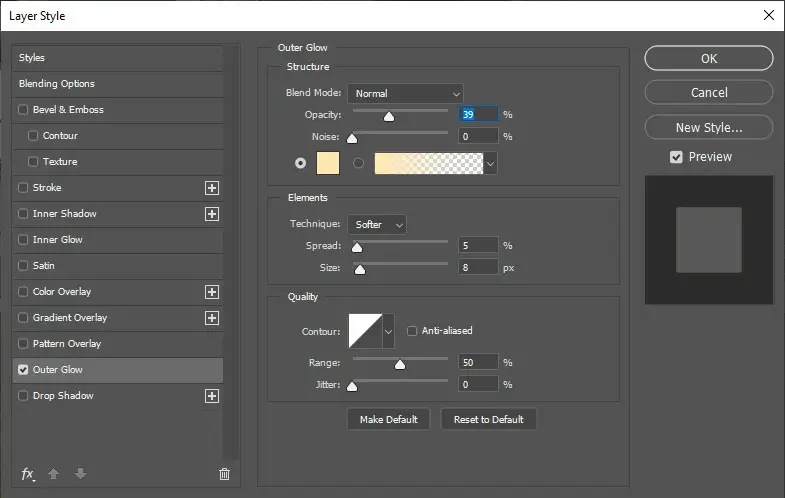
- Step #8: Using the Layer Style, incorporate an Outer Glow by adjusting the Sliders. Create an optimum level.


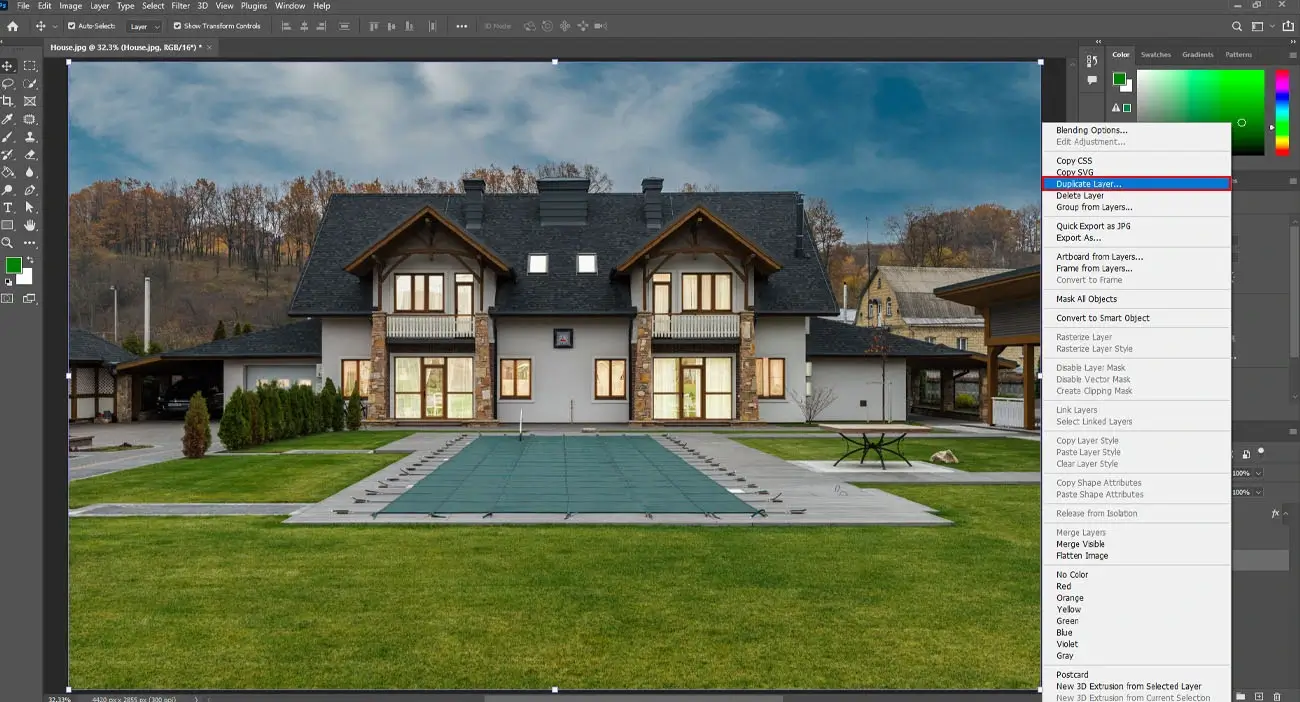
- Step #9: Once you have completed the architectural areas of the property, it’s time to edit the sky. In Photoshop, create a duplicate of the original photo.

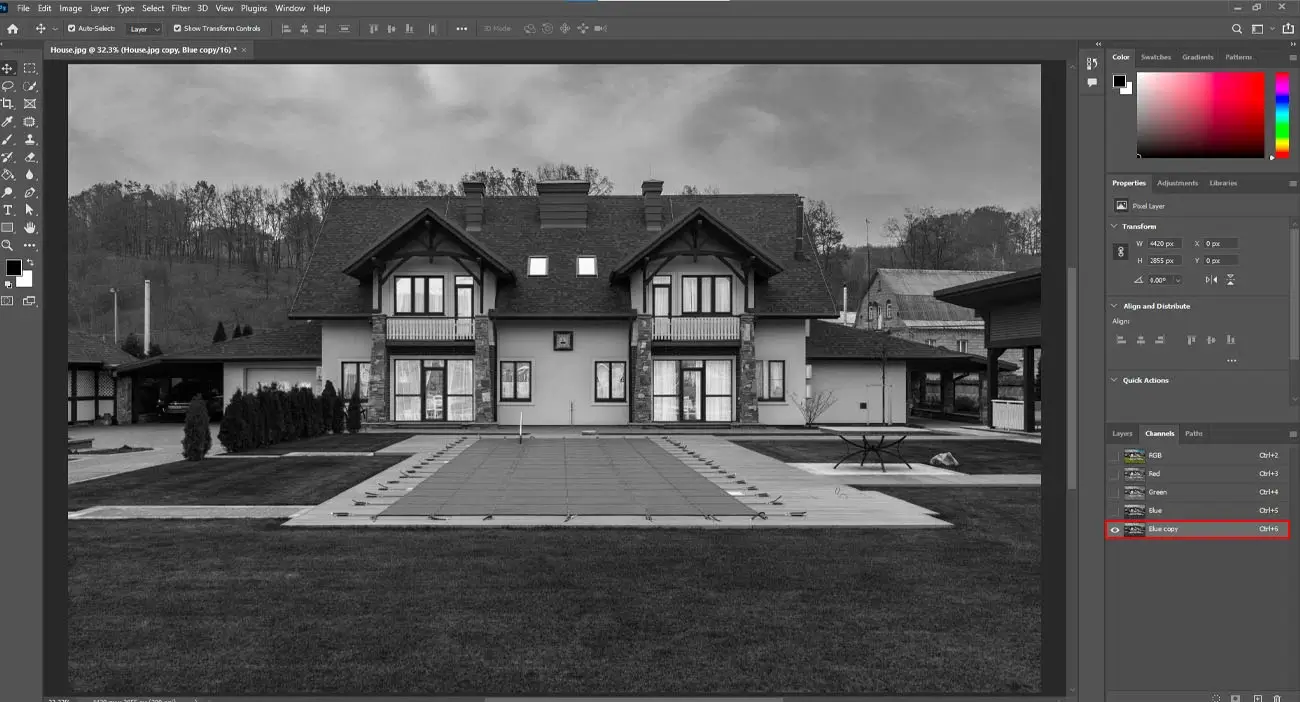
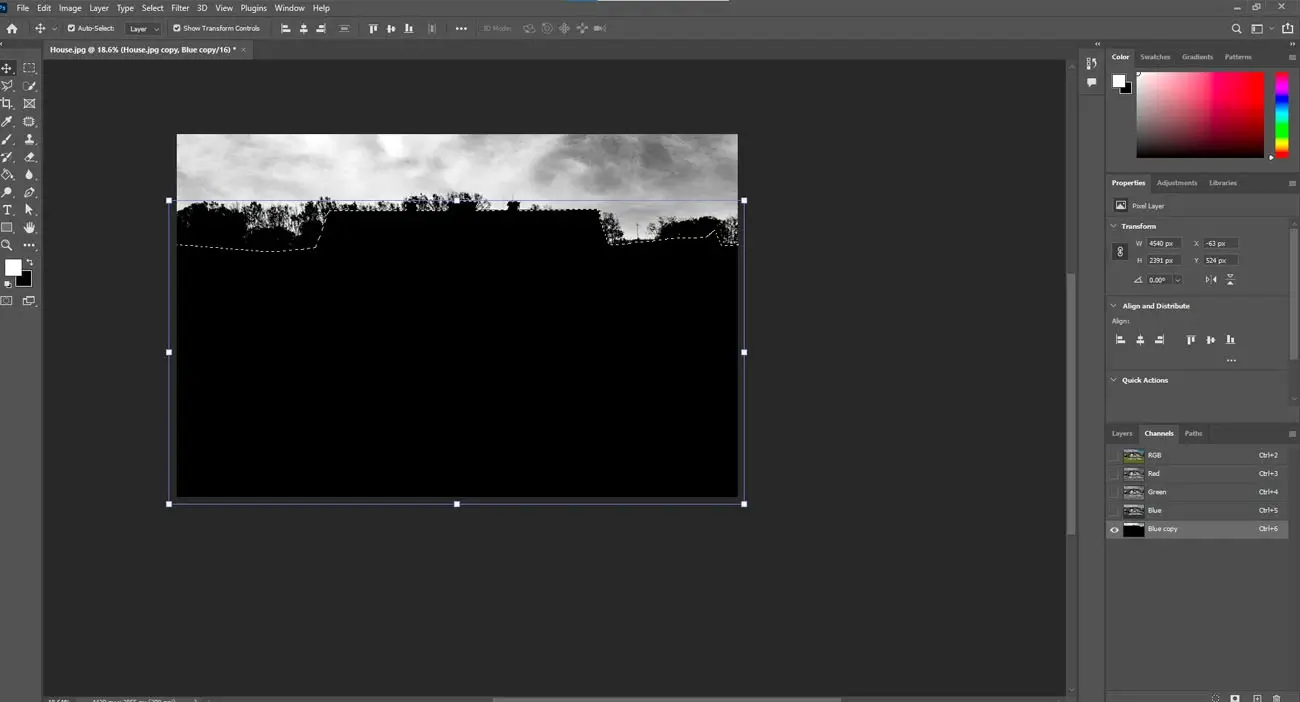
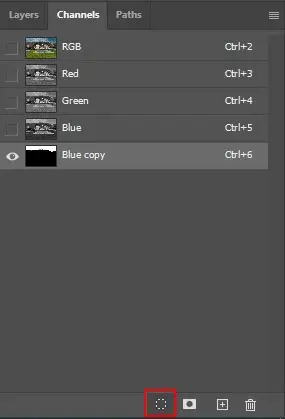
- Step #10: Go to the Channel panel and generate a duplicate version of the “Blue” channel.

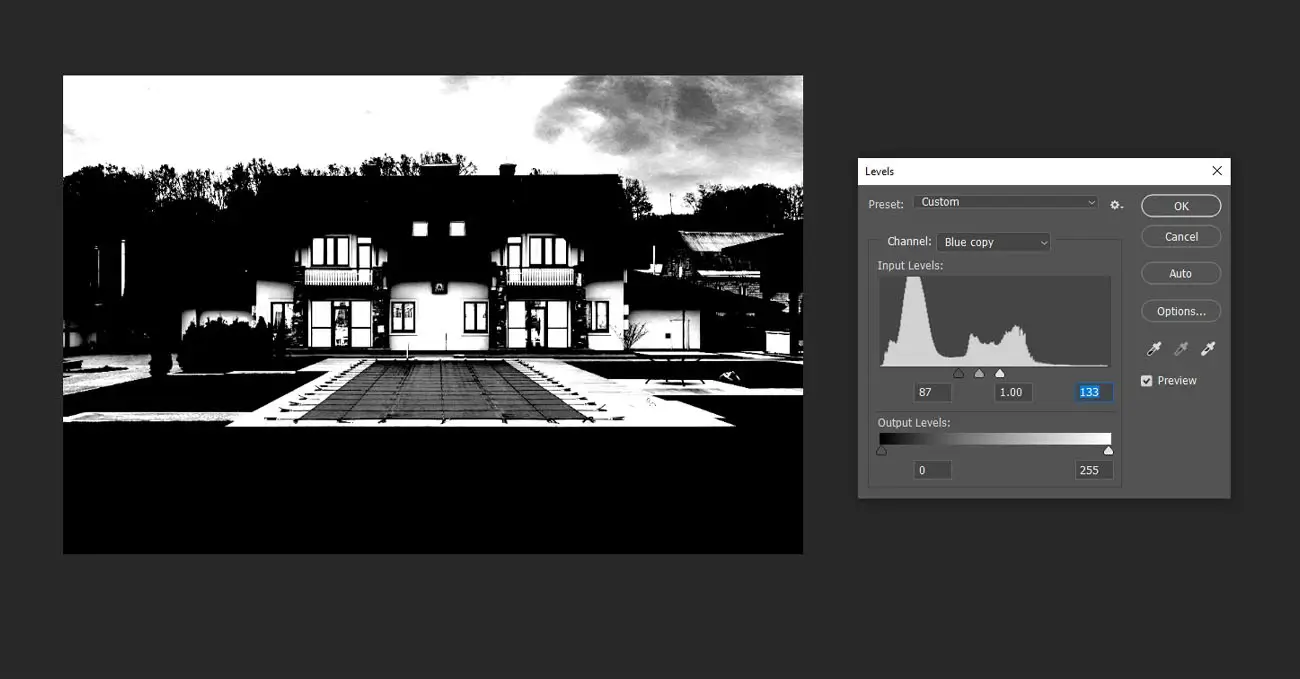
- Step #11: Regulate the Levels in the sky area in the photo. Adjustments can be done with the Control. (CTRL+L)

- Step #12: Make a selection around the non-sky portion of the photo and darken it.

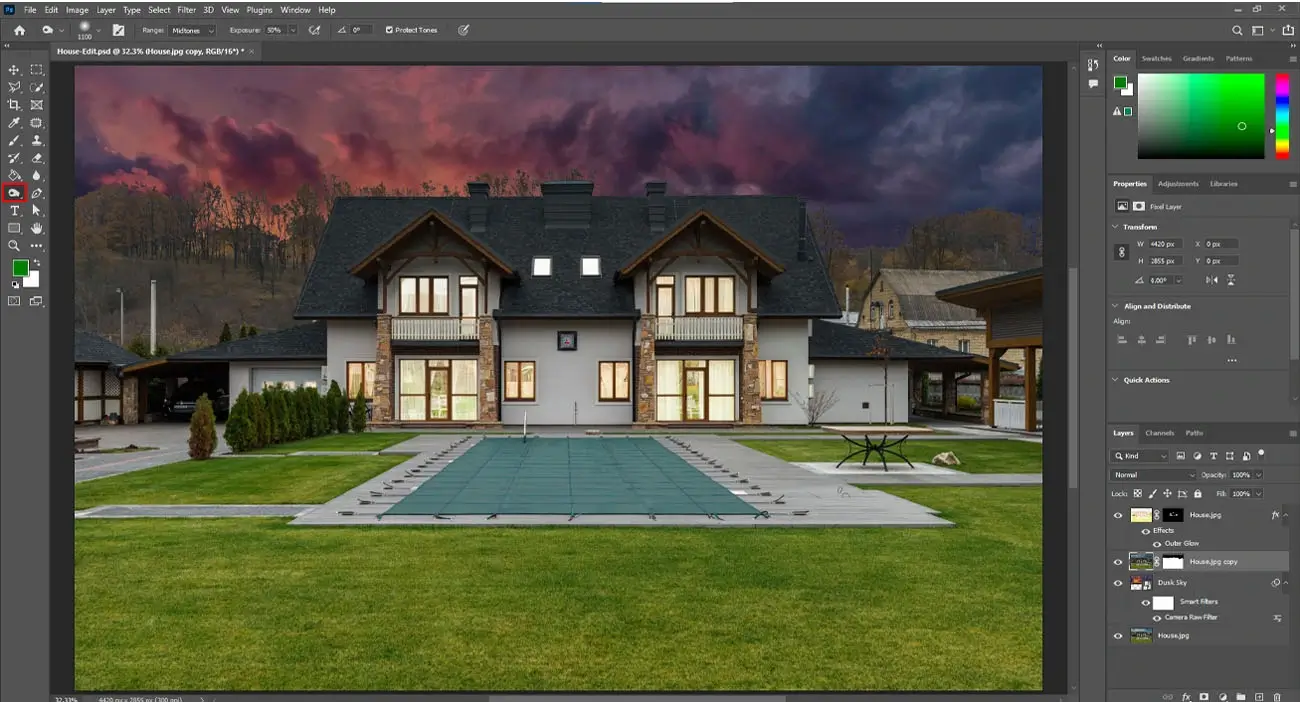
- Step #13: With the Dodge Brush Photoshop tool, lighten the sky to a desired level.

- Step #14: The next step is loading the Channel as a Selection, then click Masking option with press & holdALT key to mask as inverted.


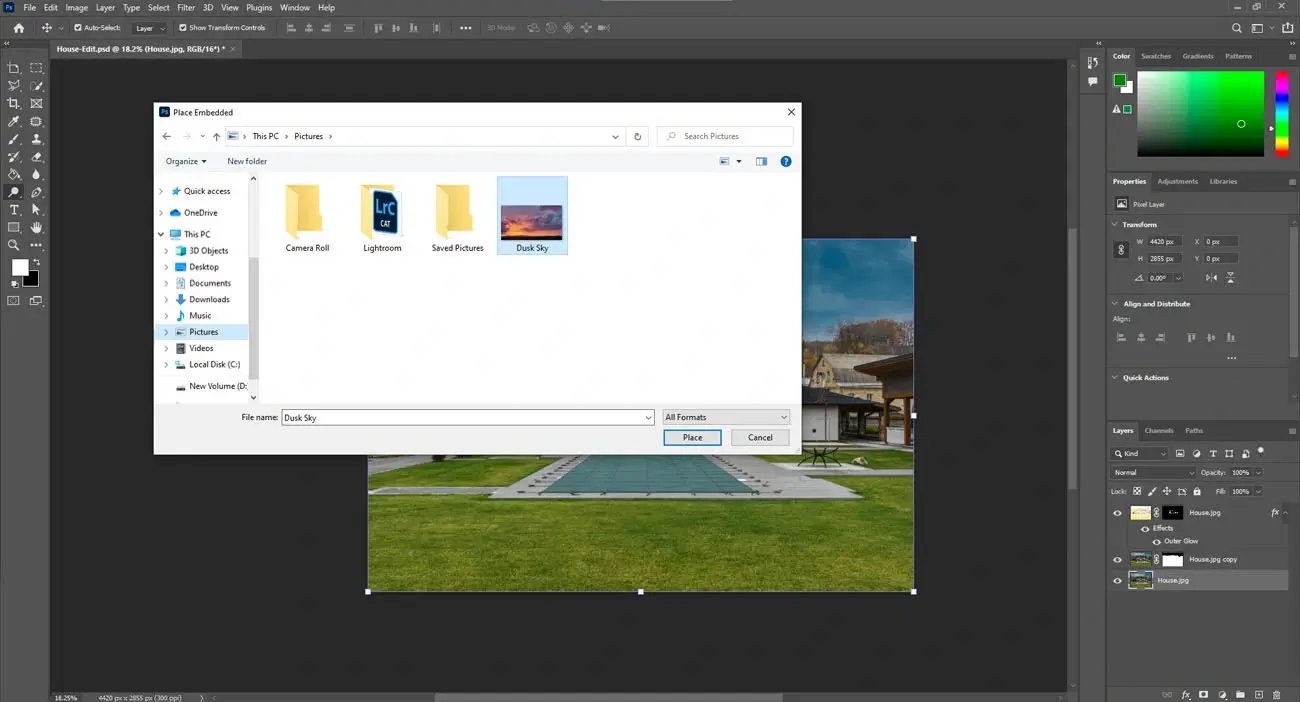
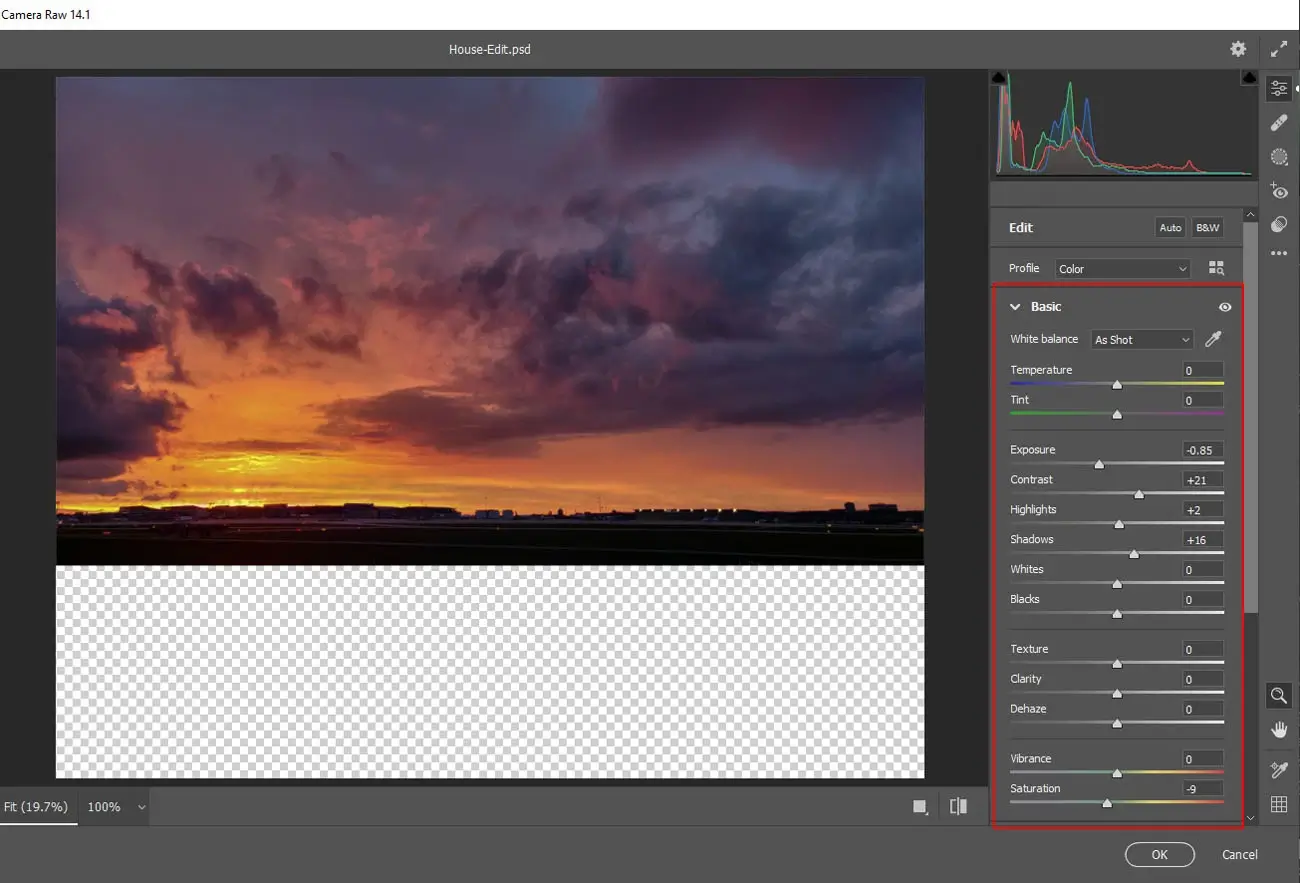
- Step #15: Import the dusk sky image to be used behind the property.

- Step #16: Tweak the image’s placement and blend it with the building or the property.

- Step #17: Use the Photoshop Burn Tool to darken the property.

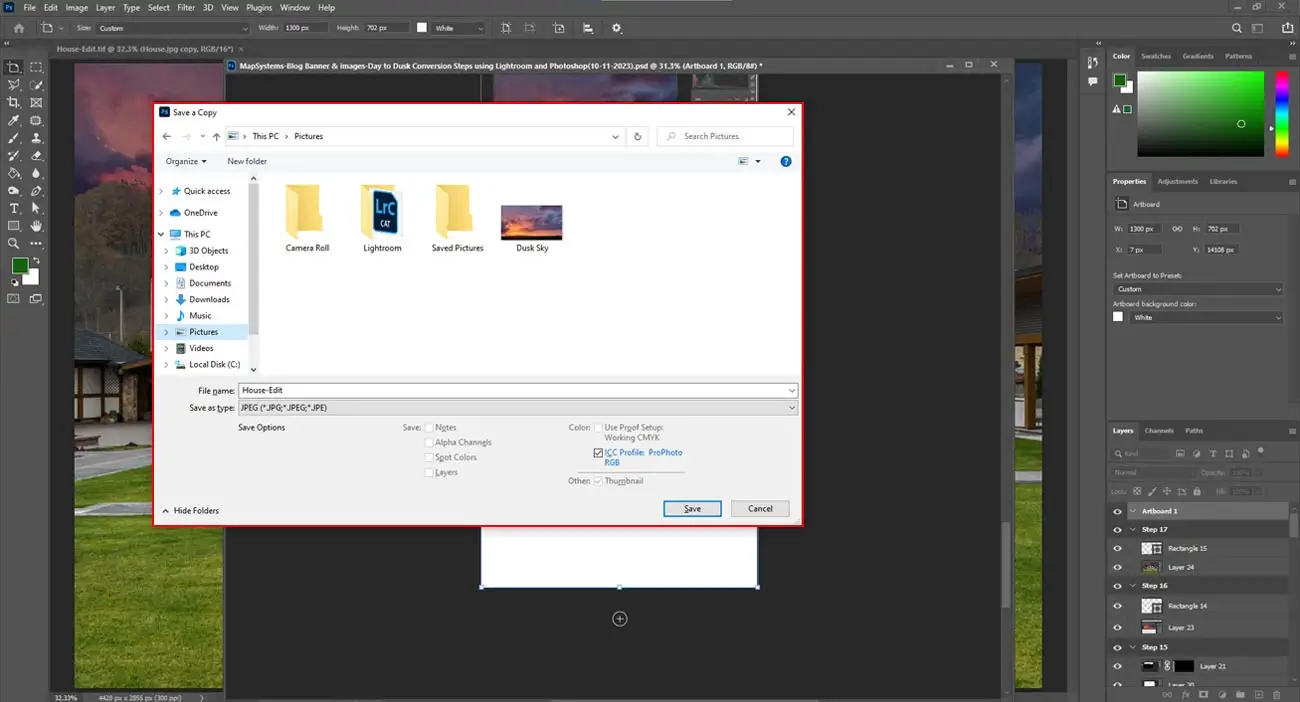
- Step #18: Save the image as new.

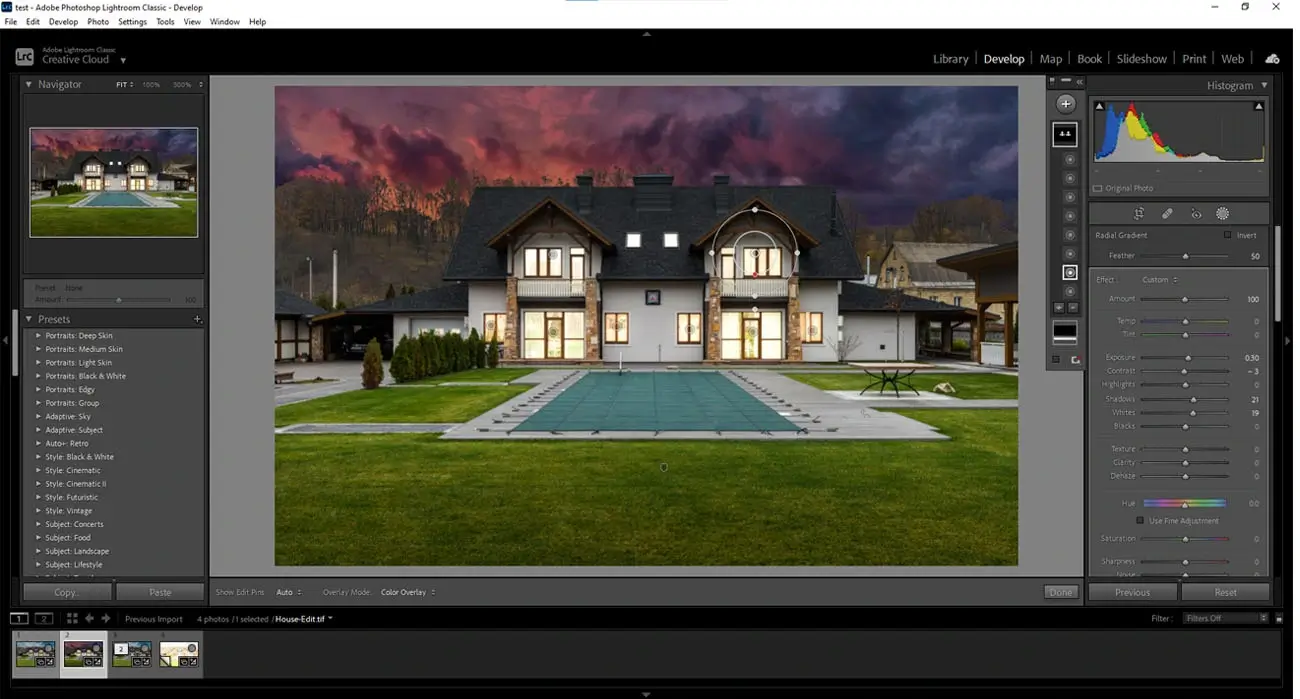
- Step #19: Come back to your Lightroom workspace and make some minimal White Balance adjustments. Make the adjustments until you reach the desired level.

- Step #20: Once you are happy with the final twilight edited image, click Save.

Why is the twilight during dusk-time considered best for real estate photos?
This technique is considered the best technique for enhancing property images. If one asks why, it captures the entire plot in the “golden hour”. Just when the day gradually shifts towards night-time and the harsh day light softens. This ethereal environment, created digitally through photo editing tools, sets the stage for bids.
However, the challenge is to capture the exact moment by tracking the sun as it starts to set on the horizon. Usually, professional photographers take the snaps just half an hour after the sun has set. In case the photoshoot has missed out on this vital moment, advanced image retouching tools save the day.
These advanced software programs can be leveraged to create an impactful image effect. Check out the benefits in detail that twilight photo editing has for realtors. Also, why is twilight the ideal time for real estate images.
-
Enhances the key USPs
Property photos that have a software-generated twilight effect accentuate the pivotal features of a property. This creates an invisible emotional connection between the prospects and their “soon to be” home. It is more than an emotional appeal that highly influences their purchase decision.
-
Depicts luxury and comfort
The subtle play of light and shadow replicating the twilight hours showcases the luxury and exclusiveness of property. In fact, twilight photography has always been associated with a sense of high-end luxury. Implementing the effect in property images elevates them, adding more sophistication. Ultimately, the realtor can ask for a decent bid for the property from a certain clientele who prefer exclusivity.
-
Emphasizes crucial architectural elements
The warm and dreamy, soft glow of the dusk hours makes certain crucial architectural aspects more appealing. Interiors, doors, windows, porches, patios, and lawns – these crucial elements become more eye-catching. With this dramatic editing, even a simple property can become stunning.
-
Accentuates vital living spaces
Dusk editing brings a certain accentuating factor to the overall living spaces. The surrounding outdoors—all the rooms, the front view, balconies, gardens, swimming pools – all get a better illuminated view, emphasizing a comfortable living.
-
Create more engagement online
These days, anything visually appealing steals the show on the Internet. Modern-age consumers are more visually-driven. That’s why visuals play a key role in any kind of purchase. This is more true for property transactions. Standard daylight images or night-time views might give them the information they need.
However, they cannot inspire or trigger their psyche. The striking visual contrast in twilight photos appears much more intriguing and special. This makes more heads turn and compels potential buyers to check out the plot. Ultimately, the click-through rate increases, and your site traffic boosts.
Conclusion
That’s all, folks. We have reached the final chapter of this informative article on day to dusk conversion steps. Hope you have thoroughly enjoyed your reading and have gained adequate information. There’s a reason why twilight is called the “golden hour” of real estate photography. In case the effect is missed in the photo session, thankfully, with the help of advanced Photoshop software, photo editors can replicate it.
The steps mentioned above will help even beginners try their hands at twilight picture editing. However, since this is a work of art with aesthetic precision, it is always recommended to hire expert real estate photo editing services. Only expert professionals can achieve the desired level of excellence with day to dusk conversion editing.
So, if you are a realtor who wants their property images to perform better on listing sites, collaborate with a professional agency. Also, if you are a real estate photographer who wants to offer dusk editing as a service, team up with a expert real estate photo editing companies.

