Are you a real estate photographer who wants to speed up your post-processing workflow? Or do you want to showcase property images in high quality? This blog will be your guide to learn about exceptional real estate photo editing techniques.
The photo editing process for real estate is a time-consuming task for many photographers. Still, at the same time, it is a highly crucial step in creating compelling and attractive property images that seal the deal. Shooting with a high-end DSLR will not serve the purpose if the editing is not up to the mark. So how do your images stand out and increase the chance of selling? Below are some tried and tested real estate image editing techniques that can help to edit the best photographs.
-
Do a thorough color correction

Doing a color correction might sound like a basic thing, but in reality it is of great significance in making property images enhanced perfectly. Lightroom and Photoshop, both offer effective color correction features, though photo editors say it is easier to perform in Lightroom.
Any part of the image that looks flat or neutral can be given a more realistic hue with the eyedropper tool in Adobe Lightroom.
-
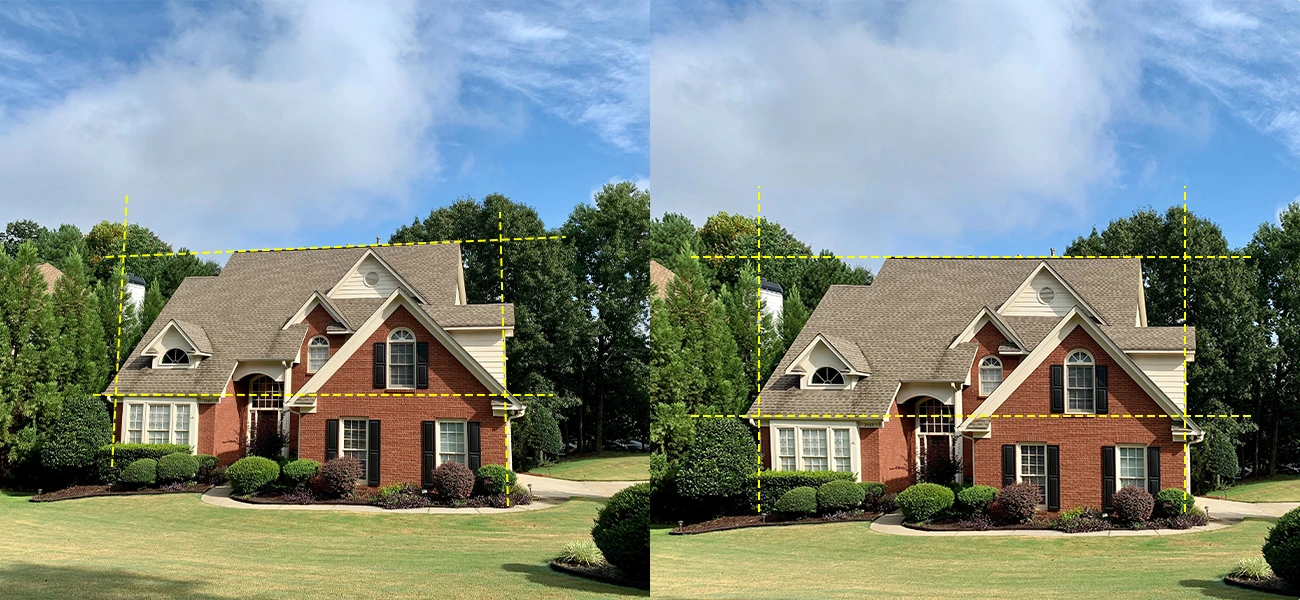
Straighten the lines
Line or perspective distortion is a common occurrence in real estate photos; they tend to have vertical and horizontal lines that don’t meet at the same point. This disturbance in convergence makes the perspective appear distorted. Perspective distortion can happen due to many factors, viz, shape and size of the interior or the outer property, camera lens’ curvature, camera positioning, so and so. This hampers the viewers’ focus on the main subject, thus failing to impress them.
This glitch can be corrected by an editing technique in Photoshop called Free Transform. Select the entire image and drag the corner opposite the leaning lines. This correction technique of aligning the bent lines with the image frame helps the photo look more natural.
-
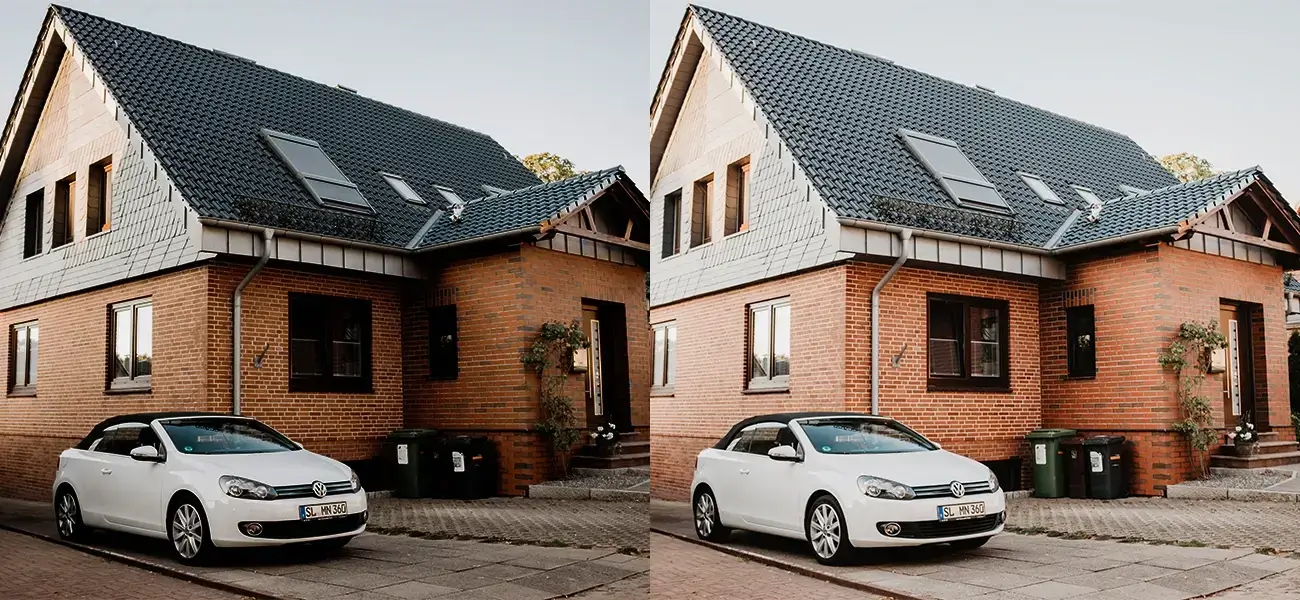
Balance the light
Both interior and exterior photos have issues like unwanted shadows and uneven lighting. Fix this using Lightroom by adjusting highlights, shadows, whites, and blacks. Take the shadow bar to the right to make it intense; ensure it is a safe middle ground. If there are harsh highlights on the image, drag the highlights bar to the left to reduce the hot spots.
-
The Photoshop wide angle filter for best angles
What to do when you get an assignment to shoot a 100 sq. ft. room in NYC for a property listing? You have to find a better angle anyway. The technique is to prop the camera on a tripod, preferably in a doorway or any other flexible area, and then take the snap. Also, a wide-angle lens helps to take a wider shot of a smaller space. However, if you want to edit and fix the photo in the post-processing phase, use Photoshop's adaptive wide-angle filter.
-
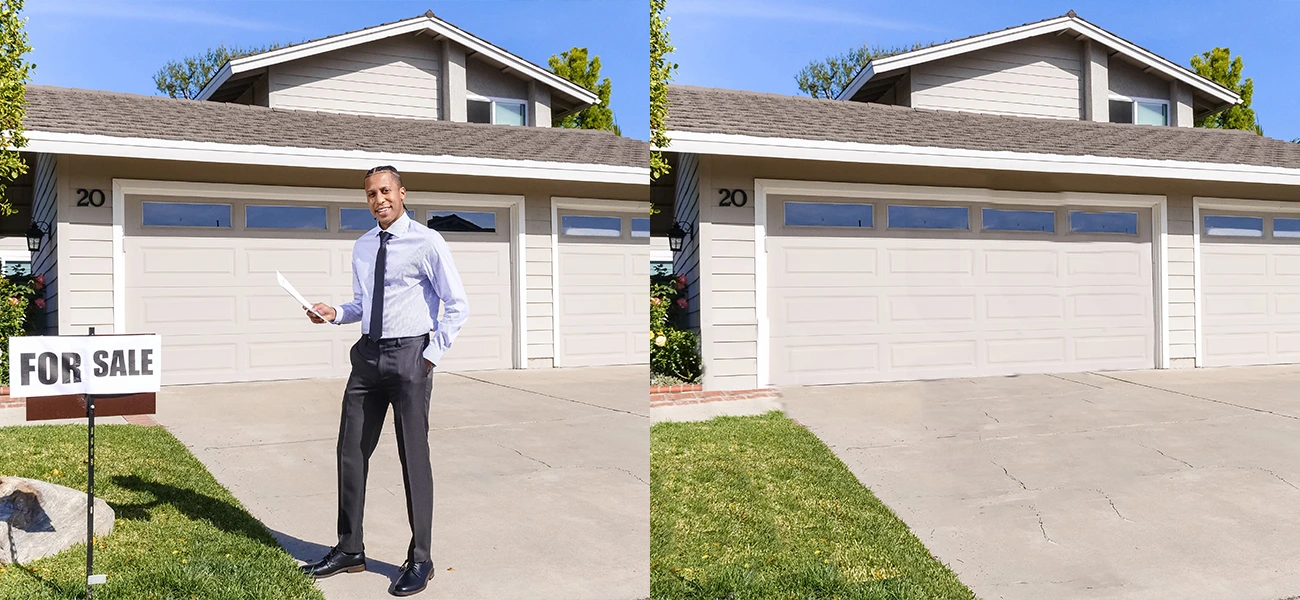
Declutter the image for better impact
The clone stamp tool in Photoshop helps you to clone and paint over unwanted objects you want to get rid of. Often we find several unwanted objects blocking the view of the main subject. Photoshop’s clone tool helps you declutter the room in minutes. Just click the option and choose the source area.
-
Lens correction is a must
Most lenses come with some issues that are detected later. Correct the lenses with Lightroom and fix the optical issues. Fixing these with Lightroom is the easiest and most realistic method editors can adopt. Go to the ‘Lens Correction’ module and choose the ‘Enable Profile Corrections’ option. Finally, click the ‘Remove Color Aberration’ option.
-
Fix the sharpness and clarity
The clarity tool in Lightroom is a handy tool used by most real estate photo editors. Open the tool and slide the clarity slider to the left or right to polish the photo. Adjust the black portions also to create depth and a sharpened look.
-
Control the shadows and highlights with the ‘Curves’ tool
One of the most powerful tools in Photoshop, the ‘Curves’ tool, is also complicated. Select the ‘Image’ menu, choose ‘Adjustments’, and click on the ‘Curves’ option. A dialog box will pop up, press the Auto option. Pull up the diagonal line at the center for brightness and pull it down for darkening the image. Click OK if the resulting image looks fine.
-
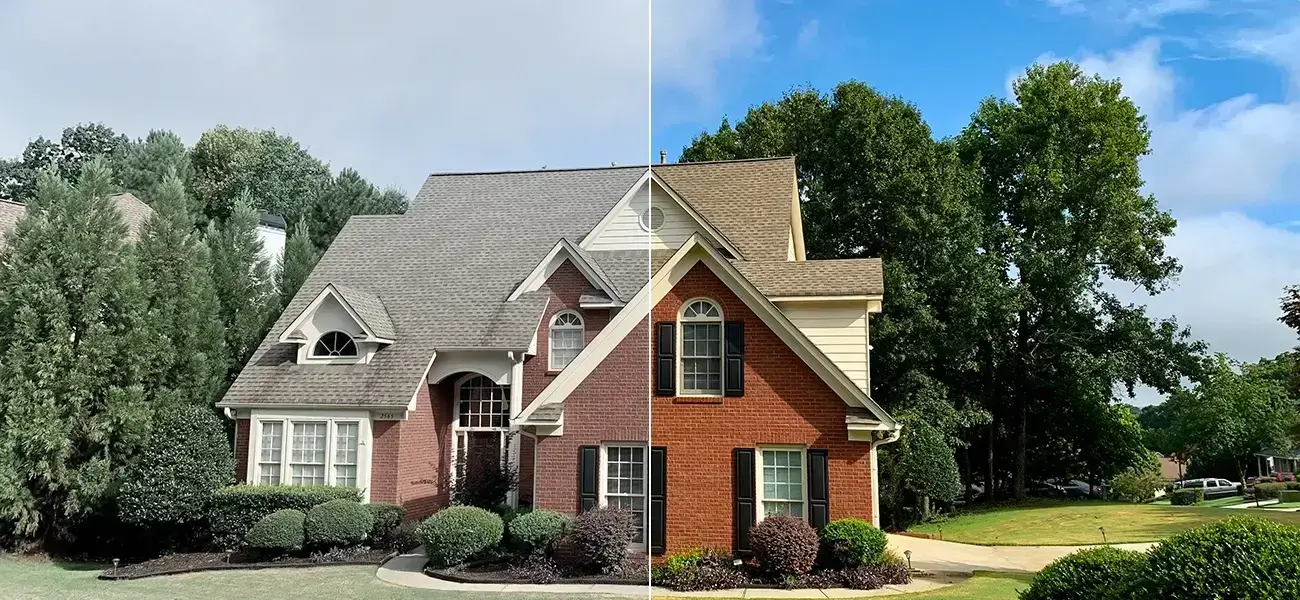
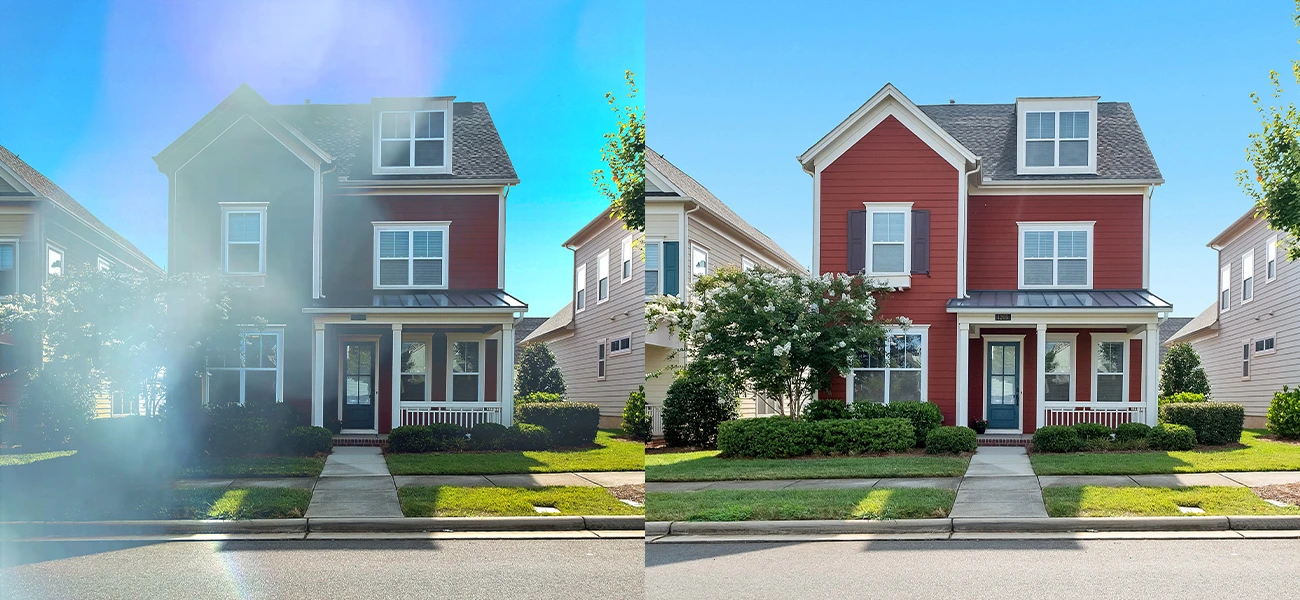
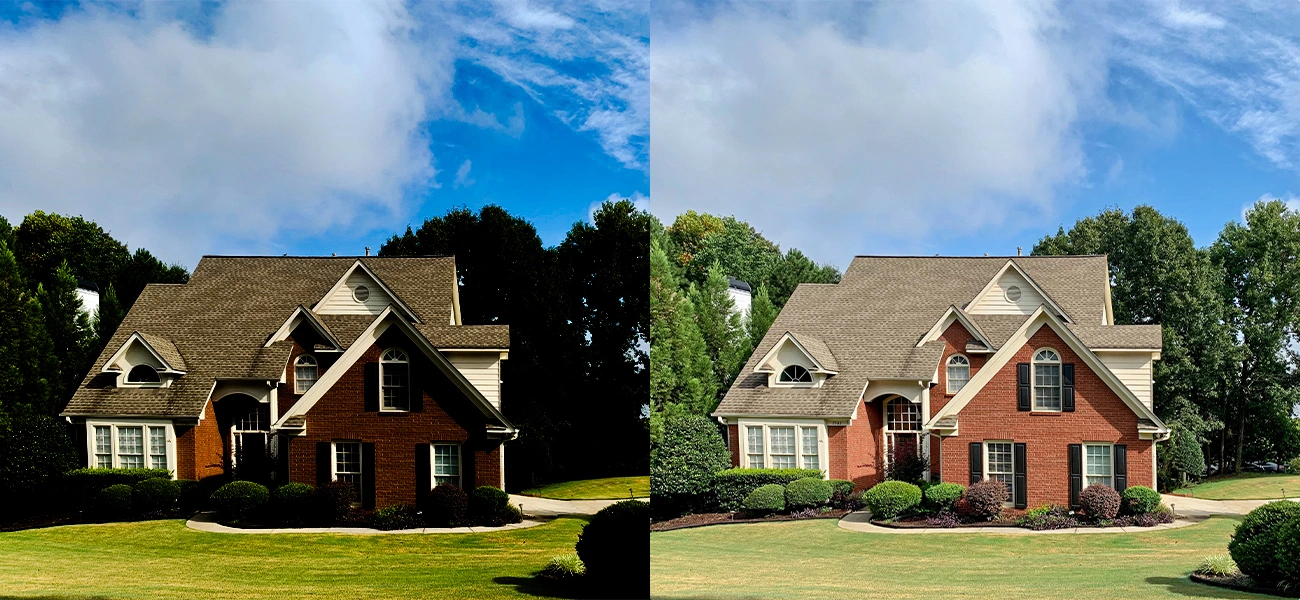
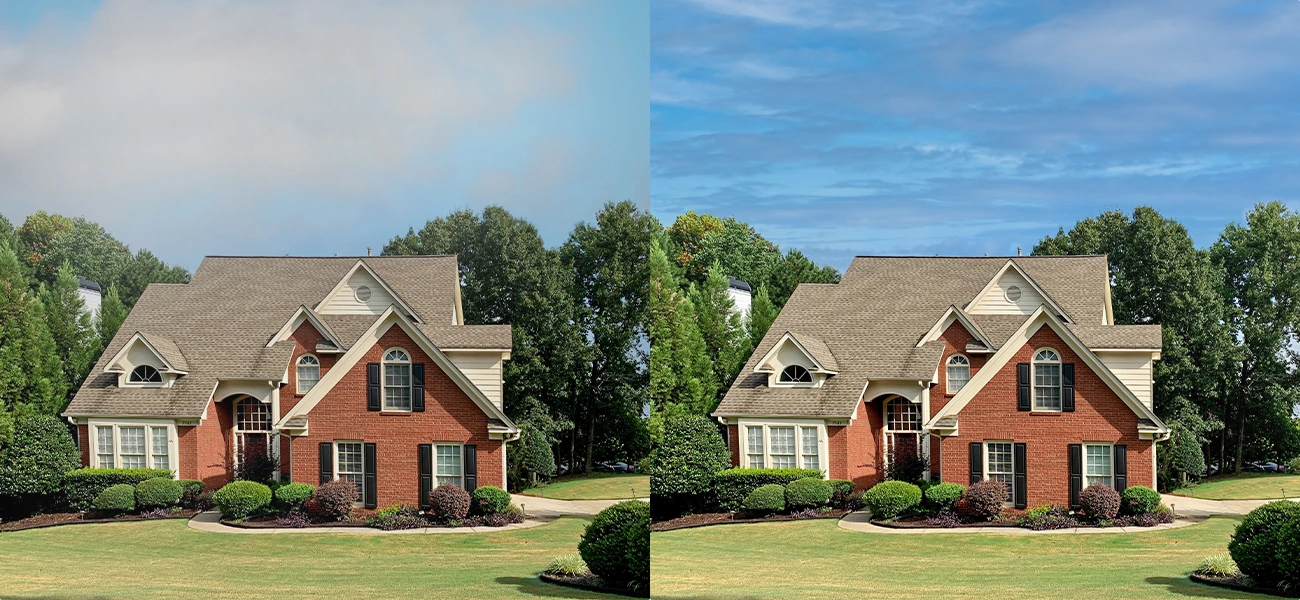
Sky replacement is a great technique to beautify real estate photos
The best real estate photos are taken against a bright, sunny sky backdrop, which emphasizes the property's aesthetics. Hence, realtors and photographers alike prefer sunny skies for photo shoots. But what to do when the assigned day is overcast, or the sun isn’t all that bright?
Turn to Photoshop sky replacement. Replace dull, overcast, and cloudy skies with clear, sunny, blue summer skies. Adding a splash of colors in a realistic way makes the photos appear to be taken during a bright summer day.
Not just a sunny sky, you can also choose from a bouquet of sky backdrops, like sunrise, sunset, dusk, and more, in Photoshop and other high-end photo editing tools.
-
Leverage the HDR technique
One of the most popular real estate picture editing techniques, high dynamic range, or HDR, enhances the richness of color, giving life to the property listing images. This technique enables the editor to balance the highlights and shadows by merging multiple images of the same subject but with a slightly different focus in each shot.
Usually, modern digital cameras have a built-in HDR mode, but if not, you can do it easily in Photoshop.
-
Adjust the hue and saturation for better impact
Another go-to Photoshop tool for most real estate photography editing professionals, the ‘Hue and Saturation’ tool, helps to enhance the greenish tinge, especially for outside property photos. If the property has a tea estate surrounding it, make them appear all the more lush and beautiful with this handy tool. Click the ‘Adjustment’ option from the ‘Image’ menu, and then click on the ‘Hue and Saturation’ option. Choose yellow or green per your needs, and:
- Increase the hue
- Decrease the saturation and lightness
Click OK if you are fine with the final image.
-
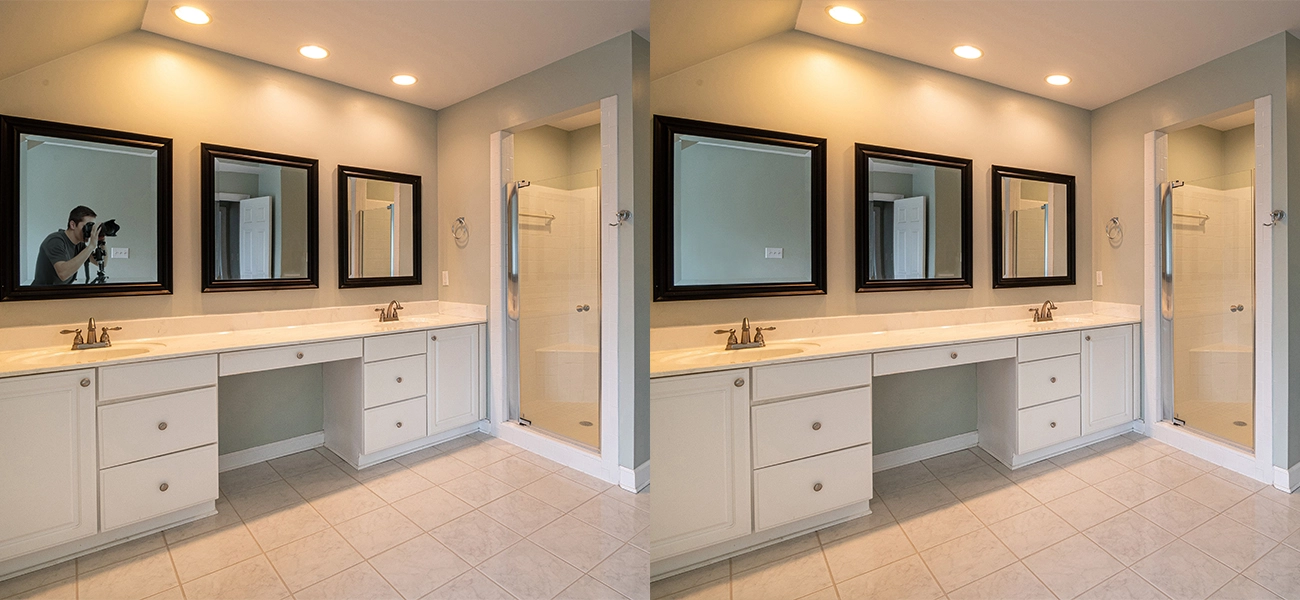
Eliminate reflections on the mirror, if any
Imagine a potential buyer noticing a reflection in a bathroom or bedroom mirror while scrolling through your property listing. That’s it; your brand image goes for a toss. During professional real estate photo shoots, it is common to have an entire crew of photographers, light handlers, etc., to be on the set. And sometimes, reflections of these crew members can be seen in the mirrors.
This can be solved in two ways: either with an angle change – changing your camera’s angle and placing it in a place that captures the entire space without you in the frame. Or you can do this with Photoshop or any other image editor during the post-production. Use the clone tool and get rid of those tricky reflections easily.
-
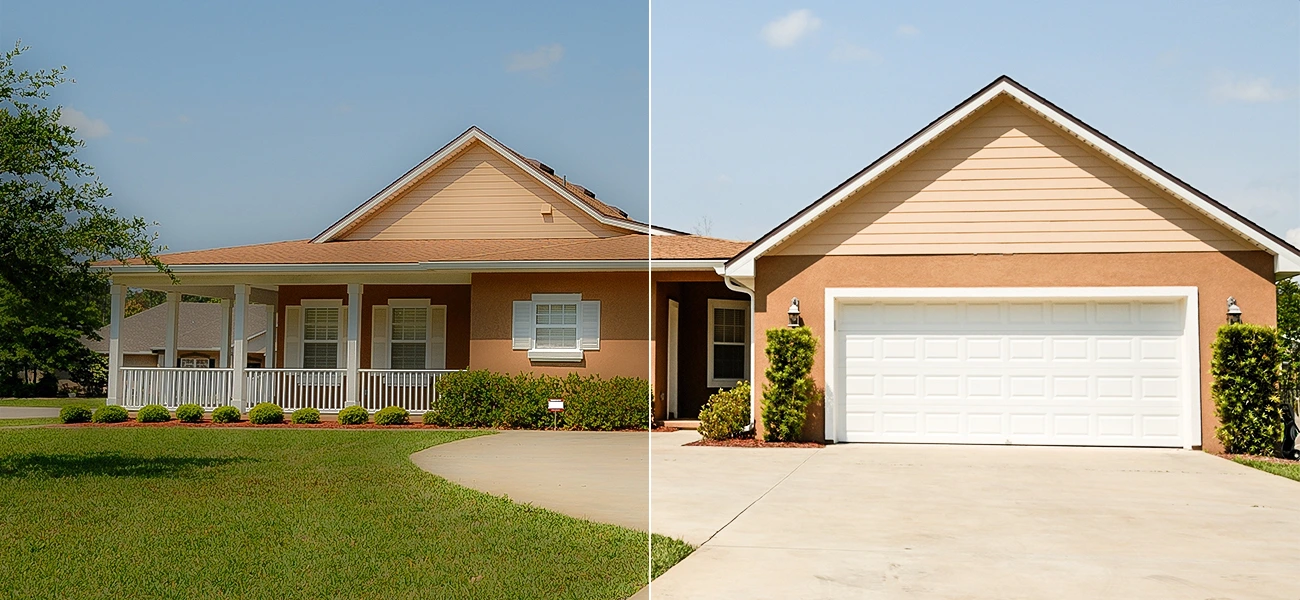
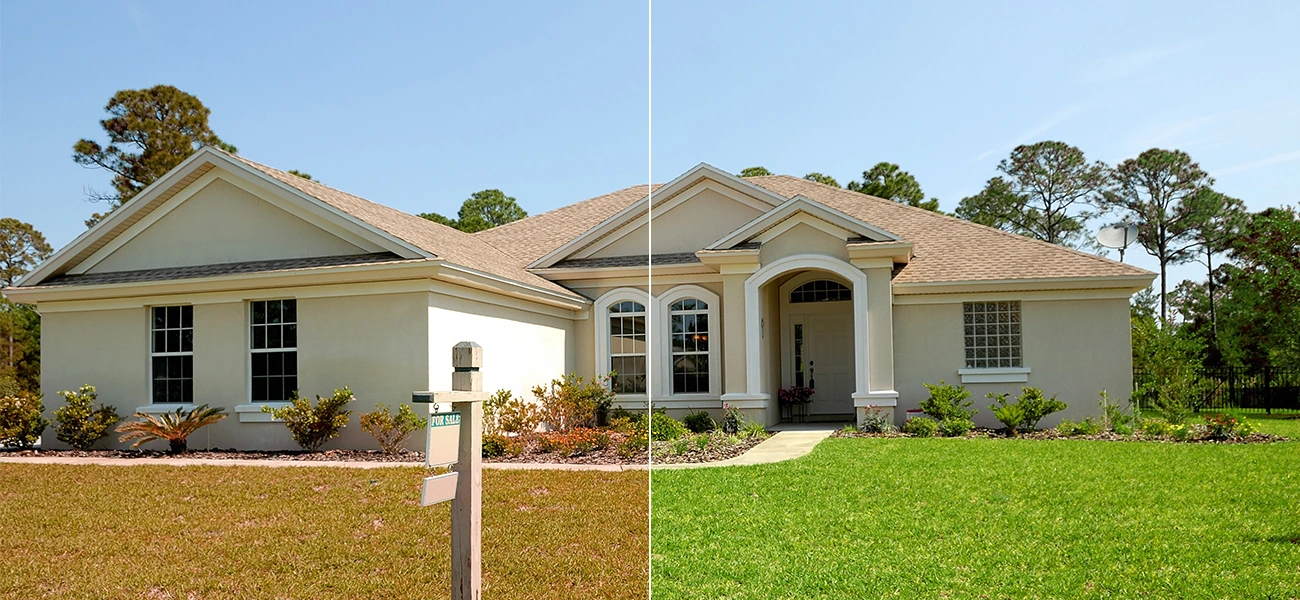
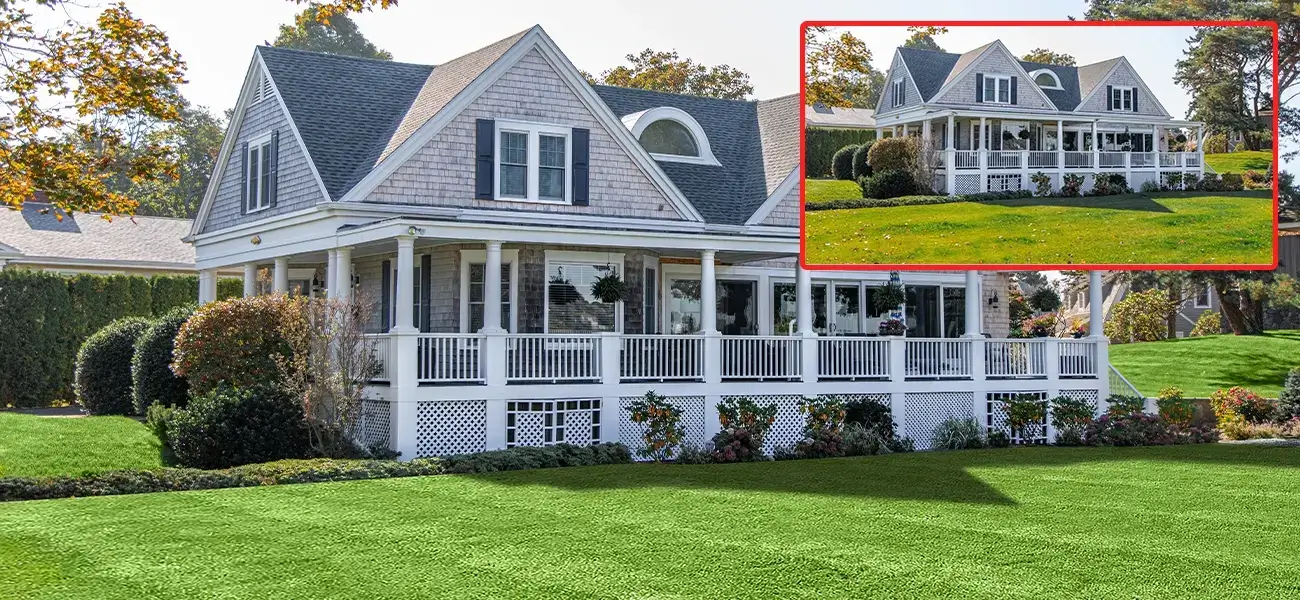
Do an effective grass or lawn replacement
If your property has a beautiful lawn, embellish its beauty with a bit of photo editing skills. With Photoshop and Lightroom, accentuate the grasses in the lawn and make it attractive.
Grass or lawn replacement or enhancement of lawn grasses is an excellent way to improve real estate images. If the property has dull, muddy, and brown grasses, expert photo editors can fix them realistically with these tools.
-
TV screen replacement
You don’t want the highly appealing living space images hampered by a black box, don’t you? This is where TV screen replacement comes in. It is a technique that photo editors working on real estate images can leverage. Replace the black screen with a vibrant screen and make the living space all the more realistic.
-
Editing fire places
The same approach from the above point can be taken for fireplaces by adding a warm flame that makes the property image nice and cozy. These comfort emotions tickle potential home buyers' psychology and influence their purchase decisions.


Pro Tips
-
Automate your image processing with batch edit
Tools like the batch editor automate most photo editing work at scale. The batch editing technique helps photo editors when they have to do similar edits on multiple photos.
Real estate photo editing software have a batch editing option; select it, do the adjustments and retouches on one photo, and click OK. The edits will automatically get synced with the rest of the images in the set. This is a huge time-saver and adds efficiency to your editing workflow.
-
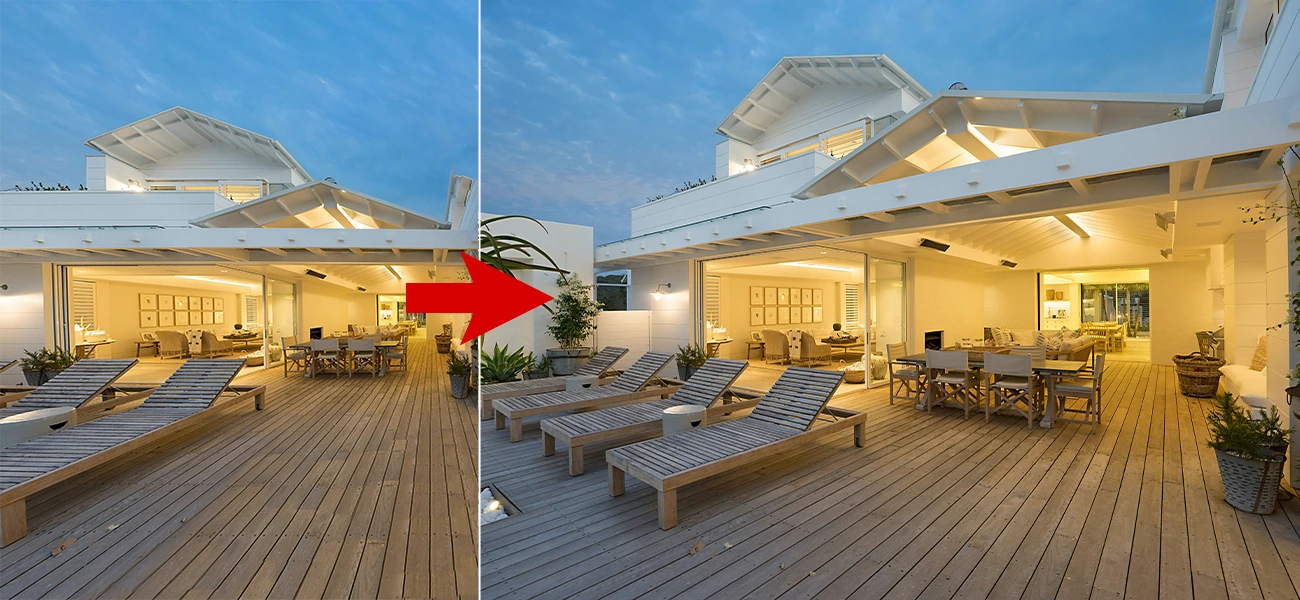
Leverage virtual staging technique
To add even more versatility and realism to property images, consider utilizing the virtual staging technique that will make the listing stand out. Add real furniture pieces, appliances, show pieces, and other real-life elements usually seen in homes.
These kinds of virtual furniture additions turn vacant rooms into stylish spaces and give buyers an idea of what the space will look like with their furniture.
Conclusion
If you want to know how to edit real estate photos in the best possible way, using high-end editing software is the answer. These tools help beginners and professionals alike a big time, enabling them to edit property images in the shortest time and with maximum efficiency.
There are several types of photo editing software and tools available online that one may avail of; some are free to use, and some come with a subscription fee or a one-time cost. If you are overloaded with your editing tasks, seeking help from any of the reputed real estate photo editing companies that offer high-end real estate photo editing solutions will be your best choice.