Blending real estate photos using Photoshop has always been the most discussed topic among the photographers, photo editors, and others in the real estate industry. The reason is simple, blending photos using Photoshop is the best way to enhance the color, consistency and other important elements in a picture to give it the most natural look and make it capable of popping-up in the eyes of the buyers.
This process is easy for those who know it, but many still are unaware of this hack. Hence we have created a simple guide to blend real estate photos using Photoshop software. So keep reading to explore this useful piece of information.
Master Photoshop Blending for Real Estate Photos in No Time
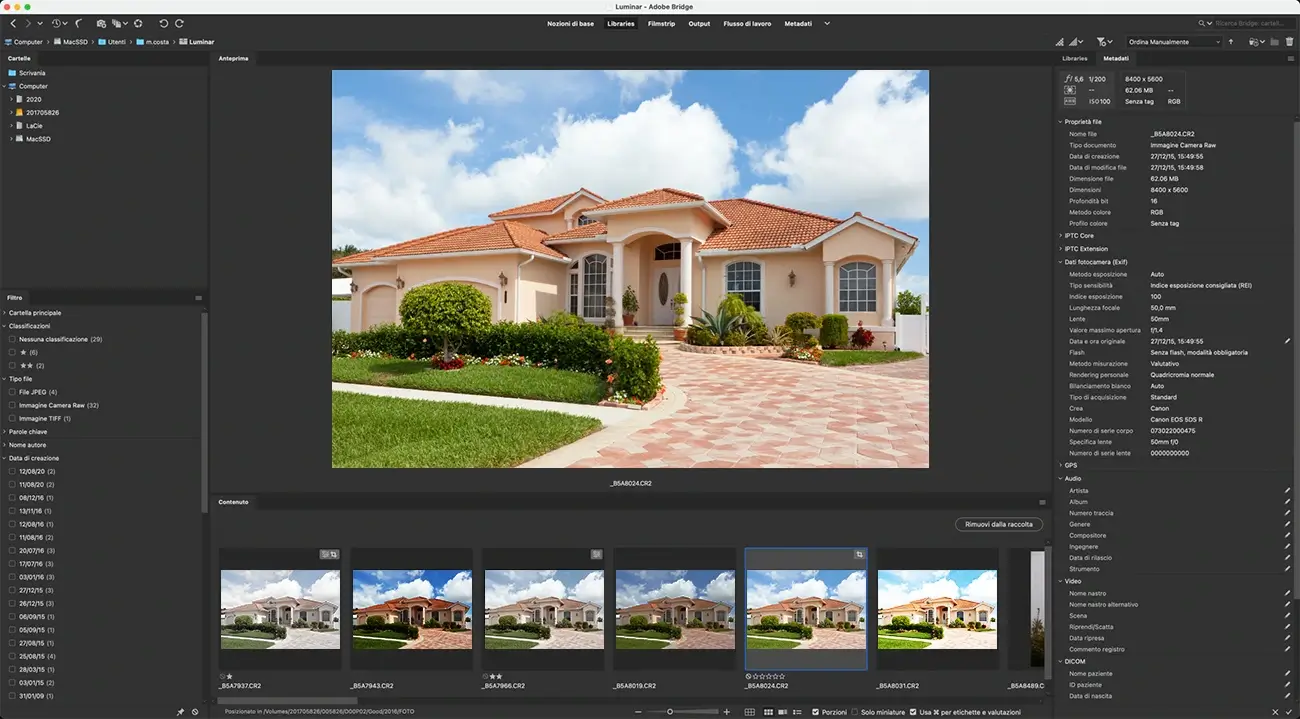
Image Specification: Open Images in Bridge & Check

The first and foremost step in the process of blending real estate photos using Photoshop is to first open them in the bridge and check them for proper image specifications. It is the most essential part of the process and it helps in aligning the images as per their specifications.
The Labeling: Select the Most Suitable Exposures

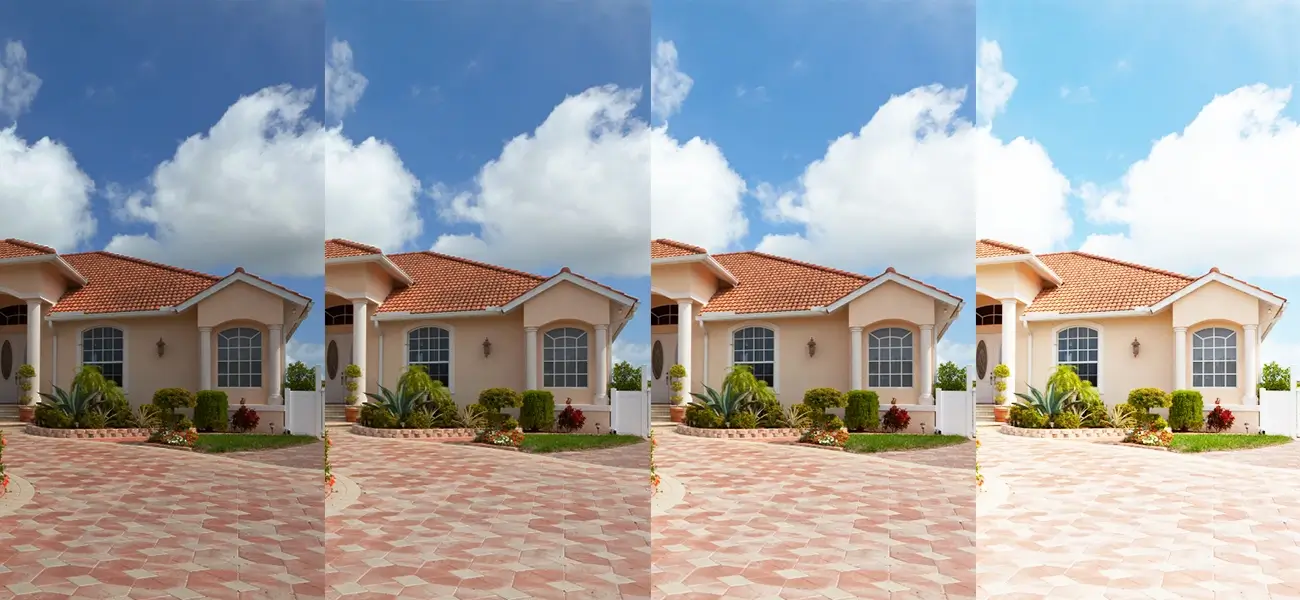
The next important step in the process of blending real estate photos is to choose the best lighting exposure that can showcase all the essential elements in the blown-out area well in exposure blending for real estate photos. Also, it is important to select the one where the window view is very clear.
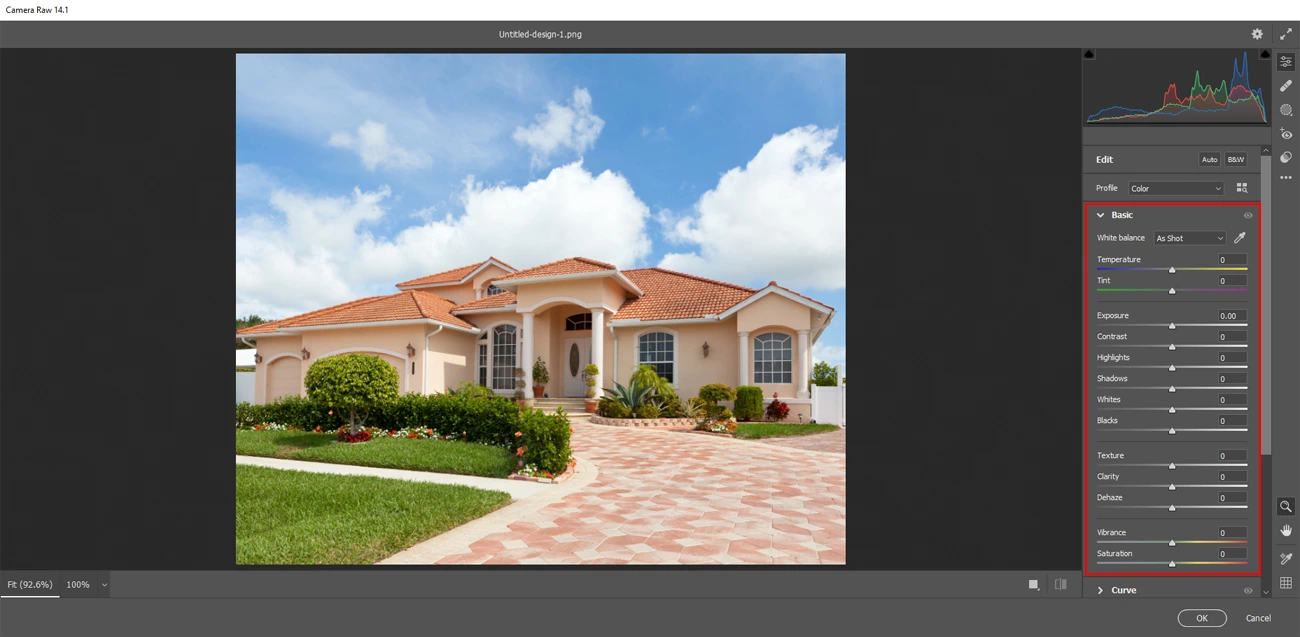
The Editing: Open All the Shots Captured by the Camera

In this step all the shots that were captured in the camera raw are edited and the slider or other elements in the pictures are increased to a level where everything looks close to reality.
Following are the Elements in which the Editing can be Done:
- White Balance: Make sure the whiteness is balanced to a level that it looks natural the way it looked when the pictures were clicked.
- Exposure: Adjust the brightness and the darkness as per the requirement to make it look most natural.
- Temperature: Set the color temperature using the warmth (yellowish-tone) or the blue-tone to give the real-to-life look to your real-estate images.This also helps in creating a white balance in the pictures.
- Tint: This is important to enhance the green tone or the magenta tone in the images. This can be used after temperature control to fine tune the colors.
- Contrast: Want to play more with the dark or light sides of the image, this is the option you need. It makes the dark parts darker and light areas even more light.
- Highlight/Shadow: Retake/Regain the details of the overexposed or underexposed areas in the images.
- Dehaze : Helps in reducing the haze
- Vibrance : Helps in increasing the saturation of the less or unsaturated colors in the images.
- Saturation: This option helps in increasing the intensity of all the pixels in equal amounts so that all the pixels look equal and gives a complete look.
The Image Enhancement

There are several sub-steps involved in this fourth step in the process of real estate photo blending in Photoshop.
- Merge Lighting
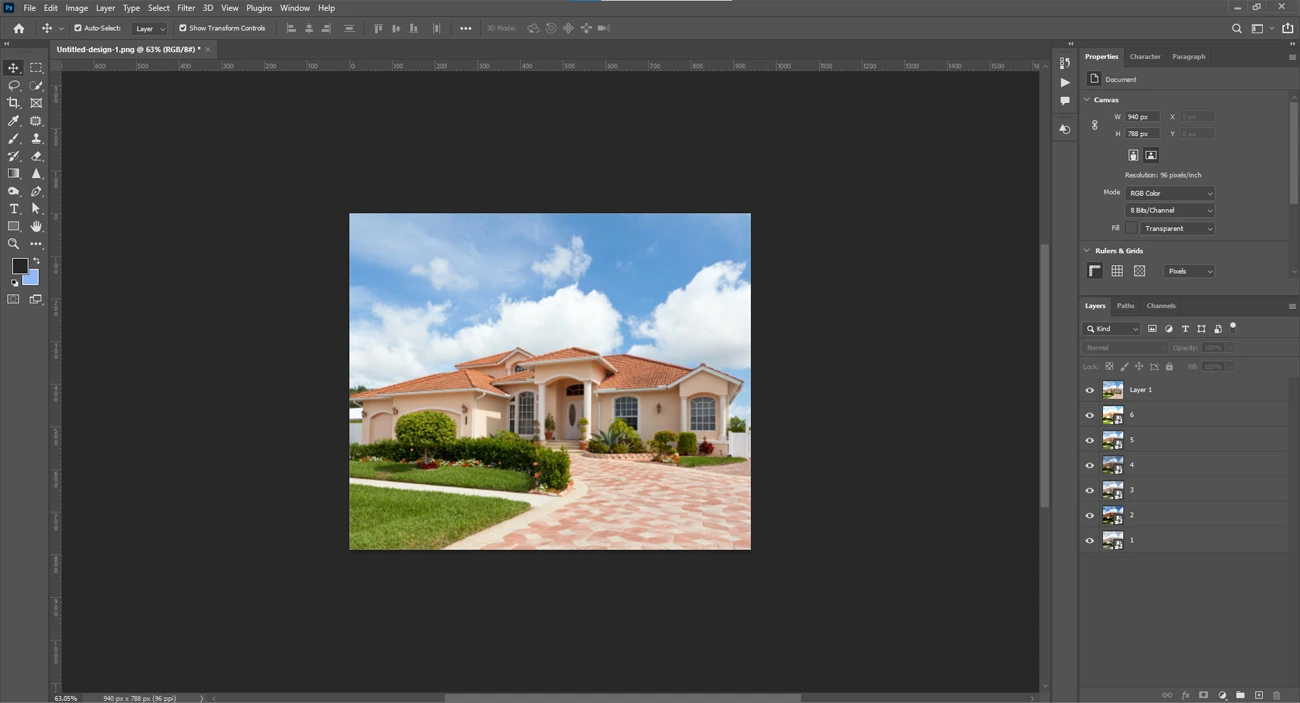
This part involves the merger of various pictures clicked of the same location in the light, dark and window view. Later these are merged to give the most natural look to the image.
For this find the window located in the menu bar. Once you find it click on it and scroll down to the channel. The next step is to press CTRL and click the blue option from the channel, this will give you all the over-exposure details.
Next, use the brush tool to brush the glare areas into the dark and vice-versa.
Brush tool Mode- Normal, Opacity: 10 – 30%, Flow: 100%
- Merge Windows
Next up is the fixing of windows and for this you need to merge all the windows with light and dark lighting to make one final image that showcases apt lighting.
-
Color Adjustment
Using the color adjustment option from the menu, you can now adjust the colors in the image at ease.
- Fix the Ceiling Color to White
Try to adjust the ceiling color so that your image looks perfect in all terms.
- Straightening & Final Review
The final step is the straightening of images and the final review of the complete process so that there are no loose ends.
-
The Final Touch
In this you can experiment with the sky color outside the window or can add some color contrasts to the image to enhance the look. Other elemental changes can be adding fire to the fireplace, adding TV Screen, removal of camera reflection, visible wires,etc if any.
- Merge Lighting
Conclusion
This comes to an end of this blog and we hope that this write up will be helpful for you in blending real estate photos in Photoshop at ease. Although all the editors have their own way to edit these types of images, a little knowledge doesn’t harm anyone and sometimes it helps you when you are stuck and trying to find a solution.
However, in this dynamic world, real estate photographers have many options to enhance their photos. Photographers will often choose to outsource their requirements to any of the reputed real estate photo editing companies offering end-to-end real estate image editing services. They help you grow your real estate business with the most appealing real estate images created by them.
Want Real Estate Image Editing Support?


